THE CAR REPAIR SHOP
0
Home » Manuals » Running gear, axles, steering
  • Examplepage for repair manual Running gear, axles, steering
  • Examplepage for repair manual 2 Running gear, axles, steering
  • Examplepage for repair manual 3 Running gear, axles, steering
  • Examplepage for repair manual Running gear, axles, steering
  • Examplepage for repair manual 2 Running gear, axles, steering
  • Examplepage for repair manual 3 Running gear, axles, steering

Running gear, axles, steering

For Caddy

Original Volkswagen repair manual


25,77 €7% VAT incl.

Immediately available for download

Language: English

Digital PDF file

17.238 KB

331 Sites

Detailed technical data

Immediately readable

This repair manual contains: Front axle, Subframe, Suspension strut, upper suspension link, Wheel bearing, Drive shaft, Vehicle level sender, Tyre Pressure Monitoring System, Adaptive cruise control and Sensors. Show more
Secure Payment via PayPal, credit card, direct debit and more
PayPal Logo SEPA Lastschrift Logo Giropay Logo Sofort Überweisung Logo

Repair manual Caddy Running gear, axles, steering PDF download has the following content:

Chapter overview

  • Technical data
    1
  • 1 Safety information
    1
  • 1.1 Safety measures when working on vehicles with start/stop system
    1
  • 1.2 Safety precautions when working on subframe
    1
  • 2 Repair instructions
    2
  • 2.1 Leaks at shock absorbers
    2
  • 2.2 Noises from shock absorbers
    2
  • 2.3 Checking shock absorbers when removed
    3
  • 2.4 Steering rack
    3
  • 2.5 Gaskets and seals
    4
  • 2.6 Nuts and bolts
    4
  • 2.7 Electrical components
    4
  • 2.8 Raising suspension to unladen position (vehicles with coil springs)
    5
  • 3 Evaluating accident vehicles
    16
  • 3.1 Check list for evaluating running gear on accident vehicles
    16
  • 4 Technical data
    18
  • 4.1 Running gear
    18
  • 5 Disposal
    19
  • 5.1 Releasing gas and draining front gas-filled shock absorbers
    19
  • 5.2 Releasing gas and draining rear gas-filled shock absorbers
    19
  • 6 Hazard classification of high-voltage system
    21
  • Front suspension
    22
  • 1 Front axle
    22
  • 1.1 Overview of fitting locations – front axle
    22
  • 2 Subframe
    23
  • 2.1 Assembly overview – subframe
    23
  • 2.2 Removing and installing subframe without steering rack
    26
  • 2.3 Removing and installing subframe with steering rack
    34
  • 2.4 Repairing subframe
    48
  • 2.5 Removing and installing anti-roll bar
    70
  • 2.6 Removing and installing coupling rod
    78
  • 2.7 Repairing thread in longitudinal member
    79
  • 2.8 Fixing subframe in position
    79
  • 2.9 Lowering subframe
    85
  • 3 Suspension strut, upper suspension link
    93
  • 3.1 Assembly overview - suspension strut, upper suspension link
    93
  • 3.2 Removing and installing suspension strut
    95
  • 3.3 Repairing suspension strut
    102
  • 4 Lower suspension link, swivel joint
    107
  • 4.1 Assembly overview - lower suspension link, swivel joint
    107
  • 4.2 Removing and installing lower suspension link
    110
  • 4.3 Renewing mounting bracket with suspension link bush
    122
  • 4.4 Checking swivel joint
    125
  • 4.5 Removing and installing swivel joint
    126
  • 4.6 Renewing bonded rubber bush for lower suspension link
    129
  • 5 Wheel bearing
    140
  • 5.1 Assembly overview – wheel bearing assembly
    140
  • 5.2 Removing and installing wheel bearing housing
    142
  • 5.3 Removing and installing wheel bearing unit
    148
  • 6 Drive shaft
    153
  • 6.1 Overview - drive shaft
    153
  • 6.2 Assembly overview – drive shaft
    154
  • 6.3 Removing and installing drive shaft
    160
  • 6.4 Loosening and tightening threaded connections of drive shaft
    168
  • 6.5 Dismantling and assembling drive shaft
    169
  • 6.6 Checking outer constant velocity joint
    187
  • 6.7 Checking inner constant velocity joint
    188
  • Rear suspension
    192
  • 1 Rear axle
    192
  • 1.1 Overview – rear axle
    192
  • 1.2 Removing and installing rear axle shaft
    193
  • 2 Axle beam
    194
  • 2.1 Assembly overview – axle beam
    194
  • 2.2 Removing and installing axle beam
    195
  • 2.3 Renewing bonded rubber bush for axle beam
    202
  • 3 Anti-roll bar
    205
  • 3.1 Assembly overview – anti-roll bar
    205
  • 3.2 Removing and installing anti-roll bar
    205
  • 3.3 Removing and installing coupling rod
    207
  • 4 Suspension strut, shock absorber, spring
    209
  • 4.1 Assembly overview - suspension strut, shock absorber, spring
    209
  • 4.2 Removing and installing shock absorber
    211
  • 4.3 Removing and installing spring
    216
  • 4.4 Renewing bonded rubber bush for spring
    219
  • 4.5 Removing and installing shackle
    220
  • 5 Wheel bearing assembly, trailing arm
    222
  • 5.1 Assembly overview – wheel bearing assembly
    222
  • 5.2 Removing and installing wheel bearing unit
    224
  • Self-levelling suspension
    230
  • 1 Vehicle level sender
    230
  • 1.1 Assembly overview – front vehicle level senders
    230
  • 1.2 Assembly overview – rear vehicle level senders
    231
  • 1.3 Removing and installing front vehicle level senders G78/G289
    231
  • 1.4 Removing and installing rear vehicle level senders G76/G77
    233
  • Wheels, tyres, vehicle geometry
    235
  • 1 Wheels, tyres
    235
  • 1.1 Removing tyre from wheel
    235
  • 1.2 Fitting tyre
    235
  • 1.3 Wheel change
    236
  • 1.4 Specified torques for wheel bolts
    241
  • 1.5 Pressing tyre off wheel rim
    241
  • 1.6 Tyre sealant disposal
    242
  • 1.7 Models with breakdown set
    242
  • 2 Tyre Pressure Monitoring System
    243
  • 2.1 System description – Tyre Pressure Monitoring System
    243
  • 3 Wheel alignment
    245
  • 3.1 Notes for wheel alignment
    245
  • 3.2 Conditions for testing
    245
  • 3.3 Test preparations
    246
  • 3.4 Specifications for wheel alignment
    248
  • 3.5 Wheel alignment procedure
    251
  • 3.6 Necessity of wheel alignment
    252
  • 3.7 Adjusting camber at front wheels
    253
  • 3.8 Adjusting camber on rear axle
    257
  • 3.9 Adjusting toe at rear axle
    257
  • 3.10 Adjusting front axle toe
    257
  • 3.11 Vehicle data sticker
    258
  • 4 Adaptive cruise control
    260
  • 4.1 Calibrating adaptive cruise control
    260
  • 5 Front camera for assist systems
    267
  • 5.1 Calibrating front camera for assist systems
    267
  • Steering
    275
  • 1 Steering wheel
    275
  • 1.1 Assembly overview – steering wheel
    275
  • 1.2 Removing and installing steering wheel
    275
  • 2 Steering column
    278
  • 2.1 Assembly overview – steering column
    278
  • 2.2 Checking steering column for damage
    280
  • 2.3 Handling and transporting steering column
    280
  • 2.4 Removing and installing steering column
    282
  • 2.5 Removing and installing mounting bracket with strut
    295
  • 3 Steering rack
    297
  • 3.1 Assembly overview – steering rack
    297
  • 3.2 Removing and installing steering rack
    299
  • 3.3 Removing and installing bellows
    312
  • 3.4 Removing and installing track rod
    315
  • 3.5 Removing and installing track rod ball joint
    320
  • 3.6 Repairing steering rack
    322
  • 4 Sensors
    325
  • 4.1 Removing and installing steering angle sender G85
    325
Manufacturer's designation Running gear, axles, steering
Manufacturer Volkswagen
Suitable for Caddy (2016)
Suitable car types SA
Category Reparaturanleitung

There are no reviews for this product at the moment.

Similar repair manuals

5-speed manual gearbox 0A4

Examplepage for repair manual 5-speed manual gearbox 0A4

For Caddy (2016)

21,28 € Details

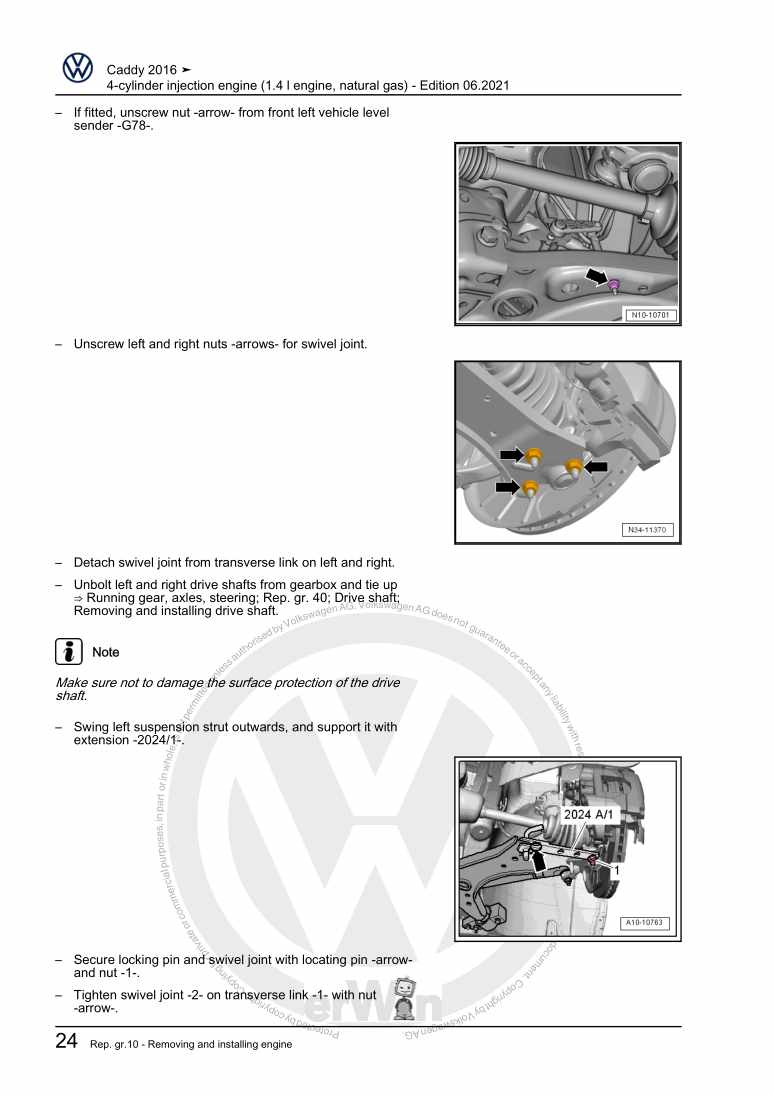
4-cylinder injection engine (1.4 l engine, natural gas)

Examplepage for repair manual 4-cylinder injection engine (1.4 l engine, natural gas)

For Caddy (2016)

28,53 € Details

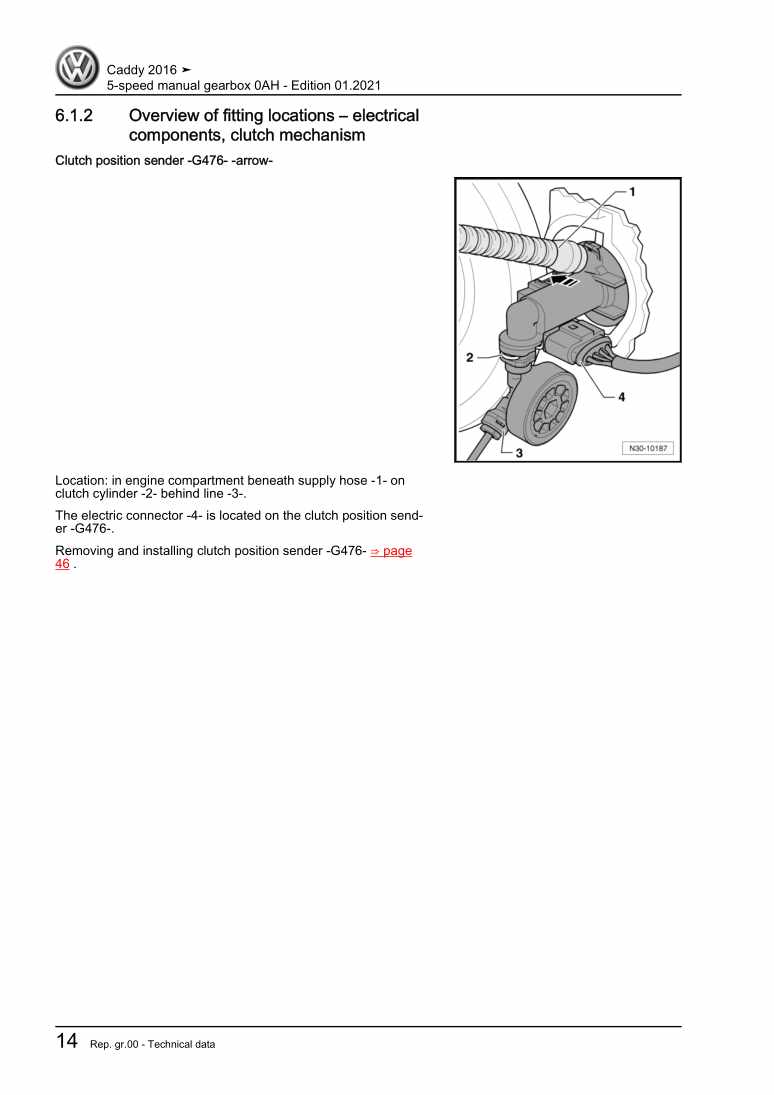
5-speed manual gearbox 0AH

Examplepage for repair manual 5-speed manual gearbox 0AH

For Caddy (2016)

16,40 € Details

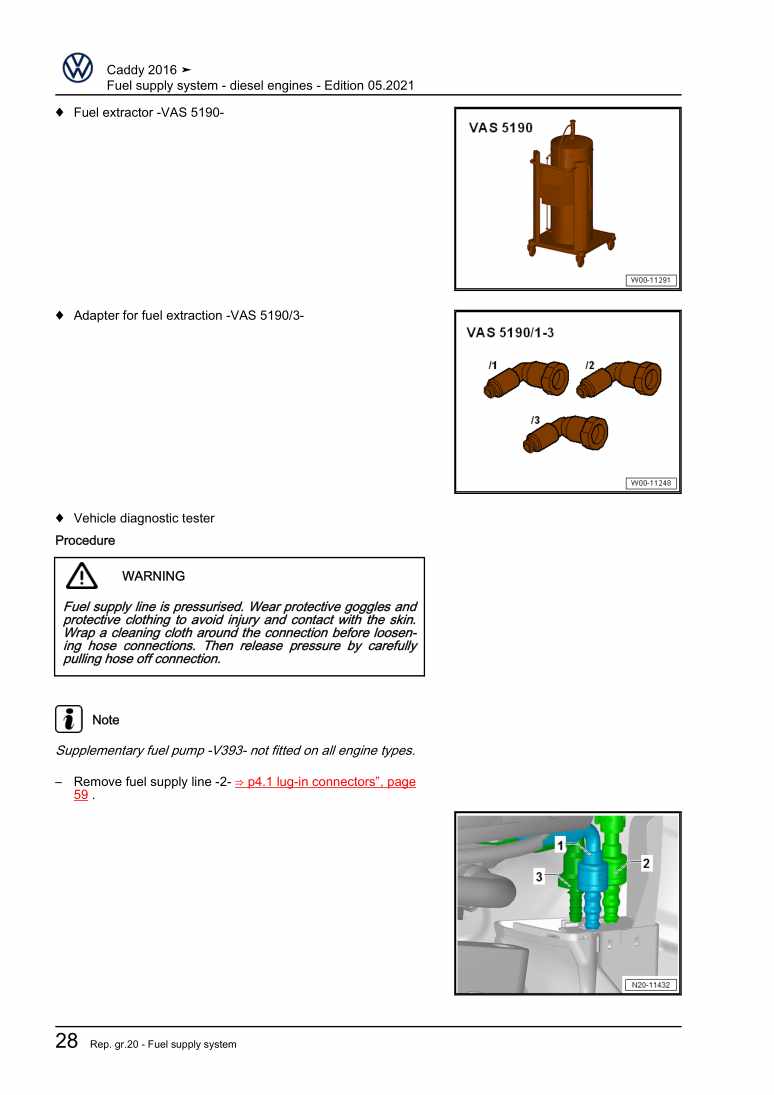
Fuel supply system - diesel engines

Examplepage for repair manual Fuel supply system - diesel engines

For Caddy (2016)

10,19 € Details

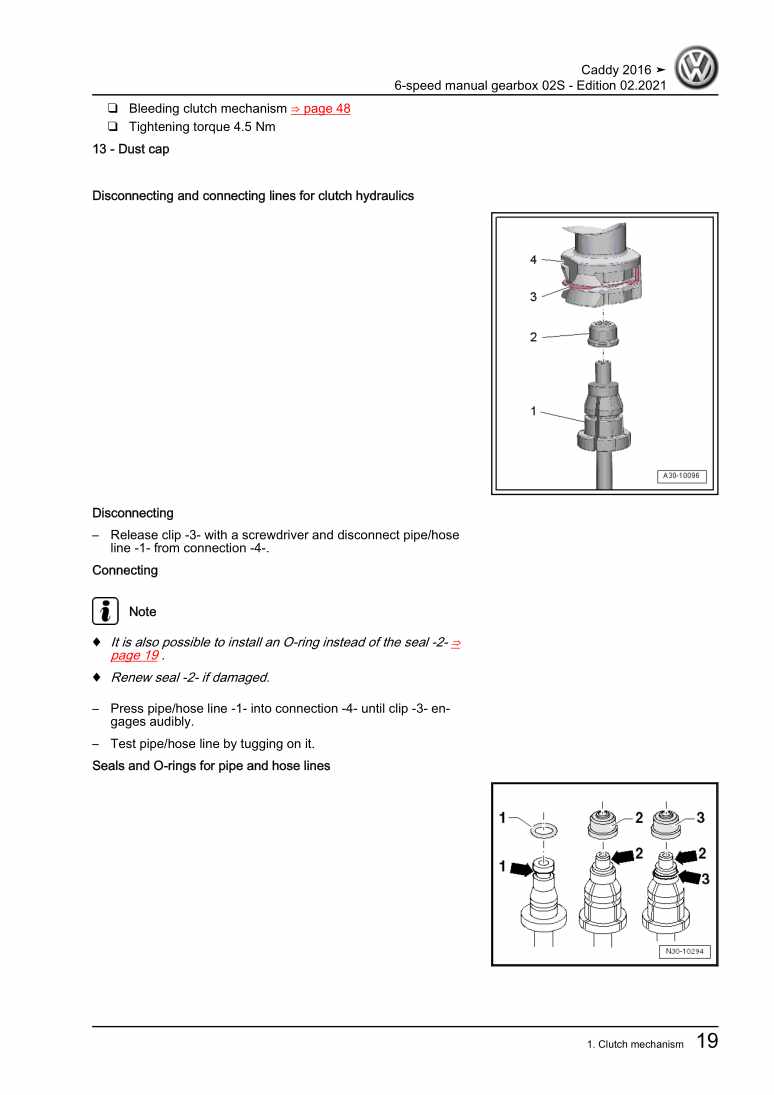
6-speed manual gearbox 02S

Examplepage for repair manual 6-speed manual gearbox 02S

For Caddy (2016)

20,72 € Details

Maintenance

Examplepage for repair manual Maintenance

For Caddy (2016)

16,70 € Details

Communication

Examplepage for repair manual Communication

For Caddy (2016)

9,91 € Details

Brake system

Examplepage for repair manual Brake system

For Caddy (2016)

12,76 € Details

6-speed manual gearboxes 02Q and 0BB

Examplepage for repair manual 6-speed manual gearboxes 02Q and 0BB

For Caddy (2016)

28,90 € Details

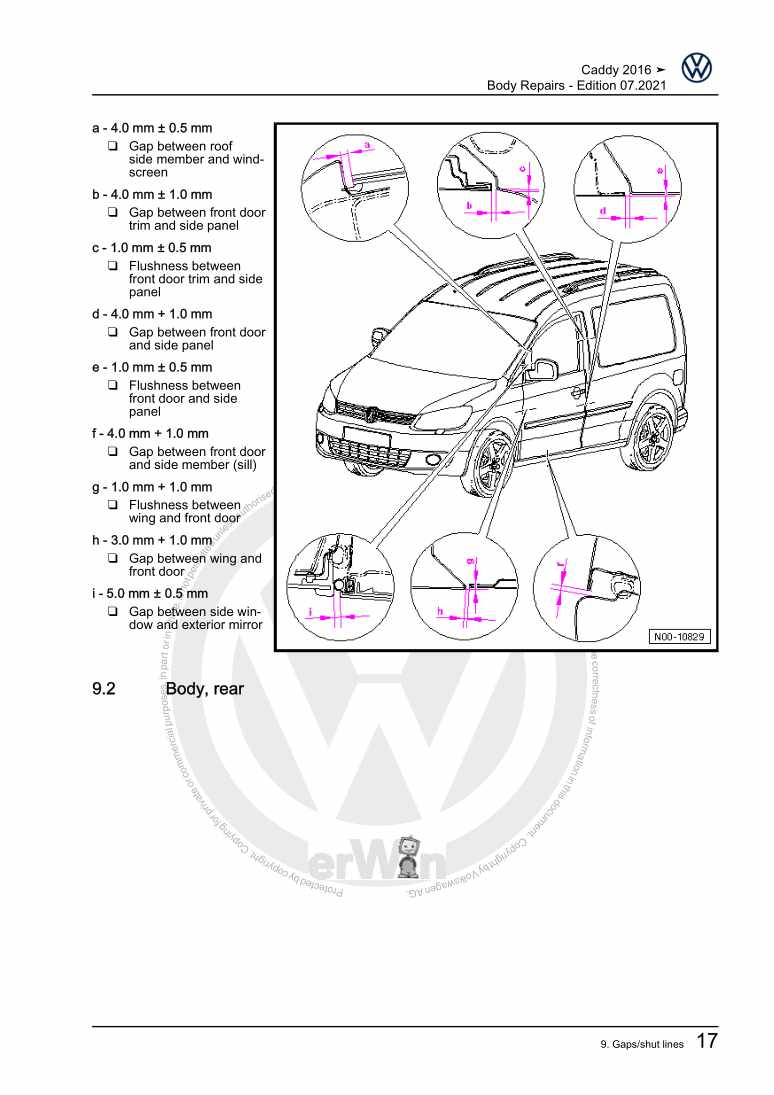
Body Repairs

Examplepage for repair manual Body Repairs

For Caddy (2016)

28,90 € Details

Our Best Sellers

Did you know? We also offer original spare parts.

car part N10638901 Schraube

N10638901

Schraube

3,01 €

Details
car part 1K0927904BA Leitg.Satz

1K0927904BA

Leitg.Satz

72,80 €

Details
car part 4N0010502EB Kennschild

4N0010502EB

Kennschild

11,50 €

Details
car part N90328504 Schraube

N90328504

Schraube

2,60 €

Details
car part 059121737AR Ventil

059121737AR

Ventil

118,24 €

Details

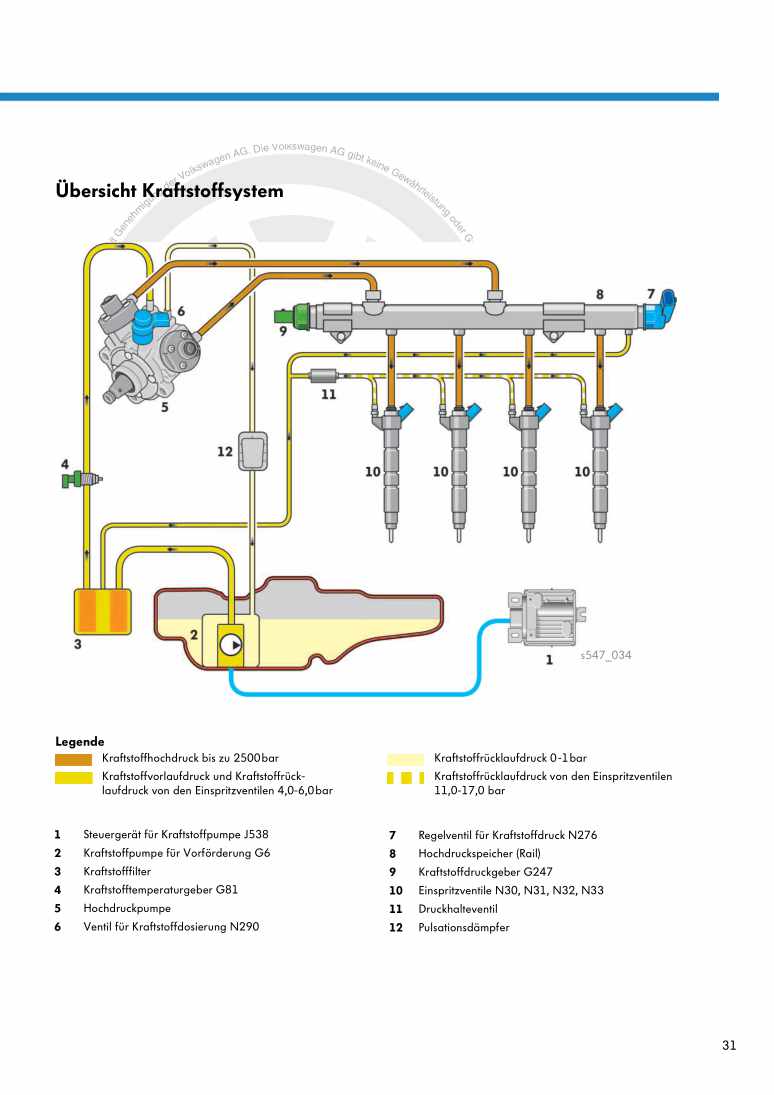
Nr. 547: Der 2,0l-176kW-TDI-Biturbo-Motor der Dieselmotoren-Baureihe EA288

Examplepage for repair manual Nr. 547: Der 2,0l-176kW-TDI-Biturbo-Motor der Dieselmotoren-Baureihe EA288

5,89 € Details

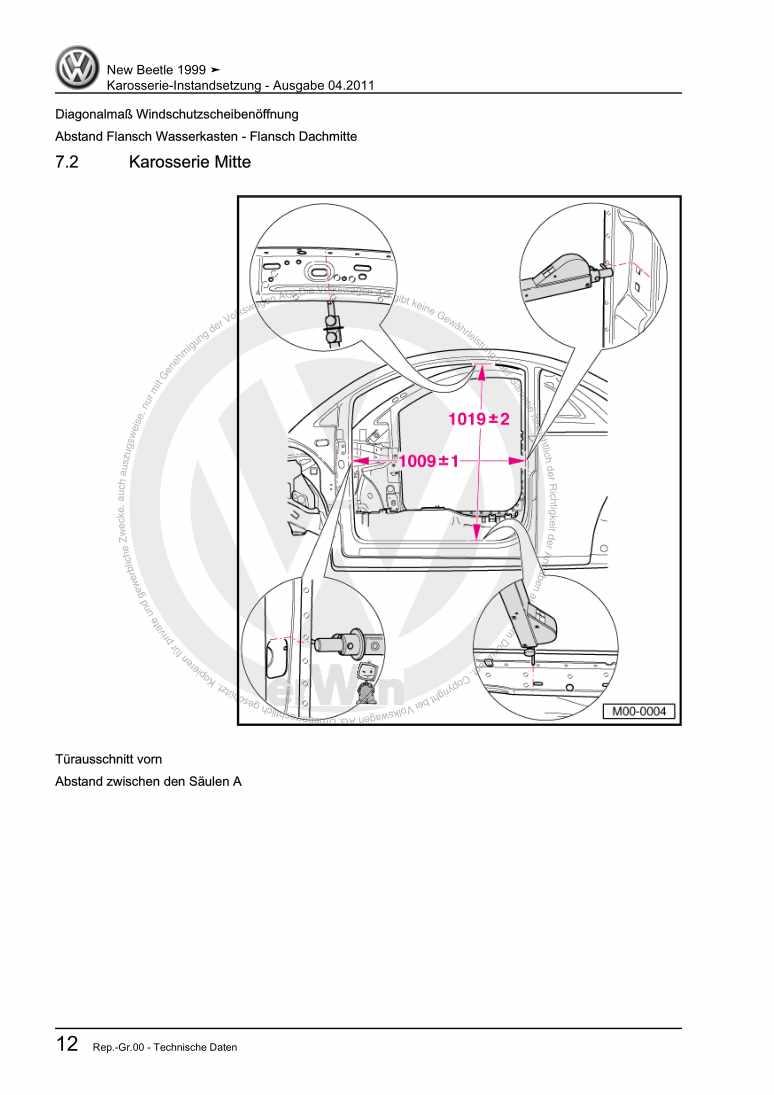
Karosserie-Instandsetzung

Examplepage for repair manual Karosserie-Instandsetzung

For New Beetle / New Beetle (USA) (1998 - 2007) / New Beetle (Europe) (1999 - 2002)

10,12 € Details

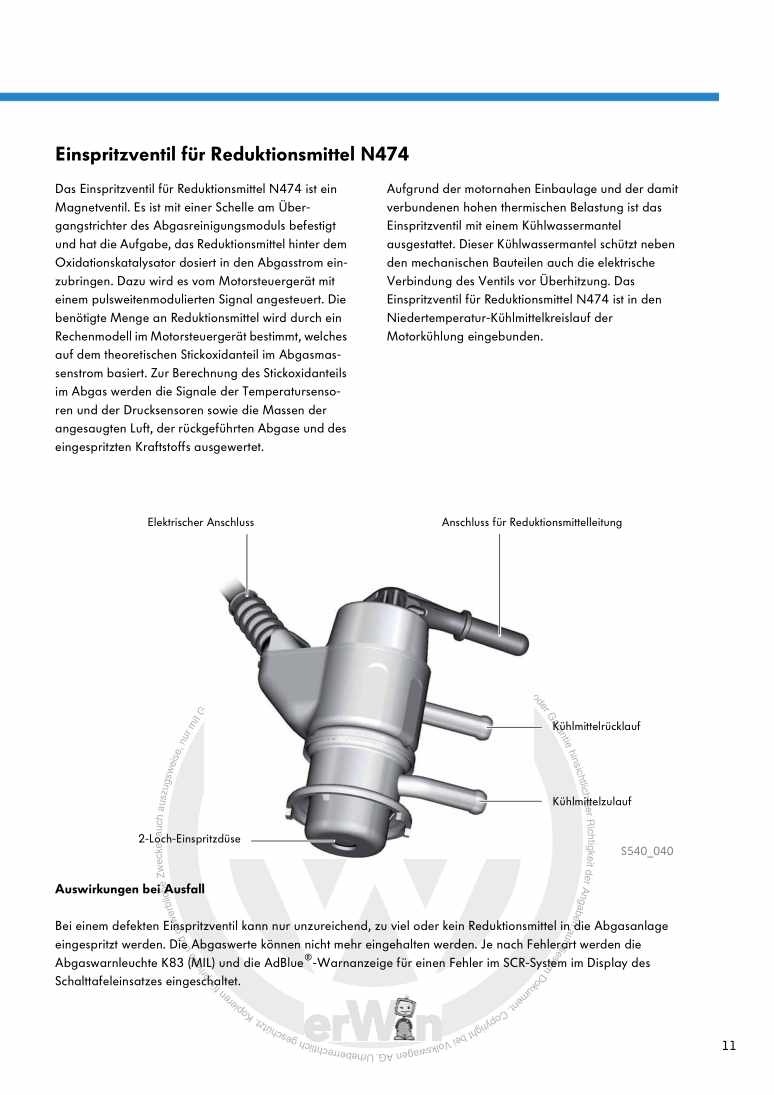
Nr. 540: Das Abgasnachbehandlungssystem Selective-Catalytic-Reduction

Examplepage for repair manual Nr. 540: Das Abgasnachbehandlungssystem Selective-Catalytic-Reduction

5,67 € Details

image/svg+xml About Clonck

Original repair manuals und spare parts

Our repair manuals are original, come directly from Volkswagen and meet the highest quality standards.

In our original parts shop we sell high-quality original spare parts from car manufacturers. Use the search function to enter the desired part number (OE number) and order the required spare part quickly and easily.

Highest quality standards

At Clonck, we want to make car mechanics and car professionals happy. That's why you will only find professional and high-quality repair manuals at Clonck that will help you to repair your vehicle professionally.

Our partners

Autohaus Schmidt GmbH
Automag GmbH Filiale Laim
KFZ-VERLAG GmbH
Zimpel und Franke GmbH

Clonck: The car repair shop - also as app!

Clonck App Logo Play Store

Clonck: Fitting car parts for your car repair

4,5 90

With Clonck you can order the right original spare parts in no time.

  • Add your car model
  • Select assembly group
  • Enter vehicle identification number (VIN)
  • Access to over 5,000 original repair manuals
Start app now
Clonck App Preview Car Mobilephone Carparts