THE CAR REPAIR SHOP
0
Home » Manuals » General body repairs, exterior
  • Examplepage for repair manual General body repairs, exterior
  • Examplepage for repair manual 2 General body repairs, exterior
  • Examplepage for repair manual 3 General body repairs, exterior
  • Examplepage for repair manual General body repairs, exterior
  • Examplepage for repair manual 2 General body repairs, exterior
  • Examplepage for repair manual 3 General body repairs, exterior

General body repairs, exterior

For Transporter Caravelle / Transporter Doppelkab / Transporter Kasten / Transporter Kombi/Cam / Transporter Pritsche

Original Volkswagen repair manual


19,30 €7% VAT incl.

  • Deutsch
  • English

Immediately available for download

Language: English

Digital PDF file

4.406 KB

237 Sites

Detailed technical data

Immediately readable

This repair manual contains: Body, front, Tailgate/boot lid, Central locking, Sliding door, Elevating/sliding roof with glass panel, Fitting the canopy frame and the canopy, Front bumper, Windows secured by threaded fasteners, Trim, Exterior mirror and Removing trim strip for number plate lighting/tailgate. Show more
Secure Payment via PayPal, credit card, direct debit and more
PayPal Logo SEPA Lastschrift Logo Giropay Logo Sofort Überweisung Logo

Repair manual General body repairs, exterior PDF download has the following content:

Chapter overview

  • Body front
    1
  • 1 Body, front
    1
  • 1.1 Body, front
    1
  • 1.2 Removing and installing lock carrier with attached components
    1
  • 1.3 Front wing - Assembly overview 01.96 >
    4
  • 1.4 Noise insulation - Assembly overview
    6
  • 1.5 Renewing damping material
    8
  • Bonnet, Flaps
    9
  • 1 Bonnet
    9
  • 1.1 Bonnet
    9
  • 1.2 Removing bonnet > 12.95
    9
  • 1.3 Installing and adjusting bonnet > 12.95
    10
  • 1.4 Assembly overview 01.96 >
    12
  • 1.5 Removing bonnet 01.96 >
    15
  • 1.6 Installing and adjusting bonnet 01.96 >
    16
  • 1.7 Removing and installing bonnet lock cable >12.95
    18
  • 1.8 Removing and installing bonnet lock and bonnet lock cable 01.96 >
    19
  • 2 Tailgate/boot lid
    22
  • 2.1 Tailgate/boot lid
    22
  • 2.2 Assembly overview
    22
  • 2.3 Removing and installing tailgate
    25
  • 2.4 Adjusting tailgate
    27
  • 2.5 Removing tailgate lock mechanism
    29
  • 2.6 Removing lock cylinder
    30
  • 2.7 Removing gas strut
    30
  • 2.8 Releasing gas from gas-filled strut
    31
  • Front doors/Door components/Central locking system
    33
  • 1 Front door
    33
  • 1.1 Front door
    33
  • 1.2 Assembly overview
    33
  • 1.3 Removing door > 12.95
    37
  • 1.4 Installing and adjusting door > 12.95
    38
  • 1.5 Removing door 01.96 >
    39
  • 1.6 Installing and adjusting door 01.96 >
    40
  • 1.7 Removing window lifters
    42
  • 1.8 Servicing electric window lifters
    43
  • 1.10 Over coming resistance with excess force limitation
    45
  • 1.11 Initialising and releasing automatic closing function
    46
  • 1.12 Removing door window
    46
  • 1.13 Installing door window
    47
  • 1.14 Removing outside door handle
    48
  • 1.15 Removing door lock
    48
  • 1.16 Removing lock cylinder (front door / side wing door)
    49
  • 2 Central locking
    50
  • 2.1 Central locking
    50
  • 2.2 Central locking - Assembly overview
    50
  • 2.3 Removing and installing front door positioning element
    51
  • 2.4 Removing and installing sliding door lock positioning element
    52
  • 2.5 Removing and installing tailgate/boot lid lock positioning element
    53
  • 2.6 Removing and installing wing door lock positioning element
    53
  • 2.7 Functional check of central locking with radio remote control
    54
  • 2.8 Synchronising keys with radio wave remote control> 04.00
    54
  • 2.9 Removing and installing batteries for key with radio wave remote control >04.00
    56
  • 2.10 Adapting (matching) ignition keys to radio wave remote control 05.00 >
    58
  • 2.11 Adapting (matching) a new additional key 05.00 >
    61
  • 2.12 Synchronizing ignition keys to radio wave remote control 05.00 >
    62
  • 2.13 Removing and installing battery for key with radio wave remote control (foldable) 05.00 >
    63
  • Rear doors/Door components
    66
  • 1 Sliding door
    66
  • 1.1 Sliding door
    66
  • 1.2 Assembly overview > 12.95
    66
  • 1.3 Assembly overview 01.96 >03.01
    70
  • 1.4 Assembly overview 04.01 >
    75
  • 1.5 Removing sliding door > 03.01
    80
  • 1.6 Removing sliding door 04.01 >
    81
  • 1.7 Removing door arrester
    82
  • 1.8 Adjusting sliding door > 12.95
    83
  • 1.9 Adjusting sliding door 01.96 >03.01
    86
  • 1.10 Adjusting sliding door 04.01 >
    90
  • 1.11 Removing central lock
    94
  • 1.12 Removing outside door handle
    95
  • 1.13 Removing lock cylinder (sliding door)
    96
  • 1.14 Guide rail - Assembly overview
    97
  • 2 Rear wing door
    99
  • 2.1 Rear wing door
    99
  • 2.2 Left wing door - Assembly overview
    99
  • 2.3 Right wing door - Assembly overview
    102
  • 2.4 Removing wing door
    105
  • 2.5 Adjusting wing doors
    106
  • 2.6 Removing door locks
    108
  • 2.7 Removing lock mechanism
    110
  • 2.8 Removing lock mechanism
    111
  • 2.9 Removing inside door opener
    112
  • 2.10 Removing lock cylinder
    112
  • 3 Side wing door
    113
  • 3.1 Side wing door
    113
  • 3.2 Side wing door - Assembly overview
    113
  • 3.3 Removing wing door
    116
  • 3.4 Installing and adjusting wing door
    116
  • 3.5 Removing door lock
    118
  • Sliding/tilting roof
    120
  • 1 Sliding/tilting roof with glass panel
    120
  • 1.1 Sliding/tilting roof with glass panel
    120
  • 1.2 Sliding/tilting roof - Assembly overview
    120
  • 1.3 Removing sliding/tilting roof glass panel
    123
  • 1.4 Installing sliding/tilting roof glass panel
    123
  • 1.5 Sliding/tilting roof glass panel (height adjustment)
    124
  • 1.6 Adjusting panel seal
    125
  • 1.7 Removing and installing electric drive
    126
  • 1.8 Checking cable drive (0 position)
    128
  • 1.9 Checking and adjusting parallel running
    129
  • 1.10 Removing sliding headlining
    131
  • 1.11 Installing sliding headlining
    133
  • 1.12 Removing and installing carrier unit
    134
  • 1.13 Routing and cleaning water drain hoses
    137
  • 2 Servicing glass/tilting roof
    139
  • 2.1 Servicing glass/tilting roof
    139
  • 2.2 Glass/tilting roof - Assembly overview
    139
  • 2.3 Removing glass panel
    141
  • 2.4 Installing glass panel
    142
  • 2.5 Routing and cleaning water drain hoses
    143
  • 3 Elevating/sliding roof with glass panel
    152
  • 3.1 Elevating/sliding roof with glass panel
    152
  • 3.2 Elevating/sliding roof - Assembly overview
    152
  • 3.3 Removing and installing elevating/sliding roof
    154
  • 3.4 Removing and installing water collector plate (with sun blind)
    156
  • 3.5 Removing and installing glass panel for elevating/sliding roof
    157
  • 3.6 Removing and installing electric drive
    158
  • 3.7 Checking parallel running
    158
  • 3.8 Adjusting parallel running
    159
  • Convertible top, Hardtop, Canopy
    160
  • 1 Fitting the canopy frame and the canopy
    160
  • 1.1 Fitting the canopy frame and the canopy
    160
  • 1.2 Canopy frame for dropside and double cab
    160
  • 1.3 Canopy frame for dropside and double cab - Assembly overview
    161
  • 1.4 Canopy frame (cab height) for double cab - Assembly overview
    163
  • 1.5 Installing canopy frame and canopy
    166
  • Bumpers
    170
  • 1 Front bumper
    170
  • 1.1 Front bumper
    170
  • 1.2 Assembly overview >12.95
    170
  • 1.3 Assembly overview - 01.96 >, long front end
    172
  • 1.4 Assembly overview - 01.96 >, short front end
    174
  • 2 Rear bumper
    176
  • 2.1 Rear bumper
    176
  • 2.2 Assembly overview > 12.95
    176
  • 2.3 Assembly overview 01.96>
    178
  • Glazing
    180
  • 1 Flush bonded windows
    180
  • 1.1 Flush bonded windows
    180
  • 1.2 Tools
    182
  • 1.3 Materials
    183
  • 1.4 Windscreen - Assembly overview
    184
  • 1.5 Side and rear window - Assembly overview
    186
  • 1.6 Removing windscreen and undamaged side, rear window
    188
  • 1.7 Removing destroyed side and rear windows
    190
  • 1.8 Installing windscreen, side and rear windows
    190
  • 1.9 Preparing old undamaged window for glazing
    191
  • 1.10 Preparing new window for glazing
    191
  • 1.11 Preparing body flange or door window flange for glazing
    192
  • 1.12 Installation instructions
    192
  • 1.13 Curing time
    195
  • 1.14 Touching up paint damage
    196
  • 1.15 Cleaning off surplus adhesive sealing material
    196
  • 1.16 Installing frame (Repair profile) (side and rear windows)
    197
  • 1.17 Touching up window sealant
    198
  • 2 Windows secured by threaded fasteners
    198
  • 2.1 Windows secured by threaded fasteners
    198
  • 2.2 Side window with air intake vent - Assembly overview
    199
  • 2.3 Removing and installing side window with air intake vent
    199
  • 3 Sliding windows
    201
  • 3.1 Sliding windows
    201
  • 3.2 Sliding window (sliding door) - Assembly overview > 05.94
    201
  • 3.3 Sliding window (sliding door) - Assembly overview 06.94 >
    205
  • 3.4 Sliding window with insect screen (sliding door) - Assembly overview > 05.94
    208
  • 3.5 Sliding window with insect screen (sliding door) - Assembly overview 06.94 >
    212
  • 3.6 Replacing detent rail
    215
  • 3.7 Renewing sealing frame
    216
  • 3.8 Renewing web
    217
  • 3.9 Renewing sliding window
    217
  • 3.10 Retrofitting sliding window
    218
  • Exterior equipment
    224
  • 1 Trim
    224
  • 1.1 Trim
    224
  • 1.2 Radiator grille - Assembly overview > 12.95
    224
  • 1.3 Removing radiator grille > 08.94
    225
  • 1.4 Removing and installing radiator grille with trim frame 09.94 >
    226
  • 1.5 Removing and installing radiator grille 01.96 >
    228
  • 2 Exterior mirror
    230
  • 2.1 Exterior mirror
    230
  • 2.2 Removing and installing exterior mirror
    230
  • 3 Removing trim strip for number plate lighting/tailgate
    231
  • 3.1 Removing trim strip for number plate lighting/tailgate
    231
  • 4 Removing trim strip for number plate lighting/rear wing door
    231
  • 4.1 Removing trim strip for number plate lighting/rear wing door
    231
Manufacturer's designation General body repairs, exterior
Manufacturer Volkswagen
Suitable for Transporter Caravelle / Transporter Doppelkab / Transporter Kasten / Transporter Kombi/Cam / Transporter Pritsche (1991 - 1996)
Suitable car types 70
Category Reparaturanleitung

There are no reviews for this product at the moment.

Similar repair manuals

Immobilizer for petrol engine, ACU, From January 1995

No image available

For Transporter Caravelle / Transporter Doppelkab / Transporter Kasten / Transporter Kombi/Cam / Transporter Pritsche (1991 - 1996)

4,21 € Details

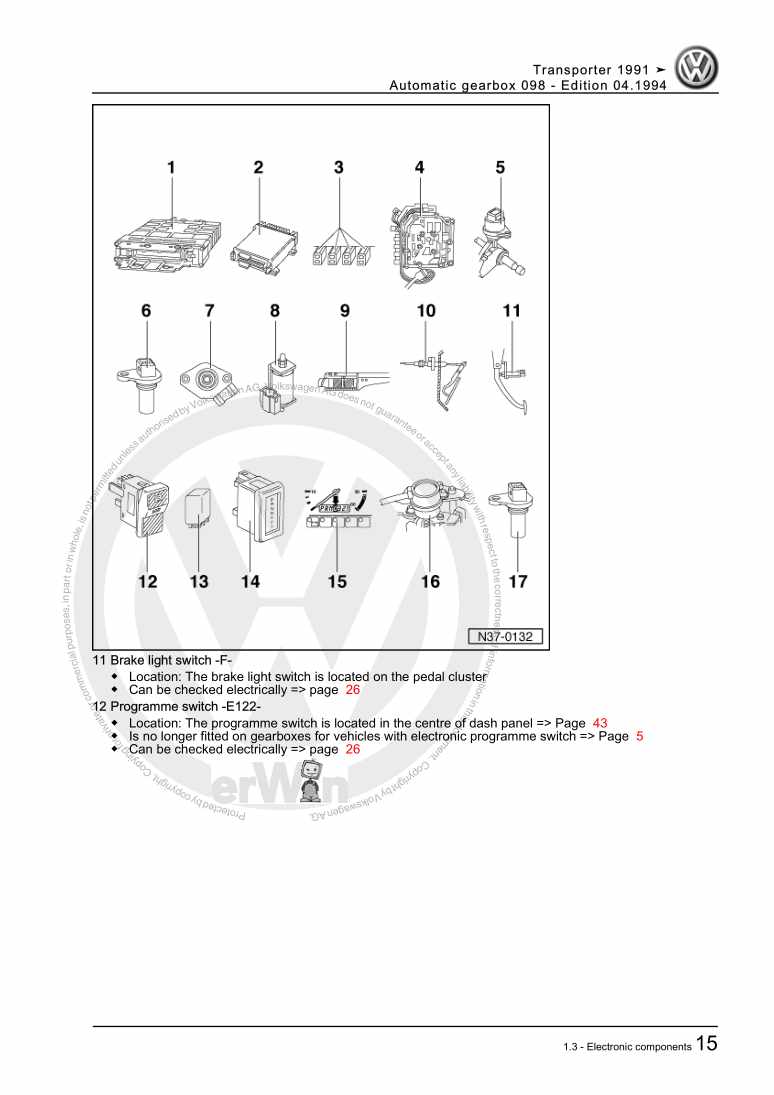
Automatic gearbox 098

Examplepage for repair manual Automatic gearbox 098

For Transporter Caravelle / Transporter Doppelkab / Transporter Kasten / Transporter Kombi/Cam / Transporter Pritsche (1991 - 1996)

18,58 € Details

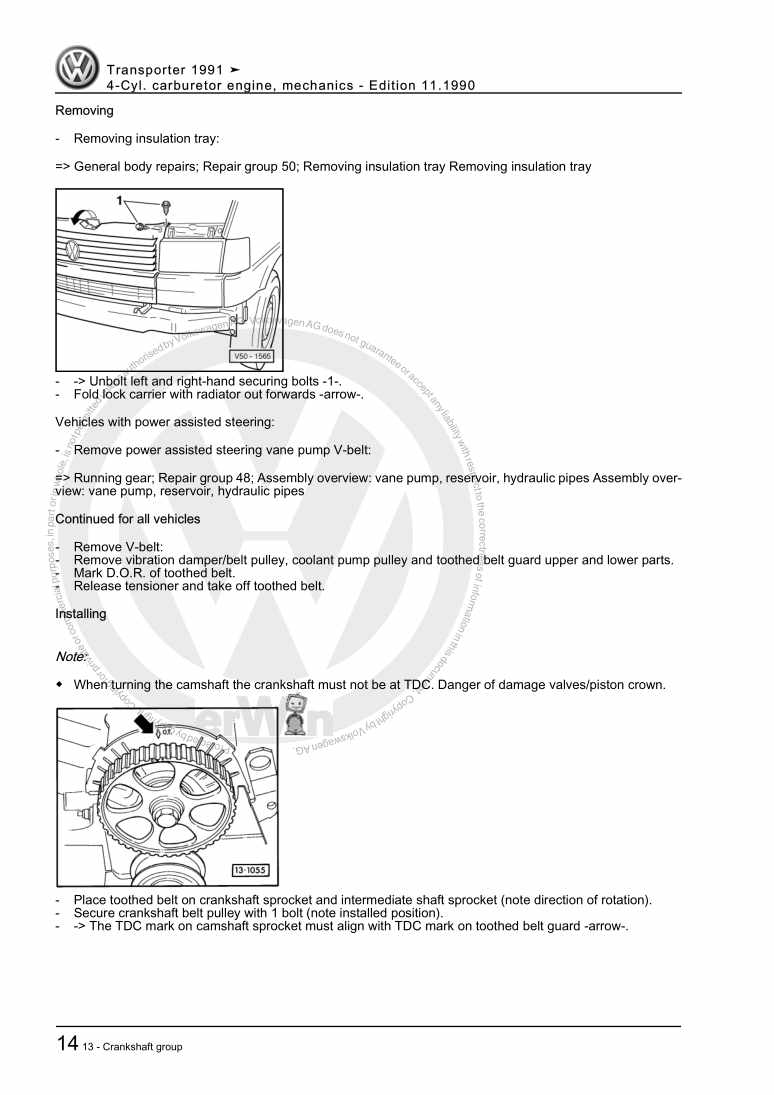
4-Cyl. carburetor engine, mechanics

Examplepage for repair manual 4-Cyl. carburetor engine, mechanics

For Transporter Caravelle / Transporter Doppelkab / Transporter Kasten / Transporter Kombi/Cam / Transporter Pritsche (1991 - 1996)

8,22 € Details

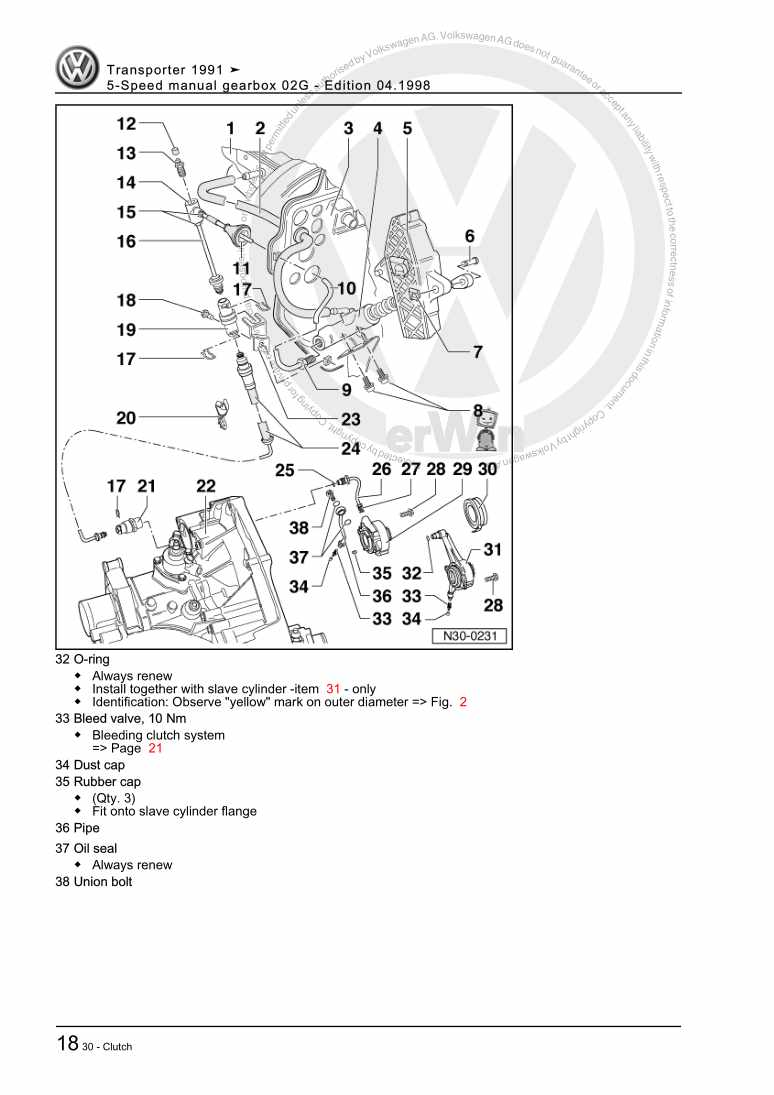
5-Speed manual gearbox 02G

Examplepage for repair manual 5-Speed manual gearbox 02G

For Transporter Caravelle / Transporter Doppelkab / Transporter Kasten / Transporter Kombi/Cam / Transporter Pritsche (1991 - 1996)

20,22 € Details

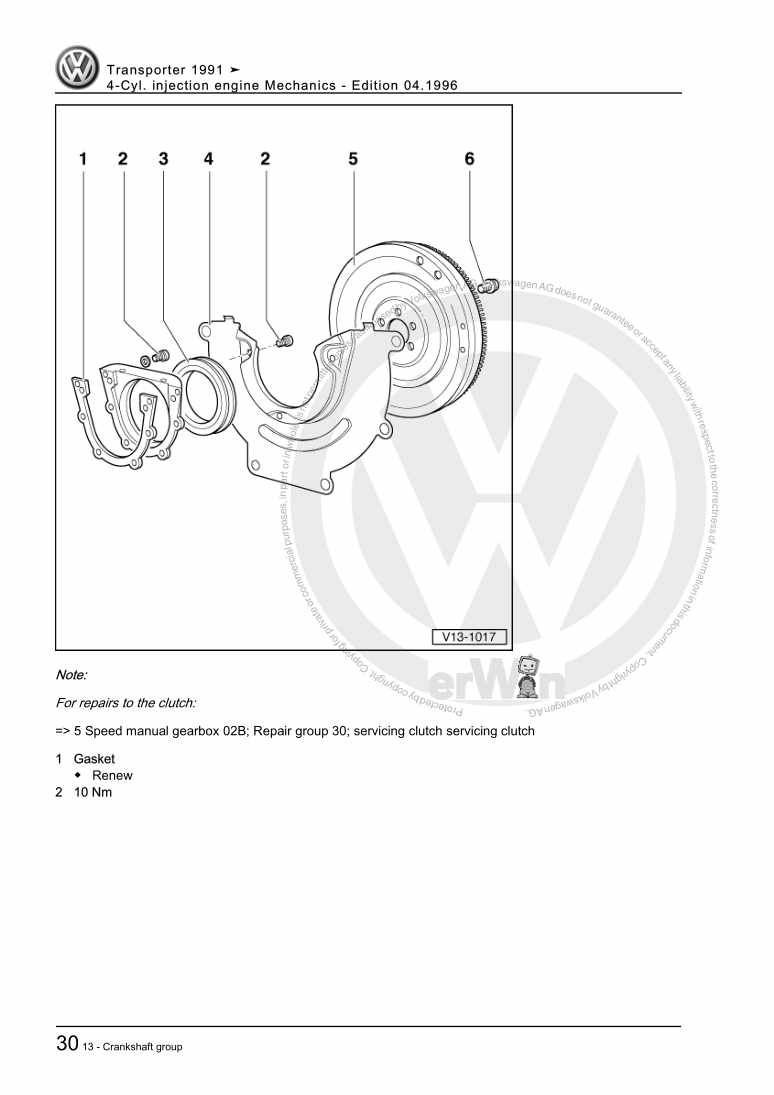
4-Cyl. injection engine Mechanics

Examplepage for repair manual 4-Cyl. injection engine Mechanics

For Transporter Caravelle / Transporter Doppelkab / Transporter Kasten / Transporter Kombi/Cam / Transporter Pritsche (1991 - 1996)

10,54 € Details

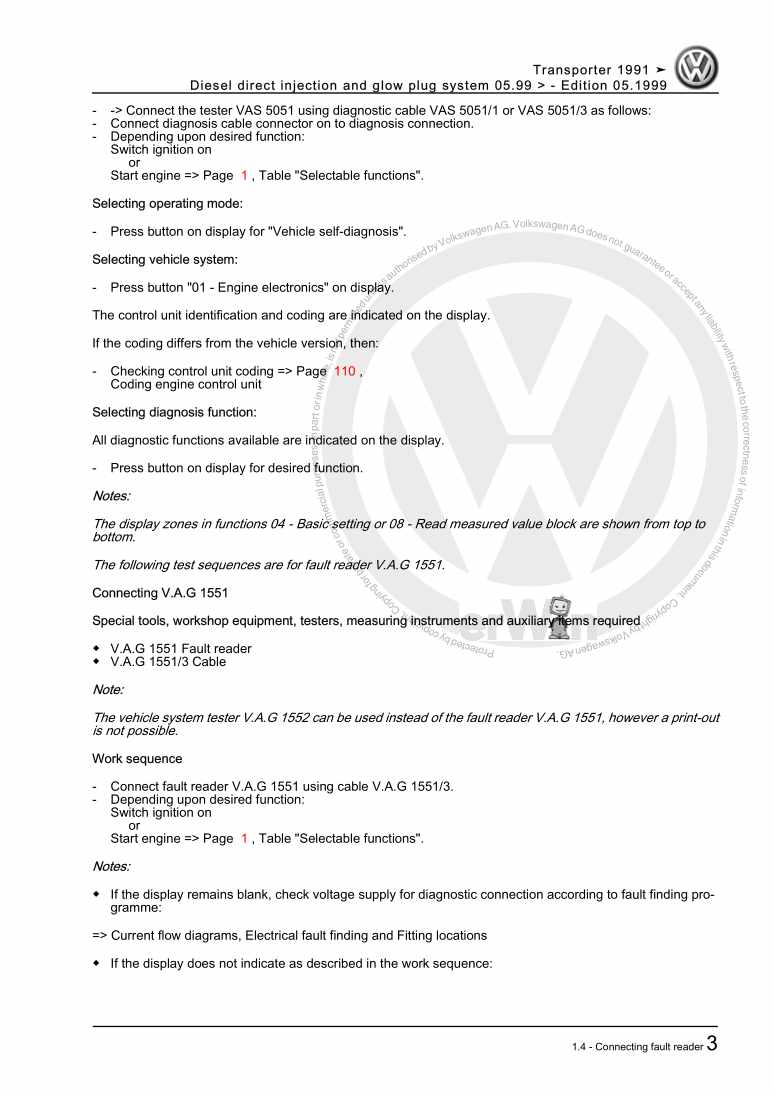
Diesel direct injection and glow plug system 05.99 >

Examplepage for repair manual Diesel direct injection and glow plug system 05.99 >

For Transporter Caravelle / Transporter Doppelkab / Transporter Kasten / Transporter Kombi/Cam / Transporter Pritsche (1991 - 1996)

10,68 € Details

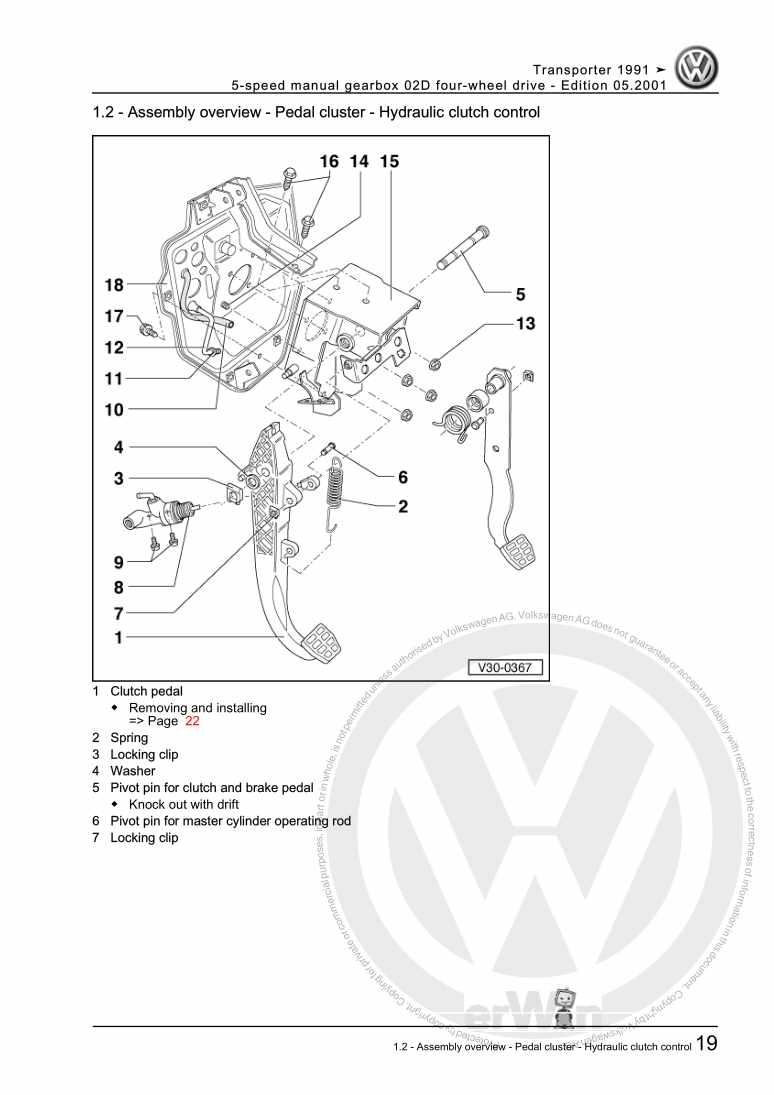
5-speed manual gearbox 02D four-wheel drive

Examplepage for repair manual 5-speed manual gearbox 02D four-wheel drive

For Transporter Caravelle / Transporter Doppelkab / Transporter Kasten / Transporter Kombi/Cam / Transporter Pritsche (1991 - 1996)

33,33 € Details

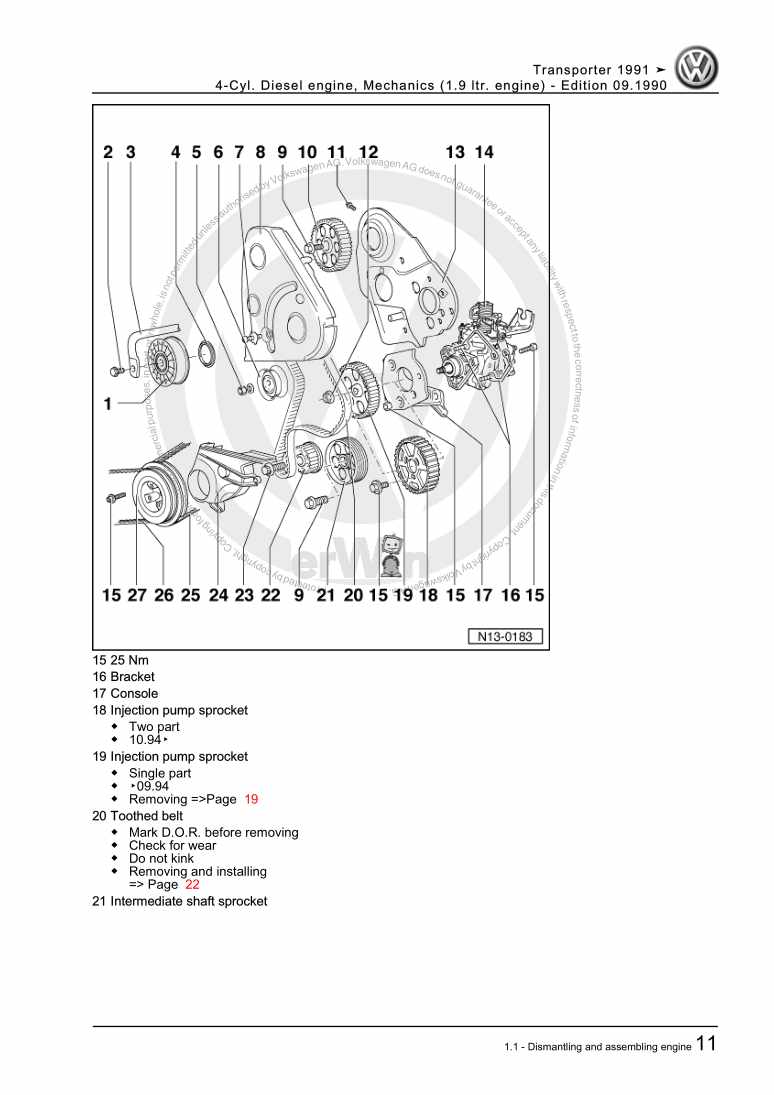
4-Cyl. Diesel engine, Mechanics (1.9 ltr. engine)

Examplepage for repair manual 4-Cyl. Diesel engine, Mechanics (1.9 ltr. engine)

For Transporter Caravelle / Transporter Doppelkab / Transporter Kasten / Transporter Kombi/Cam / Transporter Pritsche (1991 - 1996)

11,25 € Details

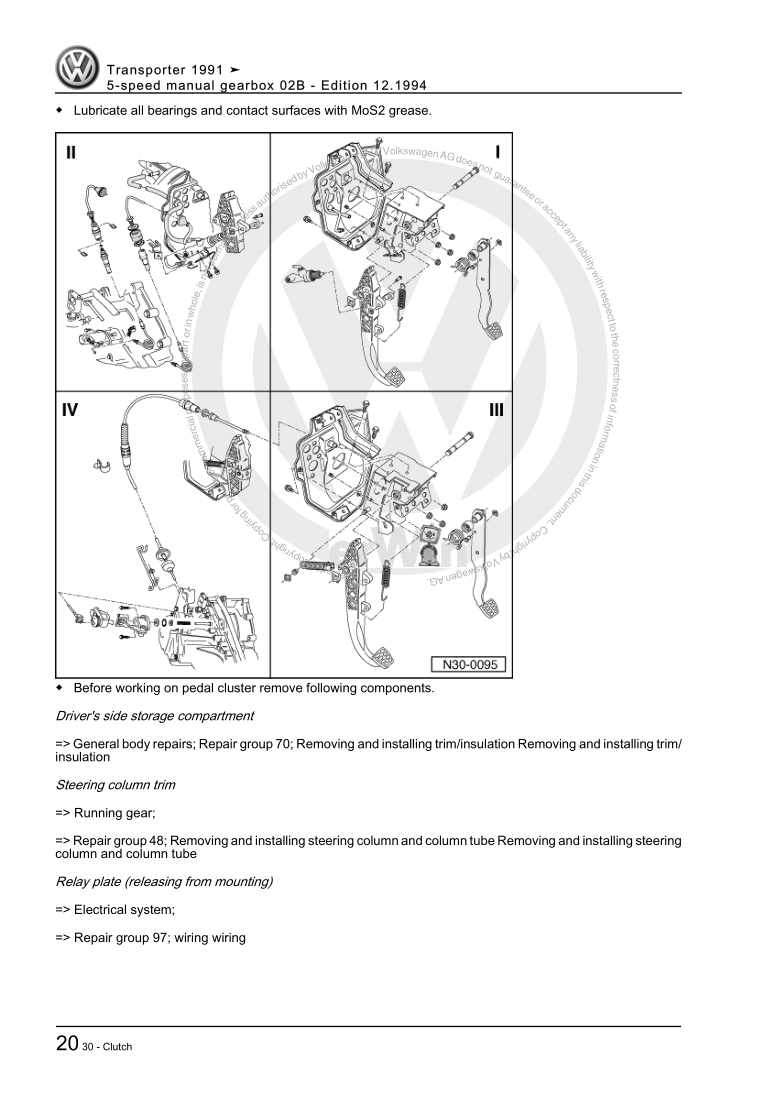
5-speed manual gearbox 02B

Examplepage for repair manual 5-speed manual gearbox 02B

For Transporter Caravelle / Transporter Doppelkab / Transporter Kasten / Transporter Kombi/Cam / Transporter Pritsche (1991 - 1996)

18,80 € Details

2E3 Carburetor/ TCI-H ignition system

Examplepage for repair manual 2E3 Carburetor/ TCI-H ignition system

For Transporter Caravelle / Transporter Doppelkab / Transporter Kasten / Transporter Kombi/Cam / Transporter Pritsche (1991 - 1996)

6,29 € Details

Our Best Sellers

Did you know? We also offer original spare parts.

car part 8W0807611A Schlieteil

8W0807611A

Schlieteil

66,85 €

Details
car part 2E0863439C Blende

2E0863439C

Blende

14,71 €

Details
car part n10255601 Klemmschel

n10255601

Klemmschel

1,98 €

Details
car part 3Q0713128 Modul

3Q0713128

Modul

96,34 €

Details
car part 06H103495AJ Abscheider

06H103495AJ

Abscheider

124,53 €

Details

Digijet-Einspritzanlage/ TSZ-H Zündanlage

Examplepage for repair manual Digijet-Einspritzanlage/ TSZ-H Zündanlage

For Polo / Polo Coupe / Polo Steilheck / Polo Stufenheck (1987 - 1994)

6,35 € Details

Nr. 526: Die Dieselmotoren-Baureihe EA288 mit Abgasnorm EU6

Examplepage for repair manual Nr. 526: Die Dieselmotoren-Baureihe EA288 mit Abgasnorm EU6

5,89 € Details

Standheizung, Zusatzheizung

Examplepage for repair manual Standheizung, Zusatzheizung

For Touareg (2011) / Touareg FL (2015 > )

6,64 € Details

image/svg+xml About Clonck

Original repair manuals und spare parts

Our repair manuals are original, come directly from Volkswagen and meet the highest quality standards.

In our original parts shop we sell high-quality original spare parts from car manufacturers. Use the search function to enter the desired part number (OE number) and order the required spare part quickly and easily.

Highest quality standards

At Clonck, we want to make car mechanics and car professionals happy. That's why you will only find professional and high-quality repair manuals at Clonck that will help you to repair your vehicle professionally.

Our partners

Autohaus Schmidt GmbH
Automag GmbH Filiale Laim
KFZ-VERLAG GmbH
Zimpel und Franke GmbH

Clonck: The car repair shop - also as app!

Clonck App Logo Play Store

Clonck: Fitting car parts for your car repair

4,5 90

With Clonck you can order the right original spare parts in no time.

  • Add your car model
  • Select assembly group
  • Enter vehicle identification number (VIN)
  • Access to over 5,000 original repair manuals
Start app now
Clonck App Preview Car Mobilephone Carparts