Starter, current supply, CCS
11 Battery
11.1 Battery concept in Touareg
11.2 Types of battery
21.3 Warning notices and safety regulations
21.4 Battery terminal connection
22 Checking battery
33 Charging battery
43.1 Charging battery with battery deactivation relay
44 Disconnecting and reconnecting battery
74.1 Disconnecting and reconnecting battery, vehicles with one-battery concept
75 Removing and installing battery
175.1 Removing and installing battery beneath front left seat
176 Battery parallel circuit relay J581
226.1 Removing and installing battery parallel circuit relay J581
227 Battery master switch and isolator switch E74
247.1 General description
247.2 Assembly overview - battery master/isolator switch E74
247.3 Detection of triggering
247.4 Resetting after triggering
257.5 Removing and installing battery master/isolator switch E74
278 Specified torques: battery
299 Slave start point, vehicles to 04/05
309.1 Assembly overview - slave start point, vehicles to 04/05
309.2 Removing and installing slave start point, vehicles to 04/05
3010 Slave start point, vehicles from 05/05
3410.1 Assembly overview - slave start point, vehicles from 05/05
3410.2 Removing and installing slave start point, vehicles from 05/05
3411 Starter
3711.1 Checking starter B
3711.2 Removing and installing starter, automatic gearbox
3811.3 Removing and installing starter, manual gearbox
6312 Specified torques: starter
6812.1 6-cylinder 3.2 l and 3.6 l FSI engine
6812.2 8-cyl. injection engine, direct injection (FSI)
6812.3 8-cylinder 4.2 l injection engine
6812.4 12-cylinder 6.0 l injection engine
6812.5 2.5 l, 5-cylinder TDI engine
6812.6 2.5 l, 5-cylinder TDI engine with diesel particulate filter
6912.7 3.0 l, 6-cylinder TDI engine
6912.8 4.9 l, 10-cylinder TDI engine
6913 Alternator
7013.1 Characteristics of alternators
7013.2 Checking poly V-belt
7113.3 Checking alternator C
7113.4 Alternator, air-cooled, 6-cylinder injection engine
7213.5 Alternator, water-cooled, 6-cylinder injection engine 3.2 l and 3.6 l FSI
7613.6 Alternator, 8-cyl. 4.2 l injection engine
8113.7 Alternator, 8-cyl. 4.2 l direct injection engine
8513.8 Alternator, 12-cyl. 6.0 l injection engine
8913.9 Alternator, 5-cyl. 2.5 l TDI engine
9213.10 Coolant-cooled alternator, 6-cyl. 3.0 l TDI engine
9813.11 Air-cooled alternator, 6-cyl. 3.0 l TDI engine
10513.12 Alternator, 10-cyl. 5.0 l TDI engine
10913.13 Removing and installing poly V-belt pulley on alternator
12313.14 Removing and installing poly V-belt pulley with freewheel on alternator
12613.15 Voltage regulator for alternator
13314 Cruise control system (CCS)
13614.1 General description
13614.2 Activating and deactivating cruise control system (CCS)
13615 Adaptive cruise control (ACC)
13715.1 General description
13715.2 Assembly overview
13715.3 Removing and installing adaptive cruise control button E357
13815.4 Removing and installing adaptive cruise control unit J428
13815.5 Calibrating adaptive cruise control sensor G550
13915.6 Initialising adaptive cruise control
13916 Distance monitoring system (Front Assist)
14116.1 General description
14116.2 Adaptive cruise control unit J428
14116.3 Adaptive cruise control button E357
141Gauges, instruments
1421 Dash panel insert
1421.1 General description
1421.2 Renewing dash panel insert
1431.3 Removing and installing dash panel insert
1431.4 Dash panel insert final control diagnosis
1451.5 Description of back of dash panel insert
1461.6 Connection assignment for connector in dash panel insert, vehicles to 11/06
1471.9 Warning lamp symbols in dash panel insert, vehicles to 11/06
1491.10 Warning lamp symbols in dash panel insert, vehicles from 12/06 with monochrome display
1512 Service interval display
1542.1 Resetting service interval display
154Windscreen wash/wipe system
1551 Windscreen wiper system
1551.1 General description
1551.2 Deactivating APP function of wiper motors from 11/07
1561.3 Assembly overview - windscreen wiper system
1571.4 Removing and installing windscreen wiper system
1581.5 Removing and installing wiper arms
1671.6 Adjusting wiper blade park position
1671.7 Removing and installing joint-free wiper
1681.8 Removing and installing rain sensor G213 / rain and light sensor G397
1701.9 Wiper motor control unit J400
1732 Windscreen washer system
1752.1 General description
1752.2 Assembly overview - windscreen washer system
1752.3 Removing and installing washer fluid reservoir
1772.4 Removing and installing windscreen and rear window washer pump V59
1792.5 Removing and installing windscreen washer fluid level sender G33
1792.6 Removing and installing windscreen washer system spray jets
1802.7 Adjusting windscreen washer system spray jets
1803 Rear window wiper system
1823.1 General description
1823.2 Assembly overview - rear window wiper system
1823.3 Removing and installing rear window wiper
1833.4 Adjusting rear window wiper park position
1863.5 Removing and installing joint-free wiper
1874 Rear window washer system
1894.1 General description
1894.2 Assembly overview - rear window washer system
1894.3 Renewing spray jet
1904.4 Adjusting spray jet
1905 Headlight washer system
1925.1 General description
1925.2 Assembly overview - headlight washer system
1925.3 Removing and installing headlight washer system pump V11
1935.4 Removing and installing spray jet pop-up cylinders
1945.5 Removing and installing spray jet assembly
1955.6 Adjusting headlight washer system spray jets
1965.7 Bleeding headlight washer system
1966 Washer fluid line hose couplings
1977 Hose repair
198Lights, bulbs, switches - exterior
1991 Headlights with halogen bulbs up to 11/06
1991.1 General description
1991.2 Assembly overview - headlight
1991.3 Removing and installing headlight
2021.4 Removing and installing headlight mounting
2031.5 Adjusting headlight installation position
2111.6 Replacing headlight bulbs
2121.7 Removing and installing headlight range control motor
2181.8 Converting headlights for use when driving on the left or right
2191.9 Adjusting headlights
2212 Headlights with gas discharge bulbs up to 11/06
2222.1 General description
2222.2 Assembly overview - gas discharge headlights
2232.3 Removing and installing headlight
2262.4 Removing and installing headlight mounting
2272.5 Adjusting headlight installation position
2272.6 Renewing gas discharge bulbs in headlights
2272.7 Removing and installing headlight range control motor
2332.8 Headlight screen adjustment solenoid
2342.9 Headlight range control unit
2352.10 Vehicle level sender
2372.11 Converting headlights for use when driving on the left or right
2382.12 Adjusting headlights
2403 Headlights with gas discharge bulbs and cornering light to 11/06
2433.1 General description
2433.2 Assembly overview - headlight with gas discharge bulb and cornering light
2443.3 Removing and installing headlight
2493.4 Removing and installing headlight mounting
2503.5 Adjusting headlight installation position
2503.6 Replacing gas discharge bulbs and cornering light bulbs in headlights
2503.7 Headlight range control motor
2583.8 Dynamic cornering light control motor
2583.9 Swivel module position sensor
2583.10 Headlight screen adjustment solenoid
2583.11 Power output module for headlight
2593.12 Removing and installing gas discharge bulb control unit
2613.13 Cornering light and headlight range control unit J745
2623.14 Vehicle level sender
2673.15 Converting headlights for use when driving on the left or right
2683.16 Adjusting headlights
2723.17 Operation and safety notes for gas discharge bulbs
2724 Headlights with halogen bulbs from 12/06
2754.1 General description
2754.2 Assembly overview - headlights with halogen bulbs from 12/06
2754.3 Removing and installing headlight
2774.4 Removing and installing headlight mounting
2784.5 Adjusting headlight installation position
2794.6 Renewing bulbs in headlight with halogen bulbs from 12/06
2794.7 Headlight range control motor
2854.8 Converting headlights for use when driving on the left or right
2874.9 Adjusting headlights
2895 Headlights with gas discharge bulbs and cornering light from 12/06
2905.1 General description
2905.2 Assembly overview - headlight with gas discharge bulb and cornering light
2915.3 Removing and installing headlight
2955.4 Removing and installing headlight mounting
2975.5 Adjusting headlight installation position
2985.6 Replacing gas discharge bulbs and cornering light bulbs in headlights
2985.7 Headlight range control motor
3055.8 Dynamic cornering light control motor
3085.9 Swivel module position sensor
3085.10 Headlight screen adjustment solenoid
3095.11 Power output module for headlight
3095.12 Gas discharge bulb control unit
3115.13 Cornering light and headlight range control unit J745
3115.14 Vehicle level sender
3165.15 Converting headlights for use when driving on the left or right
3185.16 Adjusting headlights
3205.17 Operation and safety notes for gas discharge bulbs
3206 Fog lights
3236.1 Removing and installing fog light
3236.2 Removing and installing fog light bulb
3246.3 Checking fog lights
3256.4 Adjusting fog lights
3256.5 Fog light Touareg Volkswagen R GmbH
3257 mirror turn signal lamp and entry light in exterior mirror
3267.1 Turn signal repeater bulb
3267.2 Entry light in exterior mirror
3278 Tail lights (tail light cluster)
3298.1 Assembly overview - tail light (tail light cluster) in side panel
3298.2 Removing and installing tail light (tail light cluster) in side panel
3318.3 Removing and installing tail light (cluster) bulb carrier in side panel
3338.4 Adjustable tail light carrier in side panel
3348.5 Assembly overview - tail light (tail light cluster) in rear lid
3358.6 Removing and installing tail light (tail light cluster) in rear lid
3368.7 Removing and installing tail light (cluster) bulb carrier in rear lid
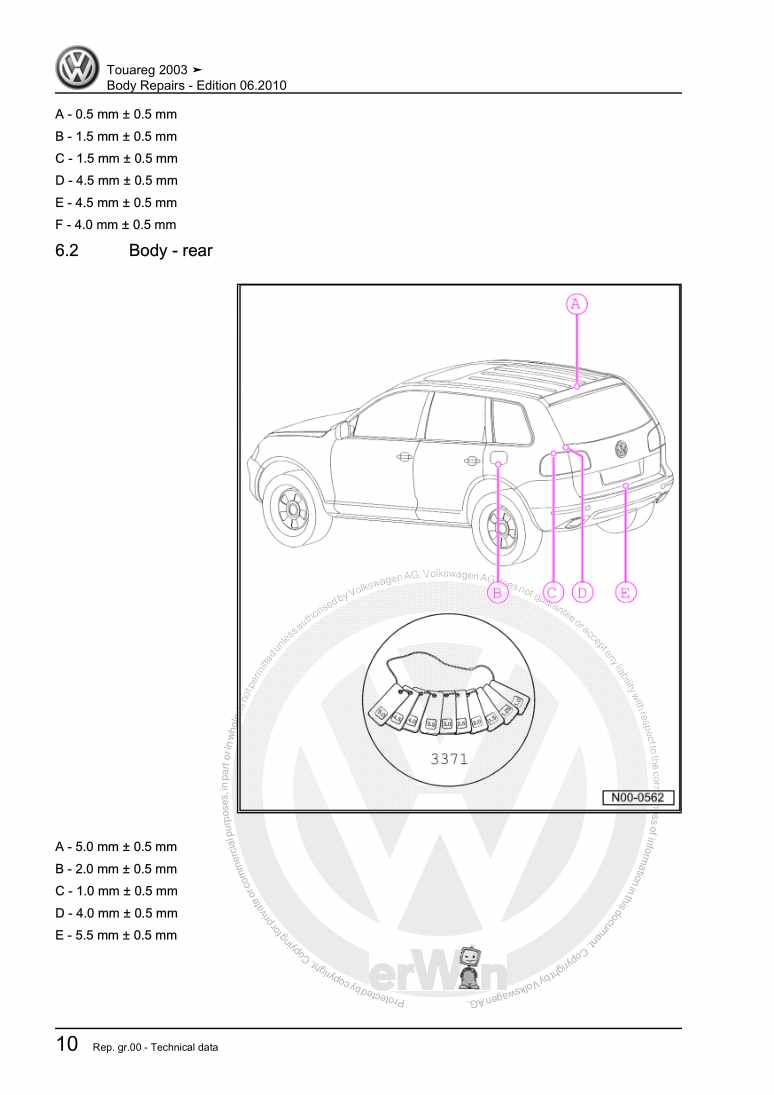
3378.8 Tail light (tail light cluster) gaps and shut lines
3389 Number plate light
3399.1 Removing and installing number plate left light X4 and number plate right light X5
3399.2 Checking number plate left light X4 and number plate right light X5
33910 Additional brake light bulb M25
34010.1 Removing and installing additional brake light M25
34010.2 Checking high-level brake light bulb M25
34111 Steering column switch
34211.1 Assembly overview - steering column switch
34211.2 Removing and installing steering column switch
34411.3 Dismantling and assembling steering column switch
34711.4 Pin assignment on steering column switch
34911.5 Steering column electronics control unit J527
35012 Rear window opening
35212.1 Emergency release of rear lid window
35212.2 Removing and installing button to open rear lid window E361
35212.3 Removing and installing rear lid window release unit V312
35413 Entry and start authorisation
35513.1 Emergency release of ignition key
35513.2 Entry and start authorisation switch E415
35613.3 Entry and start authorisation button E408
35813.4 Entry and start authorisation control unit J518
35913.5 Entry and start authorisation aerials and sensors
36214 Parking aid
37114.1 Assembly overview - parking aid
37114.2 Removing and installing parking aid control unit J446
37314.3 Removing and installing parking aid button E266
37514.4 Removing and installing front parking aid senders
37514.5 Removing and installing rear parking aid senders
37714.6 Removing and installing front left parking aid display Y13
37814.7 Removing and installing rear parking aid display Y15
37914.8 Removing and installing parking aid loudspeaker R169
38015 Side Assist (lane change assistant)
38215.1 General description
38215.2 Removing and installing lane change assist control unit with radar sensor
38215.3 Removing and installing lane change assist warning lamps in exterior mirror
38315.4 Calibrating lane change assistant (Side Assist)
38415.5 Lane change assist control unit final control diagnosis
39115.6 Coding lane change assist control unit
39116 Reversing camera system
39316.1 General description
39316.2 Removing and installing reversing camera
39416.3 Removing and installing reversing camera system control unit
39716.4 Calibrating reversing camera system
39917 Winch
40517.1 Winch with reel window
40517.2 Bumper carrier with winch mounting
41117.3 Winch E-box
41217.4 Additional relay carrier in E-box in plenum chamber
41617.5 Power relay
41817.6 Winch remote control
41918 Roof luggage basket with additional headlights
42218.1 Additional headlights on roof luggage basket
42218.2 Socket for additional headlights on roof luggage basket
42519 Specified torques: lights, bulbs, switches - exterior
43019.1 Specified torques: headlights
43019.2 Specified torques: fog lights
43019.3 Specified torques: tail light in side panel
43019.4 Specified torques: tail light in rear lid
43019.5 Torque settings: Steering column switch
43019.6 Torque settings: Rear window opening
43019.7 Torque settings: Winch
43019.8 Torque settings: Roof luggage basket with additional headlights
431Lights, bulbs, switches - interior
4321 Interior lights and switches
4321.1 Tools
4321.4 Footwell lights
4341.5 Removing and installing illuminated sill panel moulding with lettering
4362 Lights and switches in engine compartment
4392.1 Removing and installing engine compartment light W27
4392.2 Removing and installing bonnet contact switch F266
4403 Lights and switches in dash panel
4413.1 Removing and installing light switch E1
4413.4 Removing and installing glove compartment light W6
4433.5 Removing and installing glove compartment light switch E26
4443.6 Removing and installing switches in centre of dash panel
4444 Lights and switches in front doors
4474.1 Removing and installing driver side switch module
4474.3 Removing and installing window regulator switch in front passenger door E107
4494.4 Remote release button for fuel filler flap and rear lid E463
4514.7 Front left entry light W31 and front right entry light W32
4564.9 Components - front door locks
4595 Lights and switches in rear doors
4615.3 Removing and installing ashtray illumination bulb L15
4615.5 Rear left entry light W33 and rear right entry light W34
4625.6 Rear left door warning lamp W37 and rear right door warning lamp W38
4635.7 Components - rear door locks
4636 Lights and switches in luggage compartment
4646.2 Luggage compartment light W3
4656.3 Rear lid light W51
4666.4 Rear lid lock unit F256
4676.5 Removing and installing AC/DC converter with socket, 12 V - 230 V U13
4687 Lights and switches in roof trim
4707.1 Removing and installing front interior light W1
4707.2 Removing and installing front passenger reading light W13 and driver side reading light W19
4707.3 Removing and installing button module for front interior/reading light
4717.4 Sunroof switch E8
4737.5 Removing and installing sliding sunroof switch illumination bulb L65
4747.7 Removing and installing roof display unit J702
4767.8 Removing and installing garage door operating unit E284
4768 Lights and switches in centre console
4788.1 Removing and installing centre armrest illumination L157
4788.2 Removing and installing storage compartment illumination switch F335
4798.3 Removing and installing exterior mirror adjustment module
4798.5 Removing and installing adaptive suspension operating unit E281
4808.6 Removing and installing module for running gear adjustment
4808.7 Operating panel for transfer box E473
4818.8 12 V socket
4818.9 Cigarette lighter U1
4819 Horn
4829.1 Removing and installing treble horn H2 and bass horn H7
4829.2 Checking treble horn H2 and bass horn H7
48210 Immobiliser, vehicles to 11/06
48310.1 General description
48310.2 Entry and start authorisation control unit J518
48410.3 Electronic steering column lock
48410.4 Engine control unit
48510.5 Exchanging all components
48610.6 Ignition key
48610.7 Online system test
48711 Immobiliser, vehicles from 12/06
48811.1 General description
48811.2 Immobiliser control unit J362
48911.3 Entry and start authorisation control unit J518
48911.4 Electronic steering column lock
49011.5 Engine control unit J623
49011.6 New immobiliser identity
49011.7 Ignition key
49211.8 Fazit system test
49312 Anti-theft alarm (ATA)
49412.1 Activating and deactivating anti-theft alarm
49412.2 Incorporation of trailer into vehicle anti-theft alarm system
49512.4 Removing and installing interior monitoring sensor G273
49612.5 Removing and installing vehicle inclination sender G384
49712.6 Central locking and anti-theft alarm system aerial R47
49812.7 Alarm horn H12 (back-up horn)
50213 Specified torques: lights, bulbs and switches - interior
50413.1 Torque settings: alarm horn H12
504Wiring
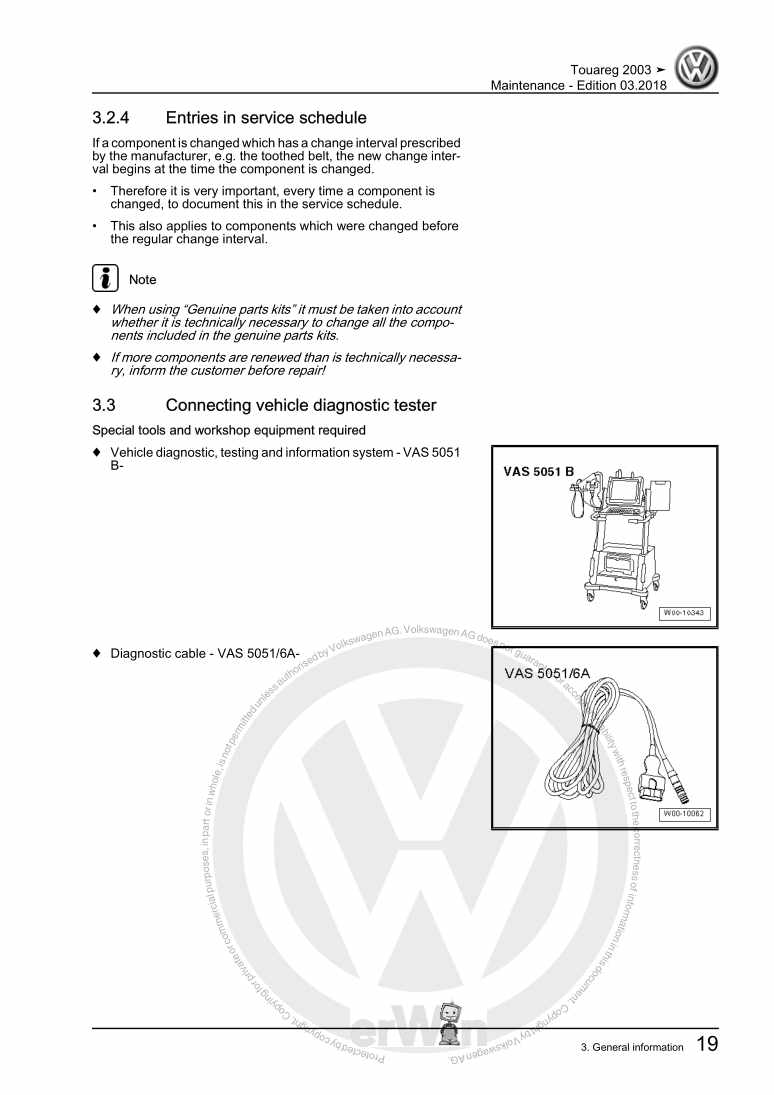
5051 Vehicle diagnosis, testing and information systems
5052 Fuse holder
5062.1 Removing and installing fuse holder
5062.2 Removing and installing pre-fuse box
5073 Relay carriers
5083.1 Removing and installing relay carrier in front left footwell
5084 Electronics boxes
5104.1 Removing and installing E-box in plenum chamber on left
5105 Control units
5125.1 Onboard supply control unit J519
5135.2 Data bus diagnostic interface J533
5175.3 Convenience system central control unit J393
5185.4 Entry and start authorisation control unit J518
5225.5 Trailer detector control unit J345
5245.6 Garage door operation control unit J530
5276 Wiring harness and connector repairs
528
