DER AUTOREPARATUR-SHOP
0
Home » Anleitungen » 10-cylinder diesel engine Volkswagen R GmbH
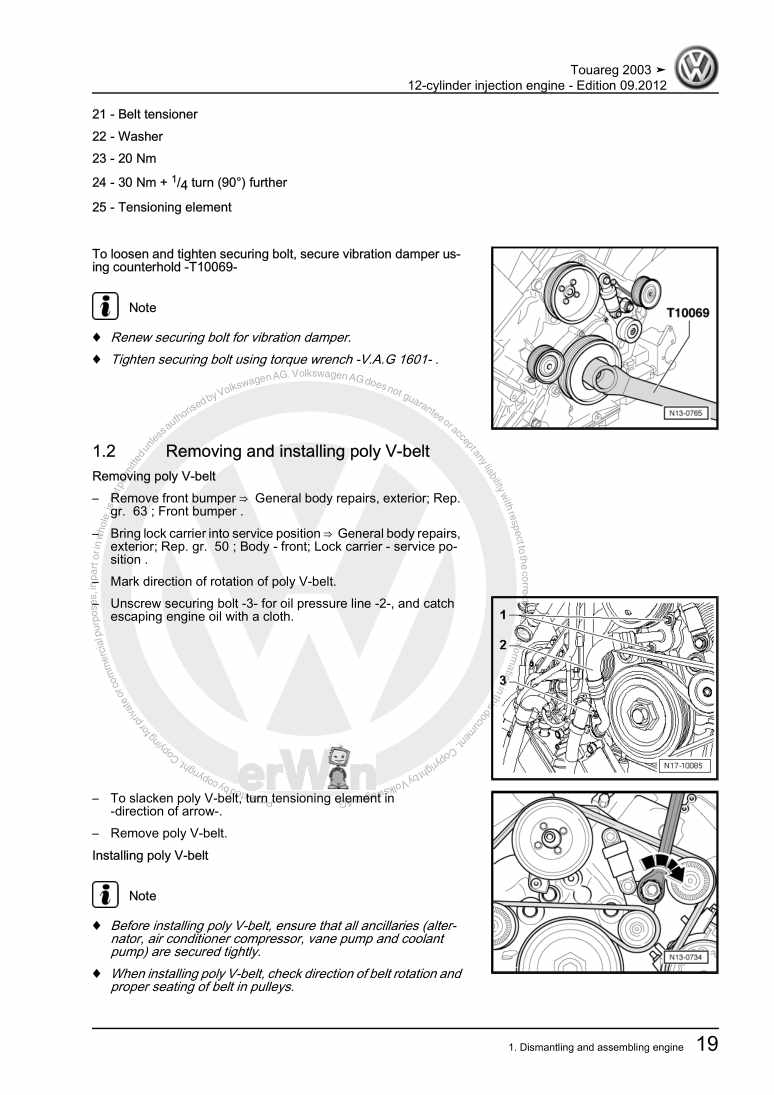
  • Beispielseite für Reparaturanleitung 10-cylinder diesel engine Volkswagen R GmbH
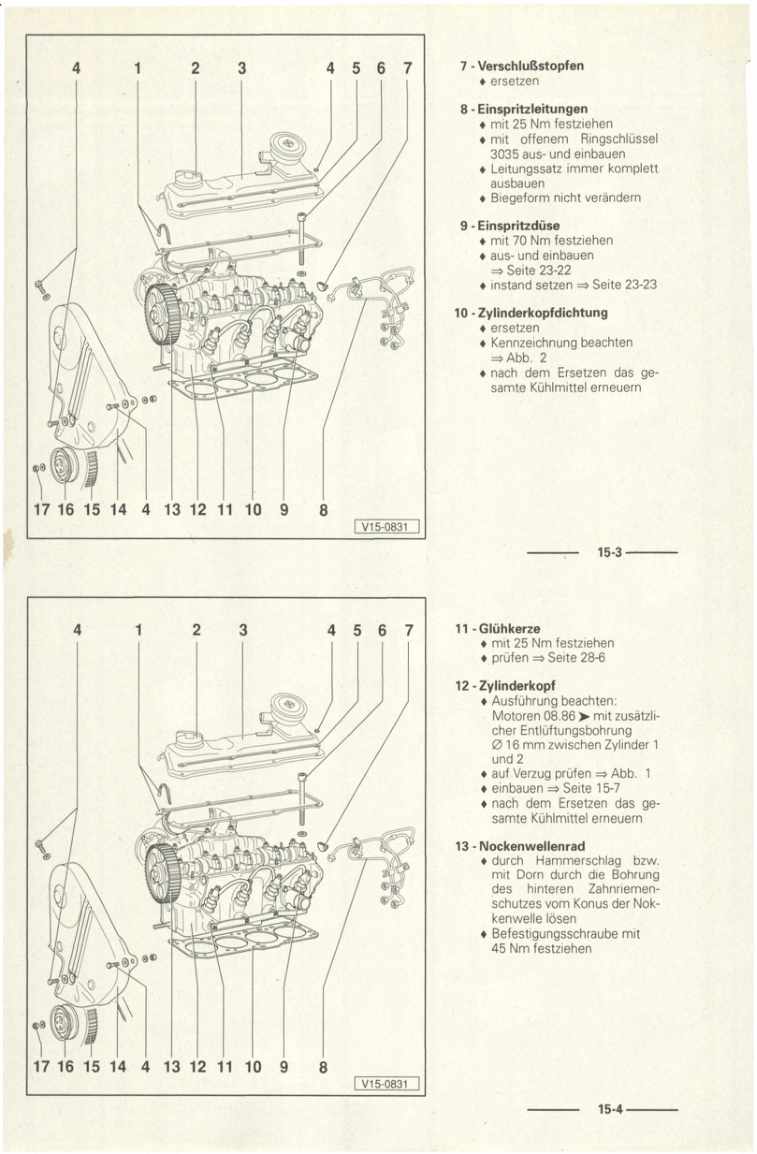
  • Beispielseite für Reparaturanleitung 2 10-cylinder diesel engine Volkswagen R GmbH
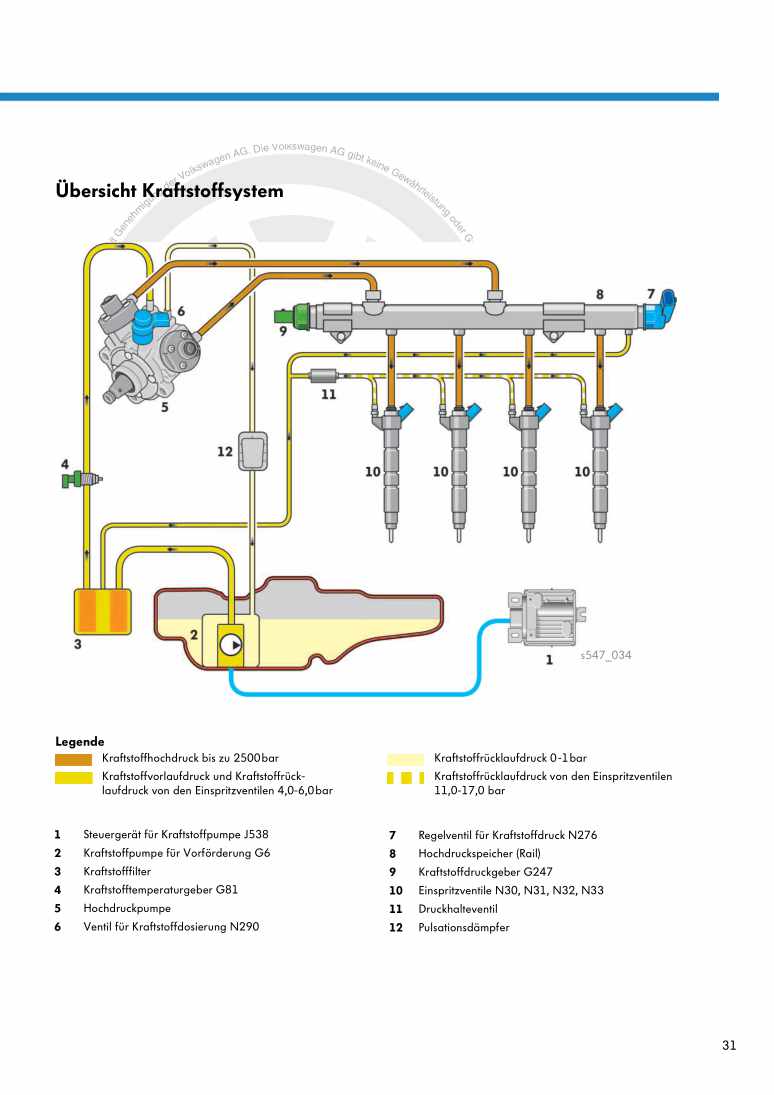
  • Beispielseite für Reparaturanleitung 3 10-cylinder diesel engine Volkswagen R GmbH
  • Beispielseite für Reparaturanleitung 10-cylinder diesel engine Volkswagen R GmbH
  • Beispielseite für Reparaturanleitung 2 10-cylinder diesel engine Volkswagen R GmbH
  • Beispielseite für Reparaturanleitung 3 10-cylinder diesel engine Volkswagen R GmbH

10-cylinder diesel engine Volkswagen R GmbH

Für Touareg

Original VW-Reparaturanleitung


14,51 €inkl. 7% MwSt.

  • Deutsch
  • English

Sofort als Download verfügbar

Sprache: English

Digitale PDF Version

6.176 KB

171 Seiten

Detaillierte technische Daten

Sofort lesbar

Diese Reparaturanleitung umfasst: Removing and installing engine, Balancer shaft, Sealing flange, seals and vibration damper, Pistons and conrods, Engine oil, Oil sump, Parts of fuel supply system, Additive tank, Charge air system with turbocharger und Glow plugs. Mehr anzeigen
Sichere Zahlung per PayPal, Kreditkarte, Lastschrift, Sofort-Überweisung oder Giropay
PayPal Logo SEPA Lastschrift Logo Giropay Logo Sofort Überweisung Logo

Reparaturanleitung Touareg 10-cylinder diesel engine Volkswagen R GmbH pdf Download mit dem Inhalt:

Kapitelübersicht

  • Technical data
    1
  • 1 Technical data
    1
  • 1.1 Engine number
    1
  • 1.2 Engine data
    1
  • Removing and installing engine
    3
  • 1 Removing and installing engine
    3
  • 1.1 Removing engine
    3
  • 1.2 Removing engine from scissor-type assembly platform VAS 6131
    12
  • 1.3 Securing engine on engine and gearbox support VAS 6095
    13
  • 1.4 Notes on installing
    14
  • Crankshaft group
    16
  • 1 Dismantling and assembling engine
    16
  • 1.1 Assembly overview - components in the V space
    16
  • 1.2 Assembly overview - gear train assembly
    18
  • 1.3 Removing and installing gear train assembly
    19
  • 1.4 Removing and installing engine mounting and engine support (left and right)
    22
  • 1.5 Removing and installing drive plate
    23
  • 2 Balancer shaft
    25
  • 2.1 Assembly overview - balancer shaft
    25
  • 3 Crankshaft
    26
  • 3.1 Assembly overview - crankshaft
    26
  • 3.2 Removing and installing bearing saddle for crankshaft
    27
  • 3.3 Crankshaft dimensions
    29
  • 4 Sealing flange, seals and vibration damper
    30
  • 4.1 Assembly overview - front sealing flange and vibration damper
    30
  • 4.2 Renewing crankshaft oil seal, vibration damper end
    31
  • 4.3 Renewing crankshaft oil seal - engine timing end
    32
  • 4.4 Renewing alternator shaft oil seal
    34
  • 5 Timing housing
    37
  • 5.1 Assembly overview - timing housing
    37
  • 6 Pistons and conrods
    39
  • 6.1 Assembly overview - pistons and conrods
    39
  • 6.2 Checking piston projection at TDC
    40
  • 6.3 Piston and cylinder dimensions
    40
  • 6.4 Piston rings, cylinder bore and piston installation position
    41
  • Cylinder head, valve gear
    43
  • 1 Cylinder head
    43
  • 1.1 Assembly overview - cylinder head
    43
  • 1.2 Removing and installing camshaft compensating gear and drive gear wheel
    45
  • 1.3 Checking valve timing
    49
  • 1.4 Adjusting valve timing
    51
  • 1.5 Removing and installing cylinder heads
    53
  • 1.6 Checking compression
    55
  • 2 Valve gear
    58
  • 2.1 Assembly overview - valve gear
    58
  • 2.2 Reworking valve seats
    61
  • 2.3 Checking valve guides
    62
  • 2.4 Renewing valve stem seals
    63
  • 2.5 Removing and installing camshaft
    65
  • Lubrication
    67
  • 1 Engine oil
    67
  • 1.1 Oil capacities
    67
  • 1.2 Checking engine oil level
    67
  • 2 Oil sump
    68
  • 2.1 Assembly overview - sump
    68
  • 2.2 Applying sealant
    71
  • 3 Oil pump, oil filter housing and oil pressure
    72
  • 3.1 Assembly overview - oil pump
    72
  • 3.2 Assembly overview - oil filter housing
    74
  • 3.3 Removing and installing oil filter housing
    75
  • 3.4 Checking oil pressure and oil pressure switch
    75
  • 3.5 Checking oil pressure at front of engine
    77
  • Cooling
    79
  • 1 Parts of cooling system
    79
  • 1.1 Assembly overview - radiator
    80
  • 1.2 Assembly overview - fans
    81
  • 1.3 Parts of cooling system - body side
    82
  • 1.4 Parts of cooling system - engine side and at top
    83
  • 1.5 Parts of alternator and fuel cooling system
    84
  • 1.6 Fitting location of continued coolant circulation pump and fuel cooling pump
    85
  • 1.7 Assembly overview - thermostat housing
    85
  • 1.8 Assembly overview - coolant pump
    87
  • 1.9 Coolant hose schematic diagram
    88
  • 1.10 Draining and filling coolant
    89
  • 1.11 Removing and installing fan support
    92
  • 1.12 Removing and installing radiator
    92
  • 1.13 Removing and installing coolant connection
    93
  • 1.14 Removing and installing coolant pump
    94
  • Fuel supply system
    97
  • 1 Parts of fuel supply system
    97
  • 1.1 Safety precautions when working on fuel supply system
    98
  • 1.2 Rules for cleanliness
    98
  • 1.3 Assembly overview - fuel tank with attachments
    99
  • 1.4 Assembly overview - fuel filter
    101
  • 1.5 Schematic diagram of fuel lines and components in fuel tank
    103
  • 1.6 Schematic diagram of fuel hoses in engine compartment
    104
  • 1.7 Emptying fuel tank
    105
  • 1.9 Removing and installing fuel tank with attached components
    109
  • 1.10 Checking fuel pumps
    113
  • 1.11 Checking tandem pump and fuel pump
    114
  • 1.12 Removing and installing tandem pump and fuel pump
    116
  • 1.13 Assembly overview - accelerator mechanism
    118
  • 2 Additive tank
    120
  • 2.1 Safety precautions when working on additive tank
    120
  • 2.2 Assembly overview - additive tank
    120
  • 2.3 Removing and installing additive tank
    122
  • Turbocharging/supercharging
    125
  • 1 Charge air system with turbocharger
    125
  • 1.1 Safety precautions
    125
  • 1.2 Rules for cleanliness
    125
  • 1.3 Installing hose connections with connector couplings
    126
  • 1.4 Assembly overview - turbocharger
    127
  • 1.5 Assembly overview - parts of charge air cooling
    129
  • 1.6 Checking charge air system for leaks
    130
  • Mixture preparation - injection
    132
  • 1 Repairing diesel direct injection system
    132
  • 1.1 Safety precautions
    132
  • 1.2 Rules for cleanliness
    133
  • 1.3 Removing and installing intake manifold
    133
  • 1.4 Assembly overview - intake connecting pipe
    134
  • 1.5 Assembly overview - air filter
    136
  • 1.6 Assembly overview - unit injector
    138
  • 1.7 Removing and installing unit injector
    139
  • 1.8 Checking and adjusting position of pump plungers in unit injectors
    141
  • 1.9 Renewing O-rings for unit injectors
    143
  • 2 Engine control units
    145
  • 2.1 Reading and clearing fault memory of engine control units
    145
  • 2.2 Adapting functions and components
    146
  • 2.3 Removing and installing engine control units
    147
  • Exhaust system
    148
  • 1 Removing and installing parts of exhaust system
    148
  • 1.1 Assembly overview - exhaust manifold
    149
  • 1.3 Assembly overview - silencers with mountings
    152
  • 2 Exhaust gas recirculation system
    154
  • 2.1 Safety precautions
    154
  • 2.2 Rules for cleanliness
    154
  • 2.3 Assembly overview - exhaust gas recirculation
    155
  • 2.4 Assembly overview - bypass flap with exhaust gas recirculation cooler
    156
  • 2.5 Removing and installing bypass flap with exhaust gas recirculation cooler
    158
  • 2.6 Vacuum hose schematic diagram
    160
  • Glow plug system
    162
  • 1 Glow plugs
    162
  • 1.1 Removing, installing and checking glow plugs
    162
Hersteller­bezeichnung 10-cylinder diesel engine Volkswagen R GmbH
Hersteller Volkswagen
Passend für Touareg (2003 - 2007)
Passende Autotypen 7L
Motor­kennbuchstaben CBWA
Kategorie Reparaturanleitung

Im Moment sind noch keine Bewertungen für dieses Produkt vorhanden.

Ähnliche Reparaturanleitungen

6-cylinder injection engine

Beispielseite für Reparaturanleitung 6-cylinder injection engine

Für Touareg (2003 - 2007)

16,26 € Details

8-cylinder injection engine

Beispielseite für Reparaturanleitung 8-cylinder injection engine

Für Touareg (2003 - 2007)

14,51 € Details

Supplementary heating

Beispielseite für Reparaturanleitung Supplementary heating

Für Touareg (2003 - 2007)

5,26 € Details

Maintenance

Beispielseite für Reparaturanleitung Maintenance

Für Touareg (2003 - 2007)

14,43 € Details

Brake systems

Beispielseite für Reparaturanleitung Brake systems

Für Touareg (2003 - 2007)

13,34 € Details

General body repairs, exterior

Beispielseite für Reparaturanleitung General body repairs, exterior

Für Touareg (2003 - 2007)

27,39 € Details

10-cylinder diesel engine

Beispielseite für Reparaturanleitung 10-cylinder diesel engine

Für Touareg (2003 - 2007)

16,77 € Details

Running gear, axles, steering

Beispielseite für Reparaturanleitung Running gear, axles, steering

Für Touareg (2003 - 2007)

25,64 € Details

Transfer box and final drive

Beispielseite für Reparaturanleitung Transfer box and final drive

Für Touareg (2003 - 2007)

12,69 € Details

12-cylinder injection engine

Beispielseite für Reparaturanleitung 12-cylinder injection engine

Für Touareg (2003 - 2007)

15,75 € Details

Unsere Best Seller

Schon gewusst? Wir bieten auch originale Autoteile an.

Autoteil 1Y0035411M Tieftoener

1Y0035411M

Tieftoener

55,49 €

Details
Autoteil 7N0122101P Schlauch

7N0122101P

Schlauch

79,92 €

Details
Autoteil 8S0827990 Adapter

8S0827990

Adapter

67,54 €

Details
Autoteil 059121113N Kuehlregle

059121113N

Kuehlregle

61,17 €

Details
Autoteil 06D103469N Zyl.Kopfha

06D103469N

Zyl.Kopfha

257,96 €

Details

4-Zyl.-Dieselmotor (1,5- und 1,6 l-Motor) 068.2 / 068.5 / 068.A / ADK

Beispielseite für Reparaturanleitung 4-Zyl.-Dieselmotor (1,5- und 1,6 l-Motor) 068.2 / 068.5 / 068.A / ADK

Für Industriemotoren - Industrial Engines ()

8,15 € Details

Nr. 547: Der 2,0l-176kW-TDI-Biturbo-Motor der Dieselmotoren-Baureihe EA288

Beispielseite für Reparaturanleitung Nr. 547: Der 2,0l-176kW-TDI-Biturbo-Motor der Dieselmotoren-Baureihe EA288

5,89 € Details

1AV Einspritz- und Zündanlage

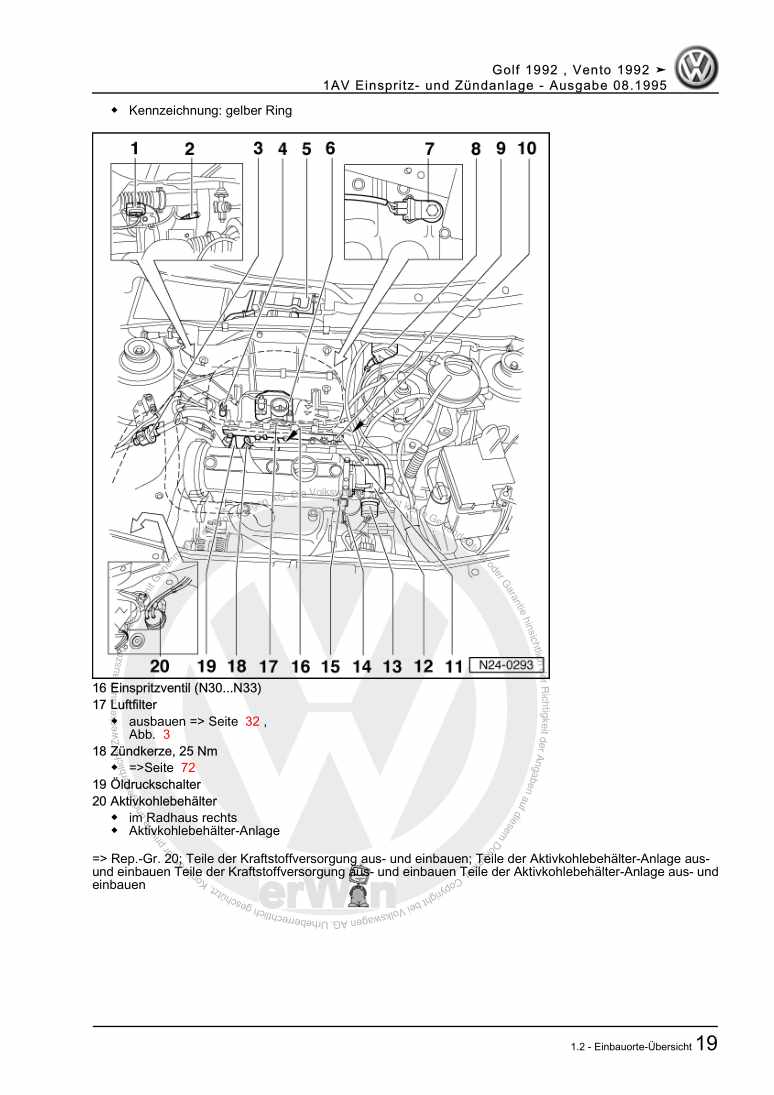
Beispielseite für Reparaturanleitung 1AV Einspritz- und Zündanlage

Für Golf / Golf Variant / Vento (1992 - 1999)

8,28 € Details

image/svg+xml Über Clonck

Originale Reparaturanleitungen und Ersatzteile

Unsere Reparaturanleitungen sind Originale, kommen direkt von Volkswagen und erfüllen die höchsten Qualitätsstandards.

In unserem Originalteile-Shop verkaufen wir hochwertige Originalersatzteile der Fahrzeughersteller. Mithilfe der Suche gibst du die gewünschte Teilenummer (OE-Nummer) ein und bestellst schnell und einfach das benötigte Ersatzteil.

Höchste Qualitätsstandards

Bei Clonck wollen wir Autoschrauber und Kfz-Profis glücklich machen. Aus diesem Grund findest du bei Clonck ausschließlich professionelle und hochwertige Reparaturanleitungen, mit deren Hilfe du dein Fahrzeug fachgerecht reparieren kannst.

Unsere Partner

Autohaus Schmidt GmbH
Automag GmbH Filiale Laim
KFZ-VERLAG GmbH
Zimpel und Franke GmbH

Clonck: Der Autoreparatur-Shop - gibt's auch als App!

Clonck App Logo Play Store

Clonck: Passende Autoteile für deine Autoreparatur

4,5 90

Mit Clonck bestellst du die richtigen Originalersatzteile im Handumdrehen.

  • Fahrzeugmodell hinzufügen
  • Baugruppe auswählen
  • Fahrzeug-Identifizierungsnummer (FIN) eingeben
  • Über 5.000 originale Reparaturanleitungen einsehen
Jetzt App starten
Clonck App Preview Auto Mobiltelefon Autoteile