

DER AUTOREPARATUR-SHOP
0
Home » Anleitungen » 4-cylinder common rail engine (2.0 l, EA189)
  • Beispielseite für Reparaturanleitung 4-cylinder common rail engine (2.0 l, EA189)
  • Beispielseite für Reparaturanleitung 2 4-cylinder common rail engine (2.0 l, EA189)
  • Beispielseite für Reparaturanleitung 3 4-cylinder common rail engine (2.0 l, EA189)
  • Beispielseite für Reparaturanleitung 4-cylinder common rail engine (2.0 l, EA189)
  • Beispielseite für Reparaturanleitung 2 4-cylinder common rail engine (2.0 l, EA189)
  • Beispielseite für Reparaturanleitung 3 4-cylinder common rail engine (2.0 l, EA189)

4-cylinder common rail engine (2.0 l, EA189)

Für Passat / Passat Variant / EOS / Tiguan / Passat CC / Scirocco / Golf / Golf Plus

Original VW-Reparaturanleitung


29,70 €inkl. 7% MwSt.

  • Deutsch
  • English

Sofort als Download verfügbar

Sprache: English

Digitale PDF Version

16.043 KB

393 Seiten

Detaillierte technische Daten

Sofort lesbar

Diese Reparaturanleitung umfasst: Removing and installing engine, Assembly mountings, Engine cover panel, Cylinder block (pulley end), Crankshaft, Pistons and conrods, Toothed belt drive, Valve gear, Sump, oil pump, Oil filter, oil pressure switch, Cooling system/coolant, Radiator, radiator fan, Exhaust turbocharger, Injectors/high-pressure accumulator (rail), Intake manifold, Lambda probe und SCR system (selective catalytic reduction). Mehr anzeigen
Sichere Zahlung per PayPal, Kreditkarte, Lastschrift, Sofort-Überweisung oder Giropay
PayPal Logo SEPA Lastschrift Logo Giropay Logo Sofort Überweisung Logo

Reparaturanleitung 4-cylinder common rail engine pdf Download mit dem Inhalt:

Kapitelübersicht

  • Technical data
    1
  • 1 Identification
    1
  • 1.1 Engine number/engine data
    1
  • 2 Safety information
    3
  • 2.1 Safety precautions when working on fuel system
    3
  • 2.3 Safety measures when working on vehicles with a start/stop system
    4
  • 2.4 Safety precautions when working on the cooling system
    4
  • 2.5 Safety precautions when working on the SCR system
    5
  • 2.6 Safety precautions when working on exhaust system
    5
  • 3 Repair notes
    7
  • 3.1 Rules for cleanliness
    7
  • 3.2 Foreign objects in engine
    7
  • 3.3 Checking vacuum system
    8
  • Removing and installing engine
    9
  • 1 Removing and installing engine
    9
  • 1.1 Removing and installing engine
    9
  • 1.2 Securing engine on engine and gearbox support
    22
  • 1.3 Installing engine
    23
  • 2 Assembly mountings
    27
  • 2.1 Assembly overview - assembly mountings
    27
  • 2.2 Supporting engine in installation position
    28
  • 2.3 Adjusting assembly mountings
    36
  • 3 Engine cover panel
    41
  • 3.1 Removing and installing engine cover
    41
  • Crankshaft group
    42
  • 1 Cylinder block (pulley end)
    42
  • 1.1 Assembly overview - poly V-belt drive
    42
  • 1.2 Removing and installing poly-V belt
    46
  • 1.3 Removing and installing tensioner for poly V-belt
    50
  • 1.4 Removing and installing bracket for ancillaries
    51
  • 1.5 Removing and installing engine bracket
    53
  • 1.6 Assembly overview - cylinder block (pulley end)
    63
  • 1.7 Removing and installing sealing flange on pulley end
    64
  • 1.8 Renewing crankshaft oil seal - belt pulley end
    66
  • 2 Cylinder block, gearbox end
    69
  • 2.1 Assembly overview - cylinder block, gearbox end
    69
  • 2.2 Removing and installing sealing flange on gearbox side
    70
  • 3 Crankshaft
    79
  • 3.1 Assembly overview - crankshaft
    79
  • 3.2 Renewing needle bearing in crankshaft
    79
  • 3.3 Crankshaft dimensions
    82
  • 4 Pistons and conrods
    83
  • 4.1 Assembly overview - pistons and conrods
    83
  • 4.2 Measuring piston projection at TDC
    86
  • 4.3 Separating new conrod
    87
  • Cylinder head, valve gear
    89
  • 1 Cylinder head
    89
  • 1.1 Assembly overview - cylinder head
    89
  • 1.2 Removing and installing cylinder head
    91
  • 1.3 Assembly overview - cylinder head cover
    100
  • 1.4 Removing and installing cylinder head cover
    101
  • 1.5 Removing and installing vacuum pump
    104
  • 1.6 Checking compression
    105
  • 2 Toothed belt drive
    107
  • 2.1 Assembly overview - toothed belt
    107
  • 2.2 Removing and installing toothed belt
    109
  • 3 Valve gear
    116
  • 3.1 Assembly overview - valve gear
    116
  • 3.2 Removing and installing camshaft oil seal
    117
  • 3.3 Removing and installing camshaft
    121
  • 3.4 Removing and installing valve stem seals
    128
  • 4 Inlet and exhaust valves
    133
  • 4.1 Valve dimensions
    133
  • 4.2 Reworking valve seats
    133
  • 4.3 Checking valve guides
    133
  • Lubrication
    134
  • 1 Sump, oil pump
    134
  • 1.1 Assembly overview - sump/oil pump
    134
  • 1.2 Removing and installing oil sump
    140
  • 1.3 Removing and installing oil pump
    143
  • 1.4 Engine oil:
    144
  • 2 Engine oil cooler
    146
  • 2.1 Assembly overview - engine oil cooler
    146
  • 3 Oil filter, oil pressure switch
    148
  • 3.1 Assembly overview - oil filter/oil pressure switch
    148
  • 3.2 Removing and installing oil filter housing
    149
  • 3.3 Checking oil pressure and oil pressure switch
    152
  • 4 Oil circuit
    154
  • 4.1 Removing and installing oil supply line for turbocharger
    154
  • 5 Balancer shaft module
    156
  • 5.1 Assembly overview - balancer shaft module
    156
  • 5.2 Removing and installing balance shaft module
    159
  • Cooling
    170
  • 1 Cooling system/coolant
    170
  • 1.1 Coolant hose connection diagram
    170
  • 1.2 Checking cooling system for leaks
    174
  • 1.3 Draining and adding coolant
    178
  • 1.4 Assembly overview - engine preheater
    182
  • 2 Coolant pump, regulation of cooling system
    186
  • 2.1 Removing and installing coolant pump
    186
  • 2.2 Removing and installing thermostat
    187
  • 2.3 Removing and installing 4/2-way valve with thermostat
    189
  • 3 Coolant pipes
    191
  • 3.1 Assembly overview - coolant pipes
    191
  • 4 Radiator, radiator fan
    195
  • 4.1 Assembly overview - radiator/radiator fan
    195
  • 4.2 Removing and installing radiator
    198
  • 4.3 Removing and installing radiator cowl with radiator fan
    199
  • Turbocharging/supercharging
    200
  • 1 Exhaust turbocharger
    200
  • 1.1 Assembly overview - turbocharger
    200
  • 1.2 Removing and installing turbocharger
    206
  • 1.3 Renewing vacuum unit for turbocharger
    210
  • 2 Charge air system
    218
  • 2.1 Assembly overview - charge air system
    218
  • 2.2 Assembly overview - charge-air hose connections
    220
  • 2.3 Checking charge air system for leaks
    221
  • Mixture preparation - injection
    224
  • 1 Injection system
    224
  • 1.1 Schematic overview - fuel system
    224
  • 1.2 Assembly overview - fuel system
    226
  • 1.3 Filling/bleeding fuel system
    229
  • 1.4 Checking fuel system for leaks
    230
  • 2 Injectors/high-pressure accumulator (rail)
    231
  • 2.1 Check pressure retention valve in fuel return line
    231
  • 2.2 Removing and installing injectors
    232
  • 2.3 Removing and installing high-pressure lines
    236
  • 2.4 Removing and installing fuel rail
    238
  • 3 Vacuum system
    242
  • 3.1 Assembly overview - vacuum system
    242
  • 3.2 Checking vacuum system
    243
  • 4 Air filter
    247
  • 4.1 Assembly overview - air filter housing
    247
  • 4.2 Removing and installing air filter housing
    249
  • 4.3 Checking changeover flap for intake air preheating
    250
  • 4.4 Removing and installing changeover flap for intake air preheating
    251
  • 5 Intake manifold
    254
  • 5.1 Assembly overview - intake manifold
    254
  • 5.2 Removing and installing intake manifold
    254
  • 6 Senders and sensors
    258
  • 6.1 Checking fuel pressure regulating valve
    258
  • 6.2 Removing and installing fuel pressure regulating valve N276
    259
  • 6.3 Removing and installing fuel pressure sender
    261
  • 7 High-pressure pump
    265
  • 7.1 Removing and installing high-pressure pump
    265
  • 8 Engine (motor) control unit
    269
  • 8.1 Removing and installing engine control unit
    269
  • 9 Lambda probe
    287
  • 9.1 Removing and installing lambda probe
    287
  • Exhaust system
    291
  • 1 Exhaust pipes and silencers
    291
  • 1.1 Assembly overview - silencers
    291
  • 1.2 Separating exhaust pipes from silencers
    299
  • 1.3 Aligning exhaust system free of stress
    301
  • 1.4 Check exhaust system for leaks
    303
  • 1.5 Installation position of clamp
    304
  • 2 Exhaust gas cleaning
    306
  • 2.1 Assembly overview - emission control
    306
  • 2.2 Removing and installing particulate filter
    316
  • 2.3 Removing and installing particulate filter with NOx storage catalytic converter
    324
  • 2.4 Removing and installing NOx storage catalytic converter
    332
  • 3 SCR system (selective catalytic reduction)
    334
  • 3.1 Assembly overview - tank for reducing agent
    334
  • 3.2 Draining reducing agent tank
    335
  • 3.3 Removing and installing reducing agent tank
    338
  • 3.4 Assembly overview - delivery module for reducing agent
    340
  • 3.5 Assembly overview - reducing agent delivery line
    342
  • 3.6 Removing and installing reducing agent supply line
    343
  • 3.7 Removing and installing injector for reducing agent
    345
  • 3.8 Removing and installing heater element (heater cup)
    346
  • 4 Exhaust gas recirculation
    351
  • 4.1 Assembly overview - exhaust gas recirculation
    351
  • 4.2 Removing and installing exhaust gas recirculation filter
    354
  • 4.3 Removing and installing exhaust gas recirculation cooler
    356
  • 4.4 Checking exhaust gas recirculation cooler for leaks
    360
  • 4.5 Removing and installing temperature sensor for exhaust gas recirculation
    363
  • 4.6 Cleaning exhaust gas recirculation system
    367
  • Glow plug system
    374
  • 1 Glow plug system
    374
  • 1.1 Removing and installing automatic glow period control unit J179
    374
  • 1.2 Removing and installing glow plug
    375
  • 1.3 Removing and installing Hall sender
    382
  • 1.4 Removing and installing engine speed sender
    386
Hersteller­bezeichnung 4-cylinder common rail engine (2.0 l, EA189)
Hersteller Volkswagen
Passend für Passat / Passat Variant (2005 - 2008) / EOS (2006) / Tiguan (2008) / Passat CC (2009) / Scirocco (2008) / Golf (2009) / Golf Plus (2009)
Passende Autotypen 3C, 5N, 357, 137, 5K1, 521
Motor­kennbuchstaben CBBB, CBBA, CBAB, CBDB, CBDC, CBDA, CBAC, CJAA
Kategorie Reparaturanleitung

Im Moment sind noch keine Bewertungen für dieses Produkt vorhanden.

Ähnliche Reparaturanleitungen

4-cylinder diesel engine (2.0 l engine, 4 valve)

Beispielseite für Reparaturanleitung 4-cylinder diesel engine (2.0 l engine, 4 valve)

Für Passat / Passat Variant (2005 - 2008)

16,99 € Details

Electrical system

Beispielseite für Reparaturanleitung Electrical system

Für Passat / Passat Variant (2005 - 2008)

33,72 € Details

6-speed manual gearbox 02S, four-wheel drive

Beispielseite für Reparaturanleitung 6-speed manual gearbox 02S, four-wheel drive

Für Golf (2004 - 2007) / Passat / Passat Variant (2005 - 2008)

21,14 € Details

General body repairs, exterior

Beispielseite für Reparaturanleitung General body repairs, exterior

Für Passat Variant (2006 - 2007) / Passat (2005 - 2008)

31,38 € Details

6-speed manual gearbox 0AJ

Beispielseite für Reparaturanleitung 6-speed manual gearbox 0AJ

Für Golf (2004 - 2007) / Touran (2003 - 2011) / Passat / Passat Variant (2005 - 2008) / Golf Plus (2005 - 2007) / EOS (2006) / Scirocco (2008) / Golf (2009) / Golf Plus (2009) / Passat/Passat Variant (2011 >) / Passat/Passat Variant (2011 >)

29,58 € Details

Wheels and Tyres Guide

Beispielseite für Reparaturanleitung Wheels and Tyres Guide

Für New Beetle Cabrio (2003 - 2010) / New Beetle / New Beetle (USA) (1998 - 2007) / Golf Plus (2005 - 2007) / Golf (2004 - 2007) / Polo (2002 - 2005) / Polo Variant (1997 - 2002) / Polo Classic (1996 - 2002) / Lupo 3L (1999 - 2006) / Lupo (1998 - 2006) / Vento (1992 - 1998) / Golf (1992 - 1998) / Golf (1998 - 2004) / Golf Cabriolet (1994 - 2002) / Touran (2003 - 2011) / Polo (1995 - 2000) / Passat (1994 - 1997) / Golf Variant (1999 - 2006) / Passat Variant (2006 - 2007) / Phaeton (2001 - 2007) / Touareg (2003 - 2010) / Passat (2005 - 2008) / Passat (1997 - 2001) / Golf Cabrio (1997 - 2002) / Bora (1999 - 2005) / Bora Variant (1999 - 2006) / New Beetle RSI (2001) / Golf Variant (1994 - 1999) / Sharan (1995 - 2001)

35,57 € Details

4-cylinder diesel engine (2.0 l engine, 2 valve)

Beispielseite für Reparaturanleitung 4-cylinder diesel engine (2.0 l engine, 2 valve)

Für Passat / Passat Variant (2005 - 2008)

17,64 € Details

Running gear, axles, steering

Beispielseite für Reparaturanleitung Running gear, axles, steering

Für Passat / Passat Variant (2005 - 2008)

34,55 € Details

Fuel supply system - Diesel engines

Beispielseite für Reparaturanleitung Fuel supply system - Diesel engines

Für Passat Variant (2006 - 2007) / Passat (2005 - 2008) / Passat/Passat Variant (2011 >) / Passat/Passat Variant (2011 >)

7,63 € Details

4-cylinder injection engine (2.0 l direct injection)

Beispielseite für Reparaturanleitung 4-cylinder injection engine (2.0 l direct injection)

Für Passat / Passat Variant (2005 - 2008) / EOS (2006)

25,18 € Details

Unsere Best Seller

Schon gewusst? Wir bieten auch originale Autoteile an.

Autoteil 5GM819728DDAR Ausstroem.

5GM819728DDAR

Ausstroem.

190,89 €

Details
Autoteil 3G9877439 Dichtung

3G9877439

Dichtung

114,06 €

Details
Autoteil 3AB971557D Leitg.Satz

3AB971557D

Leitg.Satz

17,43 €

Details
Autoteil 82A807682F9B9 Gitter

82A807682F9B9

Gitter

34,10 €

Details
Autoteil 2Q0129509A Luftfuehrg

2Q0129509A

Luftfuehrg

36,32 €

Details

4-Zylinder-Dieselmotor (1,9 l-Motor) 028.B / ADE / ADG
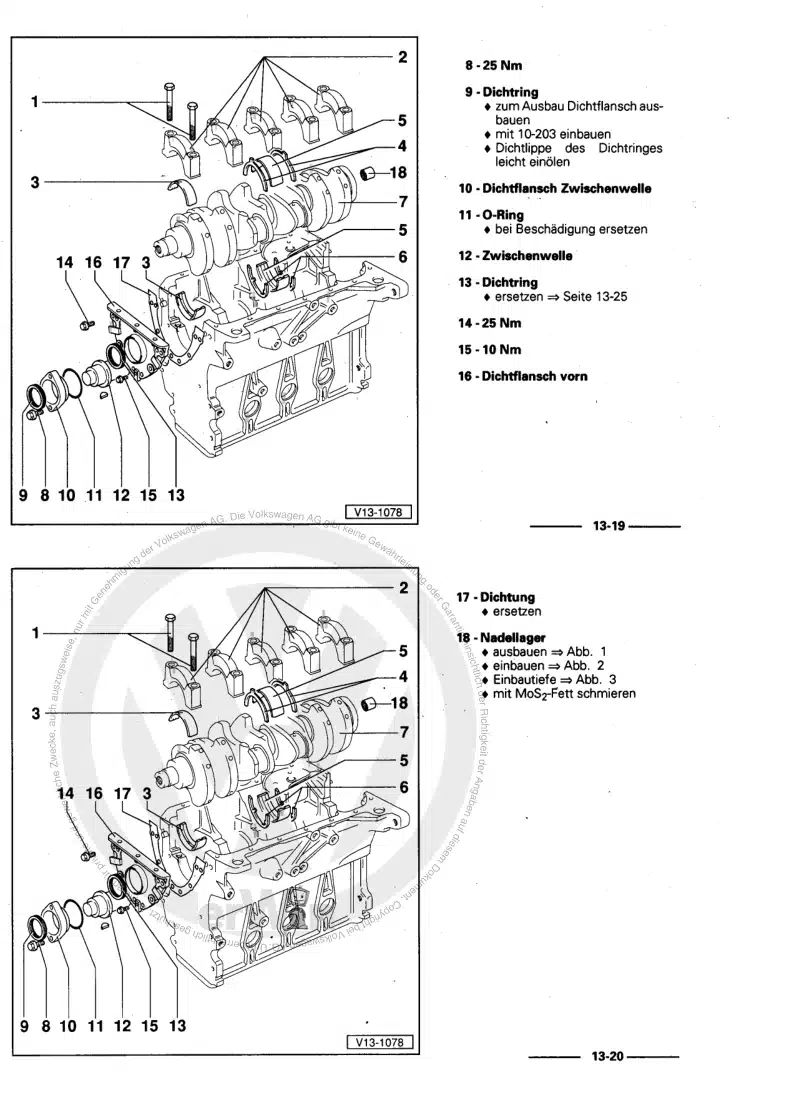
Beispielseite für Reparaturanleitung 4-Zylinder-Dieselmotor (1,9 l-Motor) 028.B / ADE / ADG

Für Industriemotoren - Industrial Engines ()

7,57 € Details

Nr. 528: Der Erdgasantrieb im Golf/Golf Variant TGI BlueMotion
Beispielseite für Reparaturanleitung Nr. 528: Der Erdgasantrieb im Golf/Golf Variant TGI BlueMotion

5,26 € Details

Kardanwelle und Achsantrieb hinten

Beispielseite für Reparaturanleitung Kardanwelle und Achsantrieb hinten

Für Passat / Passat Variant (2005 - 2008) / Golf (2004 - 2007) / Tiguan (2008) / Passat CC (2009) / Golf (2009) / Sharan (2011)

20,15 € Details

image/svg+xml Über Clonck

Originale Reparaturanleitungen und Ersatzteile

Unsere Reparaturanleitungen sind Originale, kommen direkt von Volkswagen und erfüllen die höchsten Qualitätsstandards.

In unserem Originalteile-Shop verkaufen wir hochwertige Originalersatzteile der Fahrzeughersteller. Mithilfe der Suche gibst du die gewünschte Teilenummer (OE-Nummer) ein und bestellst schnell und einfach das benötigte Ersatzteil.

Höchste Qualitätsstandards

Bei Clonck wollen wir Autoschrauber und Kfz-Profis glücklich machen. Aus diesem Grund findest du bei Clonck ausschließlich professionelle und hochwertige Reparaturanleitungen, mit deren Hilfe du dein Fahrzeug fachgerecht reparieren kannst.

Unsere Partner

Autohaus Schmidt GmbH
Automag GmbH Filiale Laim
KFZ-VERLAG GmbH
Zimpel und Franke GmbH

Clonck: Der Autoreparatur-Shop - gibt's auch als App!

Clonck App Logo Play Store

Clonck: Passende Autoteile für deine Autoreparatur

4,5 90

Mit Clonck bestellst du die richtigen Originalersatzteile im Handumdrehen.

  • Fahrzeugmodell hinzufügen
  • Baugruppe auswählen
  • Fahrzeug-Identifizierungsnummer (FIN) eingeben
  • Über 5.000 originale Reparaturanleitungen einsehen
Jetzt App starten
Clonck App Preview Auto Mobiltelefon Autoteile




