DER AUTOREPARATUR-SHOP
0
Home » Anleitungen » Running gear, axles, steering
  • Beispielseite für Reparaturanleitung Running gear, axles, steering
  • Beispielseite für Reparaturanleitung 2 Running gear, axles, steering
  • Beispielseite für Reparaturanleitung 3 Running gear, axles, steering
  • Beispielseite für Reparaturanleitung Running gear, axles, steering
  • Beispielseite für Reparaturanleitung 2 Running gear, axles, steering
  • Beispielseite für Reparaturanleitung 3 Running gear, axles, steering

Running gear, axles, steering

Für Sharan

Original VW-Reparaturanleitung


31,85 €inkl. 7% MwSt.

Sofort als Download verfügbar

Sprache: English

Digitale PDF Version

19.085 KB

429 Seiten

Detaillierte technische Daten

Sofort lesbar

Diese Reparaturanleitung umfasst: Evaluating accident vehicles, Raising wheel suspension to unladen position, Overview - front axle, Assembly overview: wheel bearing, Removing and installing drive shafts, Components of adaptive chassis control DCC and fitting locations, Specified torque for fitting wheels, Self-sealing tyres “ContiSeal”, Tyre pressure monitor display, Protecting wheel centring seat against corrosion, Front camera for driver assist systems R242 und General repair instructions. Mehr anzeigen
Sichere Zahlung per PayPal, Kreditkarte, Lastschrift, Sofort-Überweisung oder Giropay
PayPal Logo SEPA Lastschrift Logo Giropay Logo Sofort Überweisung Logo

Reparaturanleitung Sharan Running gear, axles, steering pdf Download mit dem Inhalt:

Kapitelübersicht

  • Technical data
    1
  • 1 Checklist for evaluating running gear of accident vehicles
    1
  • 2 General information
    3
  • Front suspension
    4
  • 1 Evaluating accident vehicles
    4
  • 2 Raising wheel suspension to unladen position
    5
  • 3 Overview - front axle
    7
  • 4 Assembly overview: subframe
    9
  • 4.1 Assembly overview: front left vehicle level sender G78
    11
  • 4.2 Removing and installing front left vehicle level sender G78
    12
  • 4.3 Repairing thread in longitudinal member
    13
  • 4.4 Fixing position of subframe
    13
  • 4.5 Lowering subframe
    15
  • 4.6 Removing and installing subframe without steering rack
    19
  • 4.7 Removing and installing subframe with steering rack
    24
  • 4.8 Repairing subframe
    30
  • 5 Assembly overview: front wheel suspension, suspension link
    42
  • 5.1 Checking swivel joint
    43
  • 5.2 Removing and installing swivel joint
    44
  • 5.3 Removing and installing suspension link with mounting bracket
    47
  • 5.5 Renewing bonded rubber bush for suspension link
    56
  • 5.6 Renewing mounting bracket with suspension link bush
    58
  • 6 Assembly overview: wheel bearing
    61
  • 6.1 Removing and installing wheel bearing unit
    63
  • 6.2 Removing and installing wheel bearing housing
    65
  • 7 Assembly overview: anti-roll bar
    70
  • 7.1 Removing and installing anti-roll bar
    70
  • 8 Assembly overview: suspension strut
    76
  • 8.1 Removing and installing suspension strut
    77
  • 8.2 Repairing suspension strut
    84
  • 9 Removing and installing drive shafts
    87
  • 9.1 Loosening and tightening twelve-point head bolt, with ribbing, securing drive shaft
    87
  • 9.3 Removing and installing drive shaft with constant velocity joint
    90
  • 9.5 Removing and installing right drive shaft with (push-on) constant velocity slip joint
    99
  • 9.6 Removing and installing drive shafts with triple roller joint AAR3300i
    105
  • 10 Repairing drive shaft - overview of drive shafts
    110
  • 10.1 Heat shield for drive shafts
    111
  • 11 Assembly overview: drive shaft with VL107 constant velocity joint
    112
  • 11.1 Dismantling and assembling drive shaft with VL107 constant velocity joint
    114
  • 11.2 Checking outer constant velocity joint
    118
  • 11.3 Checking inner constant velocity joint
    119
  • 12 Assembly overview: drive shaft with VL107 constant velocity slip joint
    121
  • 12.2 Checking outer constant velocity joint
    126
  • 13 Assembly overview: drive shaft with triple roller joint AAR3300i
    128
  • 13.1 Dismantling and assembling drive shaft with triple roller joint AAR3300i
    130
  • Rear suspension
    136
  • 1 Evaluating accident vehicles
    136
  • 2 Rear axle in unladen position
    137
  • 3 Overview - rear axle
    140
  • 4 Assembly overview: subframe (front-wheel drive)
    142
  • 4.1 Fixing position of subframe
    142
  • 4.2 Lowering rear axle
    143
  • 4.3 Removing and installing rear axle
    145
  • 4.4 Repairing subframe
    148
  • 5 Assembly overview: transverse link, track rod (front-wheel drive)
    157
  • 5.1 Assembly overview: rear left vehicle level sender G76 , front-wheel drive
    159
  • 5.2 Removing and installing rear left vehicle level sender G76
    159
  • 5.3 Removing and installing upper transverse link
    160
  • 5.4 Removing and installing lower transverse link
    162
  • 5.5 Removing and installing track rod
    164
  • 6 Assembly overview: wheel bearing housing, trailing arm (front-wheel drive)
    167
  • 6.1 Removing and installing wheel bearing housing
    168
  • 6.2 Renewing bonded rubber bush for wheel bearing housing
    171
  • 6.3 Removing and installing wheel bearing unit
    174
  • 6.4 Removing and installing trailing arm with mounting bracket
    177
  • 6.5 Repairing trailing arm
    181
  • 7 Assembly overview: shock absorber, coil spring (front-wheel drive)
    184
  • 7.1 Converting to Nivomat
    185
  • 7.2 Removing and installing coil spring
    185
  • 7.3 Removing and installing shock absorbers
    187
  • 7.4 Repairing shock absorber
    189
  • 8 Assembly overview: anti-roll bar (front-wheel drive)
    191
  • 8.1 Removing and installing anti-roll bar
    191
  • 9 Rear axle in unladen position (four-wheel drive)
    194
  • 10 Overview of rear axle (four-wheel drive)
    196
  • 11 Assembly overview: subframe, final drive (four-wheel drive)
    198
  • 11.1 Fixing position of subframe
    198
  • 11.2 Lowering rear axle
    199
  • 11.3 Removing and installing rear axle
    202
  • 11.4 Repairing subframe
    207
  • 12 Assembly overview: transverse link, track rod (four-wheel drive)
    216
  • 12.1 Assembly overview: rear left vehicle level sender G76
    219
  • 12.2 Removing and installing rear left vehicle level sender G76
    219
  • 12.3 Removing and installing upper transverse link
    220
  • 12.4 Removing and installing lower transverse link
    222
  • 12.5 Removing and installing track rod
    224
  • 13 Assembly overview: wheel bearing housing, trailing arm (four-wheel drive)
    228
  • 13.1 Removing and installing wheel bearing housing
    229
  • 13.2 Renewing bonded rubber bush for wheel bearing housing
    232
  • 13.3 Removing and installing wheel bearing unit
    235
  • 13.4 Removing and installing trailing arm with mounting bracket
    237
  • 13.5 Repairing trailing arm
    240
  • 14 Assembly overview: shock absorber, coil spring (four-wheel drive)
    244
  • 14.1 Converting to Nivomat
    245
  • 14.2 Removing and installing coil spring
    245
  • 14.3 Removing and installing shock absorbers
    247
  • 14.4 Repairing shock absorber
    249
  • 15 Assembly overview: anti-roll bar (four-wheel drive)
    251
  • 15.1 Removing and installing anti-roll bar
    251
  • 16 Assembly overview: drive shaft
    254
  • 16.1 Loosening and tightening twelve-point bolt for drive shaft connection
    255
  • 16.2 Removing and installing drive shaft
    256
  • 16.3 Dismantling and assembling drive shaft
    259
  • 16.4 Checking inner constant velocity joint
    263
  • Self-levelling suspension
    265
  • 1 Evaluating accident vehicles
    265
  • 2 Components of adaptive chassis control DCC and fitting locations
    266
  • 2.1 Shock absorber damping adjustment button E387
    267
  • 2.2 Removing and installing front left and right body acceleration senders G341/G342
    267
  • 2.3 Renewing bracket for front left/right body acceleration sender G341/G342
    268
  • 2.5 Removing and installing front left/right vehicle level sender G78/G289
    271
  • 2.6 Assembly overview: rear left vehicle level sender G76 for adaptive chassis control DCC
    272
  • 2.10 Removing and installing electronically controlled damping control unit J250
    276
  • 2.12 Basic setting of adaptive chassis control DCC
    278
  • 2.13 Cable routing left front axle
    278
  • 2.14 Cable routing right front axle
    279
  • 2.15 Cable routing rear axle
    280
  • 3 Assembly overview: suspension strut for adaptive chassis control DCC
    281
  • 3.1 Removing and installing suspension strut for adaptive chassis control DCC
    283
  • 4 Assembly overview: shock absorber for adaptive chassis control DCC
    292
  • 4.1 Removing and installing rear body acceleration sender G343
    293
  • 4.2 Removing and installing shock absorber for adaptive chassis control DCC
    294
  • 4.3 Repairing shock absorber for adaptive chassis control DCC
    296
  • 5 Assembly overview: shock absorber for adaptive chassis control DCC (four-wheel drive)
    299
  • 5.1 Removing and installing rear body acceleration sender G343 (four-wheel drive)
    300
  • Wheels, tyres, vehicle geometry
    306
  • 1 Evaluating accident vehicles
    306
  • 2 Specified torque for fitting wheels
    307
  • 3 Fitting wheel and tyre
    308
  • 3.1 General information
    308
  • 3.2 Fittings instructions
    308
  • 4 Self-sealing tyres “ContiSeal”
    310
  • 4.1 Explanation for mobility tyres
    310
  • 4.2 Handling mobility tyres
    311
  • 5 Tyre pressure monitor display
    312
  • 5.1 System fault in the ABS system
    312
  • 5.2 Performing basic setting
    313
  • 6 Vehicle alignment check
    314
  • 6.1 General information
    314
  • 6.2 Conditions for testing
    316
  • 6.3 Test preparations
    316
  • 6.4 Wheel alignment specifications
    317
  • 6.5 Overview - wheel alignment procedure
    319
  • 6.6 Correcting front axle camber
    320
  • 6.7 Adjusting camber on rear axle
    321
  • 6.8 Adjusting toe at rear axle
    323
  • 6.9 Adjusting front axle toe
    324
  • 6.10 Basic setting of steering angle sensor G85
    325
  • 6.11 Vehicle data sticker
    325
  • 7 Wheels, tyres
    326
  • 7.1 Models with breakdown set
    326
  • 7.2 Tyre sealant
    326
  • 7.3 Removing a tyre
    326
  • 7.4 Fitting a new tyre
    327
  • 7.5 Tyre sealant disposal
    327
  • 8 Instructions for changing or fitting wheels
    328
  • 8.1 Fitting wheels
    329
  • 9 Protecting wheel centring seat against corrosion
    330
  • 10 Vibration due to wheels/tyres - causes and rectification
    331
  • 10.1 Causes of rough running
    331
  • 10.2 Balancing wheels
    331
  • 10.3 Conducting a road test before balancing wheels
    331
  • 10.4 Balancing wheels on stationary wheel balancing machine
    332
  • 10.5 Vibration control system VAS 6230 A
    335
  • 10.6 Finish balancer
    335
  • 10.7 Radial and lateral runout of wheels and tyres
    336
  • 10.9 Checking radial and lateral run-out on wheel rim
    337
  • 10.10 Matching
    338
  • 10.11 Flat spots caused by storage or handling
    339
  • 11 Adaptive cruise control
    341
  • 11.1 Calibrating adaptive cruise control
    341
  • 12 Front camera for driver assist systems R242
    347
  • 12.1 Adjusting front camera for driver assistance system R242
    347
  • Steering
    355
  • 1 Evaluating accident vehicles
    355
  • 2 General repair instructions
    356
  • 2.1 Steering rack
    356
  • 2.2 Gaskets and seals
    356
  • 2.3 Nuts and bolts
    356
  • 2.4 Electrical components
    357
  • 2.5 Guided fault-finding, vehicle self-diagnosis and test instruments
    357
  • 3 Assembly overview - airbag and steering wheel
    358
  • 3.1 Removing and installing airbag and steering wheel
    358
  • 4 Assembly overview: steering column, left-hand drive
    361
  • 4.1 Removing and installing steering column, left-hand drive vehicle
    361
  • 4.2 Handling and transporting steering column
    370
  • 4.3 Checking steering column for damage
    371
  • 5 Assembly overview: steering column, right-hand drive
    372
  • 5.1 Removing and installing steering column, right-hand drive vehicle
    372
  • 5.2 Handling and transporting steering column
    380
  • 5.3 Checking steering column for damage
    381
  • 6 Electromechanical steering rack, LHD vehicle
    383
  • 6.1 Assembly overview - electromechanical steering rack for LHD vehicle
    383
  • 6.2 Removing and installing steering rack, left-hand drive vehicle
    384
  • 7 Electromechanical steering rack, RHD vehicle
    392
  • 7.1 Assembly overview - electromechanical steering rack for RHD vehicle
    392
  • 7.2 Removing and installing steering rack, right-hand drive vehicle
    393
  • 8 Repairing electromechanical steering rack, LHD vehicle
    401
  • 8.1 Assembly overview: electromechanical steering rack, LHD vehicle
    401
  • 8.2 Renewing bonded rubber bushes for power-assisted steering rack
    402
  • 8.3 Removing and installing track rod
    404
  • 8.4 Removing and installing track rod ball joint
    408
  • 8.5 Removing and installing boot
    409
  • 8.6 Checking play, security and boots of track rod ends
    412
  • 8.7 Allocation of track rod ball joints
    412
  • 9 Repairing electromechanical steering rack, RHD vehicle
    413
  • 9.1 Assembly overview: electromechanical steering rack, RHD vehicle
    413
  • 9.2 Removing and installing track rod
    414
  • 9.3 Removing and installing track rod ball joint
    417
  • 9.4 Removing and installing boot
    418
  • 9.5 Checking play, security and boots of track rod ends
    421
  • 9.6 Allocation of track rod ball joints
    421
Hersteller­bezeichnung Running gear, axles, steering
Hersteller Volkswagen
Passend für Sharan (2011) / Sharan (2016 > )
Passende Autotypen 7N1, 7N2
Kategorie Reparaturanleitung

Im Moment sind noch keine Bewertungen für dieses Produkt vorhanden.

Ähnliche Reparaturanleitungen

Propshaft and rear final drive
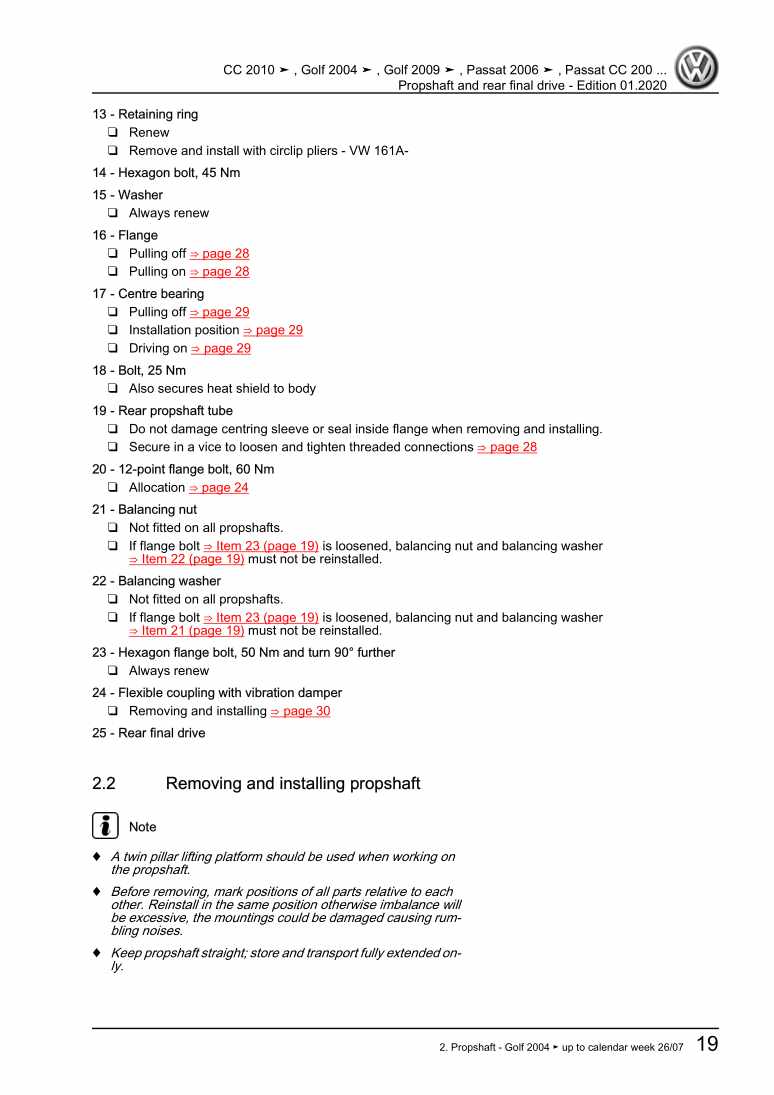
Beispielseite für Reparaturanleitung Propshaft and rear final drive

Für Golf (2004 - 2007) / Passat / Passat Variant (2005 - 2008) / Tiguan (2008) / Passat CC (2009) / Golf (2009) / Sharan (2011)

19,87 € Details

Heating, air conditioner

Beispielseite für Reparaturanleitung Heating, air conditioner

Für Sharan (2011)

11,68 € Details

Manual for Troubleshooting and Diagnosing Noises
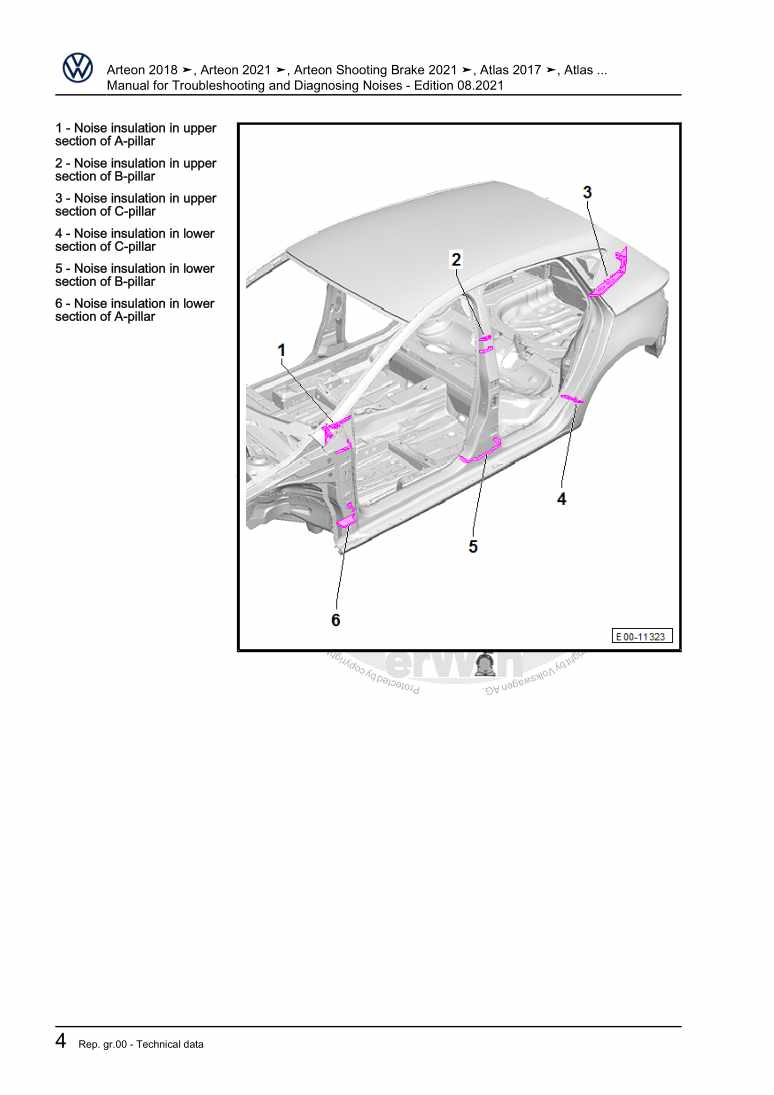
Beispielseite für Reparaturanleitung Manual for Troubleshooting and Diagnosing Noises

Für Touran (2003 - 2011) / EOS (2006) / Passat Variant (2006 - 2007) / Jetta 2-türig Rl (1980 - 1984) / Passat (2005 - 2008) / Jetta 4-türig Ll (1980 - 1984) / Tiguan (2008) / Passat CC (2009) / Scirocco (2008) / Golf (2009) / Golf Plus (2009) / Golf VI Variant (2010) / Touareg (2011) / Sharan (2011) / Polo (Russ.) (2010) / Polo A05 (2010) / Passat/Passat Variant (2011 >) / Passat/Passat Variant (2011 >) / Golf Cabriolet (2012) / Beetle (NBL) Limousine (2012) / Passat (NMS - US) (2012) / Passat CC (2009) / Beetle (NBC) Cabrio (2012) / Up! (2012) / Golf VII (2013) / Golf Variant (2014) / Polo MY (KH) (2014) / Polo MY (LIM) (2014) / Jetta (2014 >) / eUp! (ab 2014) / eGolf (ab 2014) / Polo (2014) / Golf (Mexiko) (2014 >) / Jetta (Malaysia) (2013 >) / Golf Sportsvan (2014 >) / Scirocco GP (2015) / Polo (Malaysia) (2015 >) / Passat Lim (2015 >) / Polo G (Indien) (2015) / Touareg FL (2015 > ) / Passat Var. (2015 >) / Sharan (2016 > ) / Polo G (Indien) (2015) / Polo (Russland) (2015 >) / Polo Malaysia (2016) / Touran (2016 > ) / Passat (2016) / Tiguan (2016) / VW eUP (2012) / VW Beetle (2011) / Golf VII (2017) / Arteon () / Tiguan RUS (2017) / e-Golf (2017) / e-UP! (2017) / Golf [MX] (2018 >) / Polo (2018) / T-Roc (2018 >) / Jetta [MX] (2018 >) / Golf Sportsvan (2018 >) / Passat (USA) (2019 >) / T-Roc Cabriolet (2020 >) / Tiguan (2021 >) / Arteon (2021 >) / Arteon Shooting Brake (2021 >)

4,97 € Details

4-cylinder common rail engine (2.0 l, EA189 Gen II)
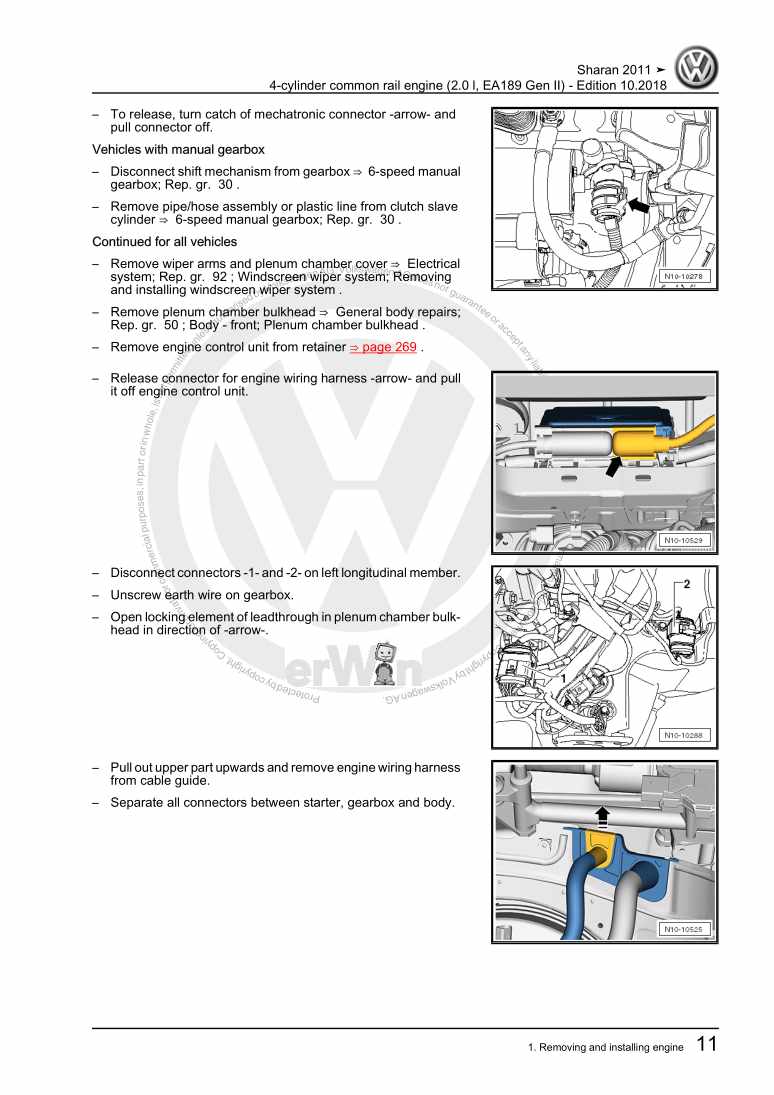
Beispielseite für Reparaturanleitung 4-cylinder common rail engine (2.0 l, EA189 Gen II)

Für Sharan (2011)

25,44 € Details

Fuel supply system - diesel engines

Beispielseite für Reparaturanleitung Fuel supply system - diesel engines

Für Sharan (2011) / Sharan (2016 > )

6,29 € Details

Body Repairs

Beispielseite für Reparaturanleitung Body Repairs

Für Sharan (2011)

18,44 € Details

General body repairs, interior

Beispielseite für Reparaturanleitung General body repairs, interior

Für Sharan (2011) / Sharan (2016 > )

20,15 € Details

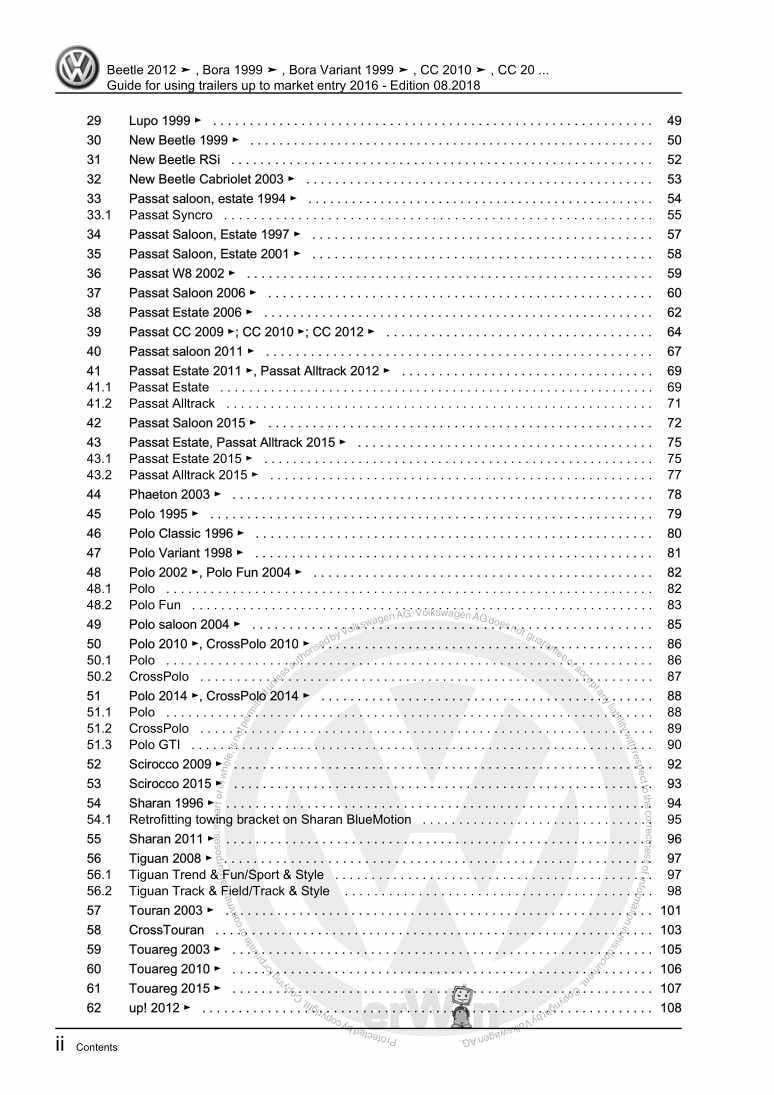
Guide for using trailers up to market entry 2016
Beispielseite für Reparaturanleitung Guide for using trailers up to market entry 2016

Für Touareg (2003 - 2007) / Polo (1995 - 2002) / Phaeton (2001 - 2008) / Lupo (1998 - 2006) / Golf / Golf Variant / Vento (1992 - 1999) / Lupo 3L (1999 - 2006) / Bora / Bora Variant / Golf / Golf Variant (1998 - 2006) / New Beetle Cabrio (2003 - 2010) / New Beetle / New Beetle (USA) (1998 - 2007) / Passat / Passat Variant (1997 - 2005) / Touran (2003 - 2011) / Passat / Passat Variant (2005 - 2008) / Golf Plus (2005 - 2007) / Passat / Passat Variant (1994 - 1997) / Sharan (1995 - 2010) / Golf / Golf Variant / Jetta (2004 - 2007) / New Beetle RSI (2001) / Golf Cabriolet (1994 - 2002) / Polo / Polo Sedan (2002 - 2007) / Golf Cabrio (1997 - 2002) / EOS (2006) / Polo Classic / Polo Variant (1996 - 2002) / Jetta 2-türig Rl (1980 - 1984) / Jetta 4-türig Ll (1980 - 1984) / Tiguan (2008) / Passat CC (2009) / Scirocco (2008) / Golf (2009) / Golf Plus (2009) / Golf VI Variant (2010) / Touareg (2011) / Sharan (2011) / Polo A05 (2010) / Passat/Passat Variant (2011 >) / Passat/Passat Variant (2011 >) / Golf Cabriolet (2012) / Beetle (NBL) Limousine (2012) / Passat CC (2009) / Up! (2012) / Golf VII (2013) / Golf Variant (2014) / eUp! (ab 2014) / eGolf (ab 2014) / Polo (2014) / Golf Sportsvan (2014 >) / Scirocco GP (2015) / Passat Lim (2015 >) / Touareg FL (2015 > ) / Passat Var. (2015 >)

10,68 € Details

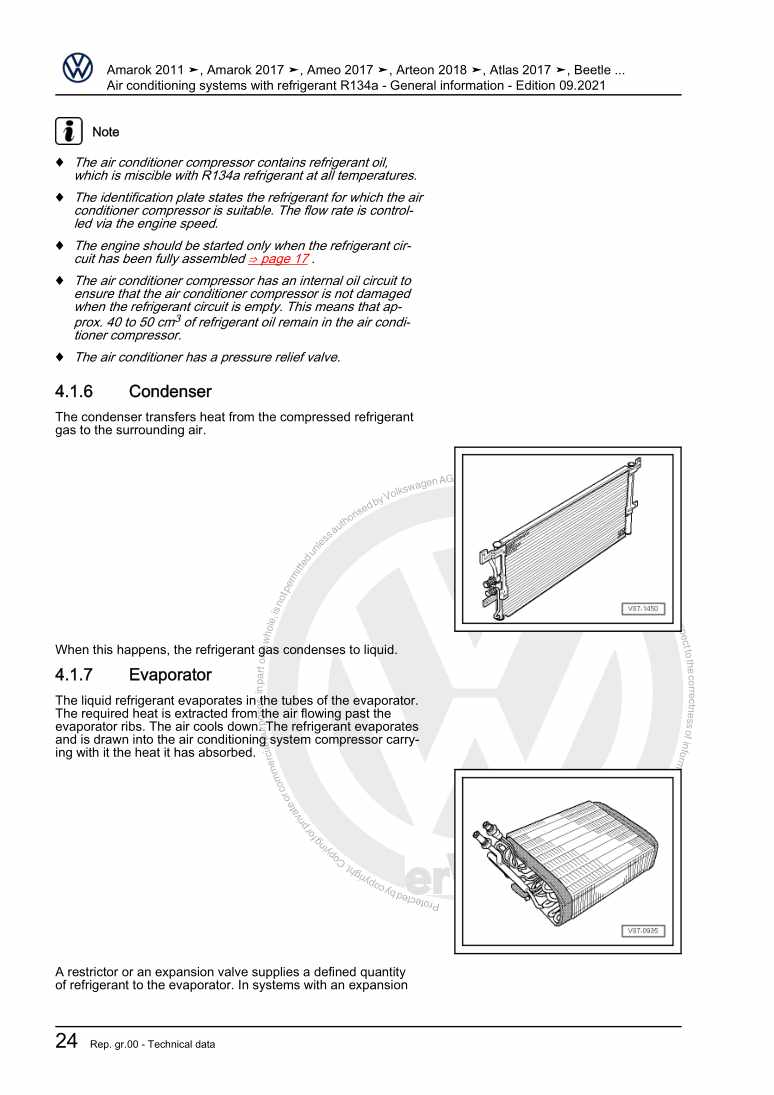
Air conditioning systems with refrigerant R134a - General information
Beispielseite für Reparaturanleitung Air conditioning systems with refrigerant R134a - General information

Für Touareg (2003 - 2007) / Polo (1995 - 2002) / Phaeton (2001 - 2008) / FOX (2004 - 2010) / Lupo (1998 - 2006) / LT 28-35 Fahrgest 300 / LT 28-35 Fahrgest. / LT 28-35 Kasten 2500 / LT 28-35 Kombi 3000 / LT 28-35 Kombi 3550 / LT 28-46 Doppelkab 35 / LT 28-46 Fahrgest 355 / LT 28-46 Kasten 3550 / LT 35 Kombi 4025 / LT 35-46 Doppelkab 40 / LT 35-46 Fahrgest 402 / LT 35-46 Kasten 4025 (1996 - 2006) / Golf / Golf Variant / Vento (1992 - 1999) / Lupo 3L (1999 - 2006) / Transporter Bus/Campe / Transporter Doppelkab / Transporter Kasten / Transporter Kombi / Transporter Kombi/Cam / Transporter Pritsche (1996 - 2003) / Bora / Bora Variant / Golf / Golf Variant (1998 - 2006) / Polo Variant (1997 - 2002) / New Beetle Cabrio (2003 - 2010) / New Beetle / New Beetle (USA) (1998 - 2007) / California / Multivan / Transporter / Transporter/Kombi LR (2003 - 2007) / Passat / Passat Variant (1997 - 2005) / Touran (2003 - 2011) / Passat / Passat Variant (2005 - 2008) / Golf Plus (2005 - 2007) / Caddy (2004 - 2010) / Passat / Passat Variant (1994 - 1997) / Transporter (2003 - 2007) / Polo Classic (1996 - 2002) / Sharan (1995 - 2010) / Golf / Golf Variant / Jetta (2004 - 2007) / Golf Cabriolet (1994 - 2002) / EOS (2006) / CRAFTER (2006 - 2007) / LT 2006> (2006 - 2007) / Jetta 2-türig Rl (1980 - 1984) / Jetta 4-türig Ll (1980 - 1984) / Tiguan (2008) / Passat CC (2009) / Golf (2009) / Scirocco (2008) / Golf Plus (2009) / Transporter (2010) / Transporter (2010) / Caddy KA / Caddy Maxi (2011) / Polo (India) (2010) / Touareg (2011) / Polo (India) (2010) / Amarok (2011) / Sharan (2011) / Polo (Russ.) (2010) / Polo A05 (2010) / Passat/Passat Variant (2011 >) / Passat/Passat Variant (2011 >) / Golf Cabriolet (2012) / Beetle (NBL) Limousine (2012) / Passat CC (2009) / Beetle (NBC) Cabrio (2012) / Up! (2012) / Golf VII (2013) / Polo MY (KH) (2014) / Polo MY (LIM) (2014) / Polo (2014) / Scirocco GP (2015) / XL1 (2012 -) / Polo (Malaysia) (2015 >) / Passat Lim (2015 >) / Polo G (Indien) (2015) / Passat Var. (2015 >) / Sharan (2016 > ) / Polo G (Indien) (2015) / Polo (Russland) (2015 >) / Polo Malaysia (2016) / Touran (2016 > ) / VW eUP (2012) / VW Beetle (2011) / Arteon () / Beetle (2017) / Polo [IN] (2016 >)

19,37 € Details

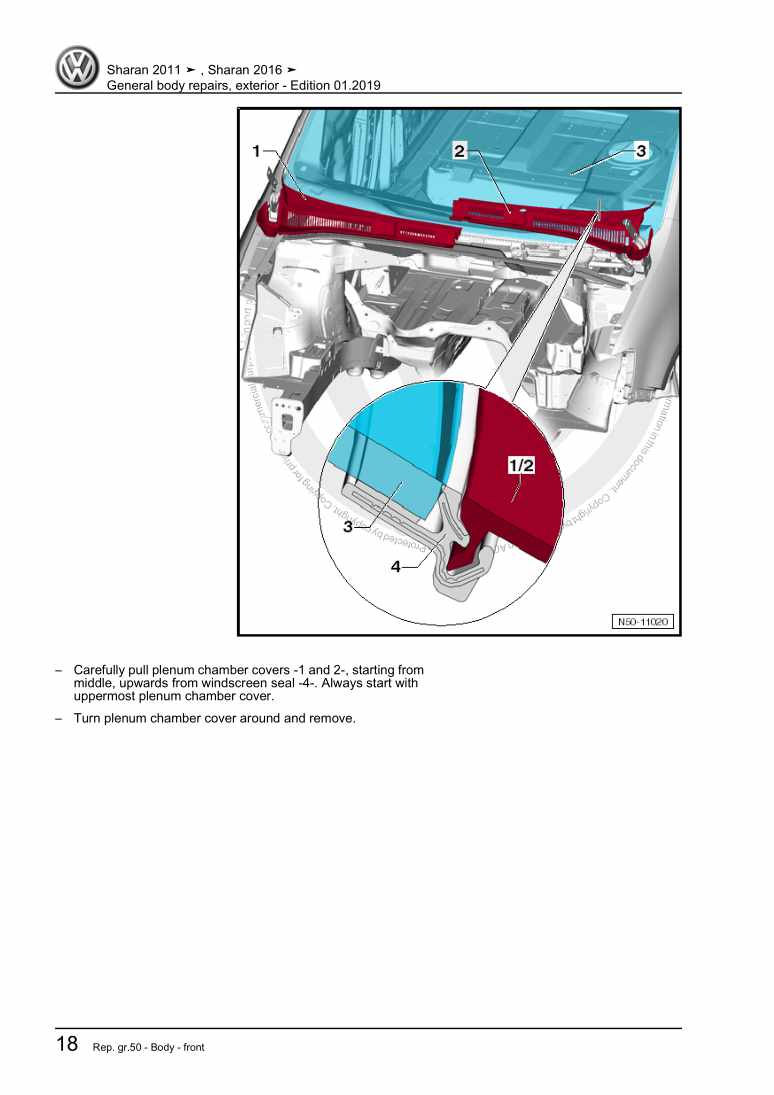
General body repairs, exterior

Beispielseite für Reparaturanleitung General body repairs, exterior

Für Sharan (2011) / Sharan (2016 > )

34,33 € Details

Unsere Best Seller

Schon gewusst? Wir bieten auch originale Autoteile an.

Autoteil N0385012 Spreizniet

N0385012

Spreizniet

0,92 €

Details
Autoteil 4N0010502EB Kennschild

4N0010502EB

Kennschild

11,02 €

Details
Autoteil 8R0906961CA Cd Rom

8R0906961CA

Cd Rom

13,14 €

Details
Autoteil 5GM819728DDAR Ausstroem.

5GM819728DDAR

Ausstroem.

175,17 €

Details
Autoteil 3G9877439 Dichtung

3G9877439

Dichtung

112,63 €

Details

Eigendiagnose für Automatisches Getriebe 09A - 5 Gang

Beispielseite für Reparaturanleitung Eigendiagnose für Automatisches Getriebe 09A - 5 Gang

Für Bora / Bora Variant / Golf / Golf Variant (1998 - 2006)

6,00 € Details

Nr. 526: Die Dieselmotoren-Baureihe EA288 mit Abgasnorm EU6

Beispielseite für Reparaturanleitung Nr. 526: Die Dieselmotoren-Baureihe EA288 mit Abgasnorm EU6

5,89 € Details

Heizung, Klimaanlage

Beispielseite für Reparaturanleitung Heizung, Klimaanlage

Für Caddy (2004 - 2010) / Caddy KA / Caddy Maxi (2011)

12,76 € Details

image/svg+xml Über Clonck

Originale Reparaturanleitungen und Ersatzteile

Unsere Reparaturanleitungen sind Originale, kommen direkt von Volkswagen und erfüllen die höchsten Qualitätsstandards.

In unserem Originalteile-Shop verkaufen wir hochwertige Originalersatzteile der Fahrzeughersteller. Mithilfe der Suche gibst du die gewünschte Teilenummer (OE-Nummer) ein und bestellst schnell und einfach das benötigte Ersatzteil.

Höchste Qualitätsstandards

Bei Clonck wollen wir Autoschrauber und Kfz-Profis glücklich machen. Aus diesem Grund findest du bei Clonck ausschließlich professionelle und hochwertige Reparaturanleitungen, mit deren Hilfe du dein Fahrzeug fachgerecht reparieren kannst.

Unsere Partner

Autohaus Schmidt GmbH
Automag GmbH Filiale Laim
KFZ-VERLAG GmbH
Zimpel und Franke GmbH

Clonck: Der Autoreparatur-Shop - gibt's auch als App!

Clonck App Logo Play Store

Clonck: Passende Autoteile für deine Autoreparatur

4,5 90

Mit Clonck bestellst du die richtigen Originalersatzteile im Handumdrehen.

  • Fahrzeugmodell hinzufügen
  • Baugruppe auswählen
  • Fahrzeug-Identifizierungsnummer (FIN) eingeben
  • Über 5.000 originale Reparaturanleitungen einsehen
Jetzt App starten
Clonck App Preview Auto Mobiltelefon Autoteile