THE CAR REPAIR SHOP
0
Home » Manuals » 4-cylinder injection engine (2.0 l engine, turbocharger)
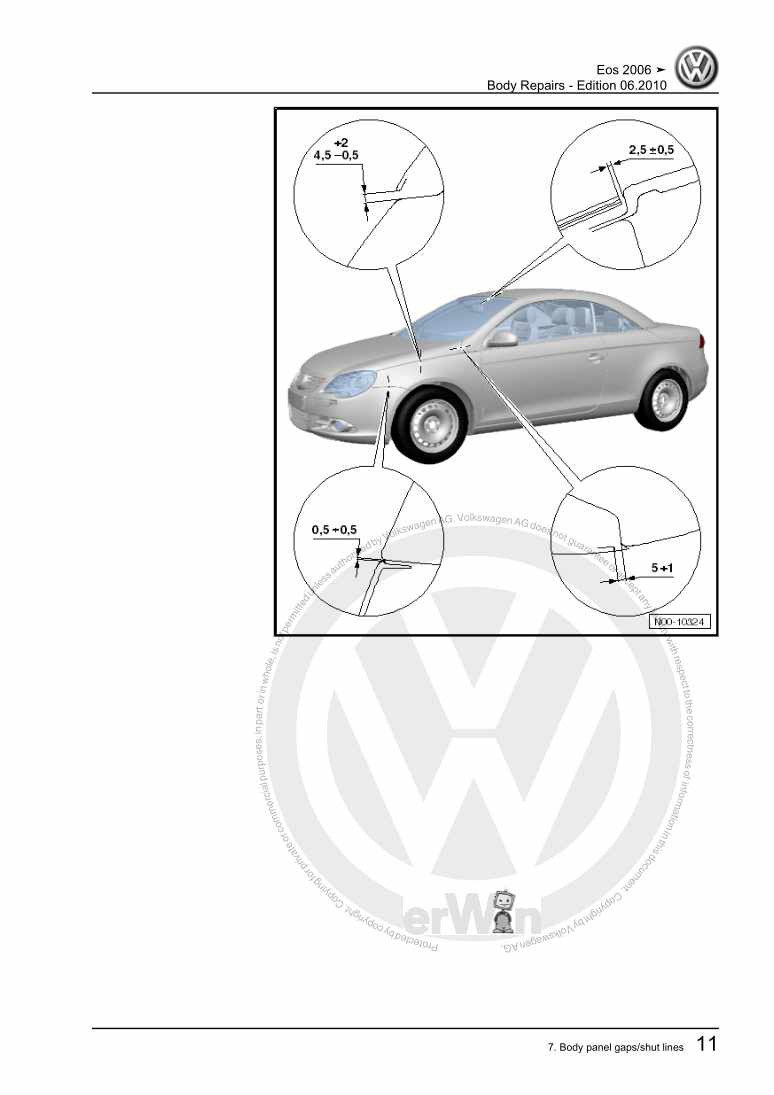
  • Examplepage for repair manual 4-cylinder injection engine (2.0 l engine, turbocharger)
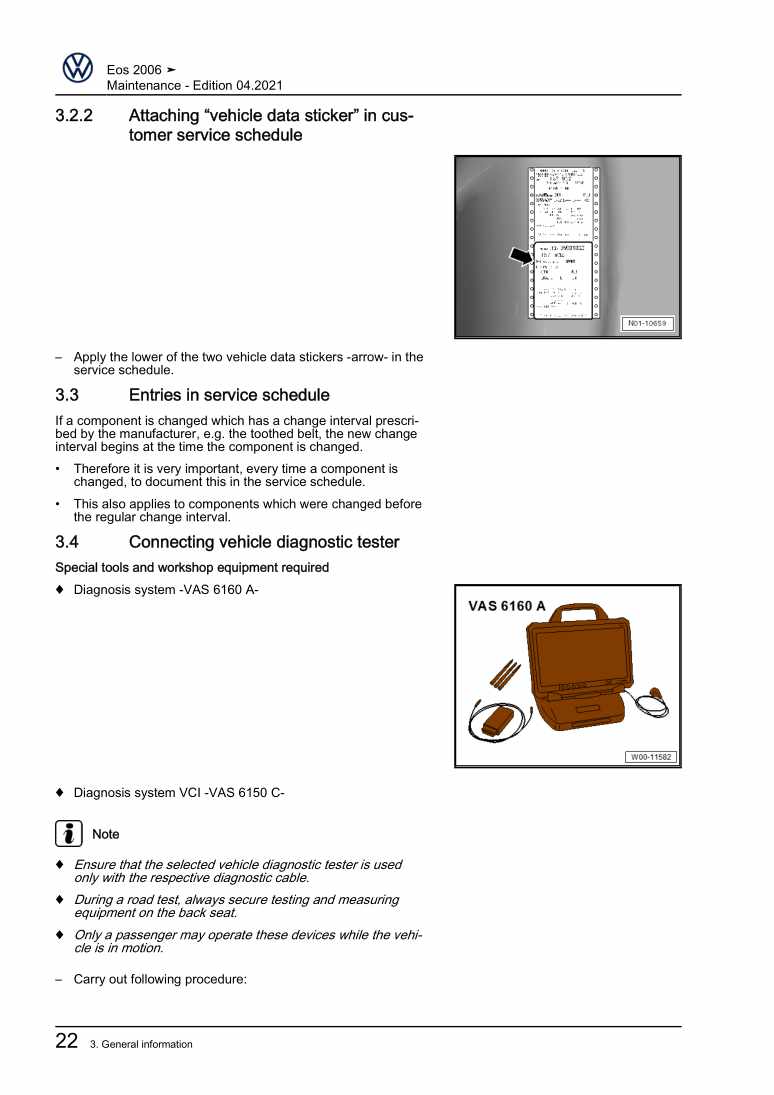
  • Examplepage for repair manual 2 4-cylinder injection engine (2.0 l engine, turbocharger)
  • Examplepage for repair manual 3 4-cylinder injection engine (2.0 l engine, turbocharger)
  • Examplepage for repair manual 4-cylinder injection engine (2.0 l engine, turbocharger)
  • Examplepage for repair manual 2 4-cylinder injection engine (2.0 l engine, turbocharger)
  • Examplepage for repair manual 3 4-cylinder injection engine (2.0 l engine, turbocharger)

4-cylinder injection engine (2.0 l engine, turbocharger)

For EOS

Original Volkswagen repair manual


17,42 €7% VAT incl.

Immediately available for download

Language: English

Digital PDF file

5.713 KB

211 Sites

Detailed technical data

Immediately readable

This repair manual contains: Removing and installing engine, Sealing flange and flywheel, Crankshaft, Pistons and conrods, Cylinder head, Safety precautions, Fuel tank, Repairing fuel supply system, Activated charcoal filter system, engine code BWA, Turbocharger and Checking components. Show more
Secure Payment via PayPal, credit card, direct debit and more
PayPal Logo SEPA Lastschrift Logo Giropay Logo Sofort Überweisung Logo

Repair manual EOS 4-cylinder injection engine PDF download has the following content:

Chapter overview

  • Technical data
    1
  • 1 Technical data
    1
  • 1.1 Engine number
    1
  • 1.2 Engine data
    1
  • Removing and installing engine
    2
  • 1 Removing and installing engine
    2
  • 1.1 Removing engine
    2
  • 1.2 Installing engine
    10
  • Crankshaft group
    14
  • 1 Dismantling and assembling engine
    14
  • 1.1 Assembly overview
    15
  • 1.2 Removing and installing poly-V-belt
    19
  • 2 Sealing flange and flywheel
    21
  • 2.1 Assembly overview - sealing flange
    21
  • 2.2 Renewing crankshaft oil seal - belt pulley end
    22
  • 2.3 Removing and installing sealing flange - pulley end
    25
  • 2.4 Removing and installing crankshaft sealing flange - flywheel end
    27
  • 2.5 Removing and installing flywheel
    28
  • 3 Crankshaft
    30
  • 3.1 Assembly overview - crankshaft
    31
  • 3.2 Pulling needle bearing out of and driving into crankshaft
    32
  • 3.3 Crankshaft dimensions
    33
  • 4 Pistons and conrods
    35
  • 4.1 Assembly overview - pistons and conrods
    35
  • 4.2 Checking pistons, piston rings and cylinder bores
    36
  • 4.3 Piston and cylinder dimensions
    38
  • Cylinder head, valve gear
    39
  • 1 Cylinder head
    39
  • 1.1 Assembly overview - cylinder head
    40
  • 1.2 Removing and installing cylinder head cover
    41
  • 1.3 Removing and installing cylinder head
    43
  • 1.4 Removing and installing toothed belt
    48
  • 1.5 Checking compression
    57
  • 2 Valve gear
    59
  • 2.1 Assembly overview - valve gear
    60
  • 2.2 Valve dimensions
    61
  • 2.3 Checking valve guides
    61
  • 2.4 Renewing valve stem oil seals
    62
  • 2.5 Renewing exhaust camshaft oil seal
    66
  • 2.6 Removing and installing camshaft adjuster
    68
  • 2.7 Removing and installing inlet camshaft control valve 1 N205
    72
  • 2.8 Removing and installing camshafts
    73
  • Lubrication
    77
  • 1 Parts of lubrication system
    77
  • 1.1 Engine oil
    77
  • 1.2 Assembly overview - parts of lubrication system
    78
  • 1.3 Draining oil filter housing
    82
  • 1.4 Removing and installing sump
    83
  • 1.5 Removing and installing oil pump with balancer shaft gear assembly
    85
  • 1.6 Removing and installing oil filter bracket
    89
  • 1.7 Checking oil pressure and oil pressure switch
    90
  • Cooling
    92
  • 1 Parts of cooling system
    92
  • 1.1 Assembly overview - parts of cooling system, engine side
    93
  • 1.2 Assembly overview - coolant circulation pump V50 , engine code BWA
    94
  • 1.3 Assembly overview - coolant circulation pump V50 , engine code BPY
    95
  • 1.4 Assembly overview - parts of cooling system, body side
    96
  • 1.5 Coolant hose schematic diagram, engine code BWA
    97
  • 1.6 Coolant hose schematic diagram, engine code BPY
    98
  • 1.7 Bypass thermostat
    99
  • 1.8 Draining and filling coolant
    100
  • 1.9 Removing and installing coolant pump
    103
  • 1.10 Removing and installing coolant thermostat housing with thermostat
    106
  • 1.11 Removing and installing radiator fan V7 and radiator fan 2 V177
    107
  • 1.12 Removing and installing radiator
    108
  • 1.13 Checking cooling system for leaks
    110
  • Fuel supply system
    112
  • 1 Safety precautions
    112
  • 1.1 Safety precautions when working on fuel supply system and ignition system
    112
  • 1.2 Reducing pressure in high pressure area
    113
  • 2 Fuel tank
    115
  • 2.1 Rules for cleanliness
    115
  • 2.2 Assembly overview - fuel tank, engine code BPY
    116
  • 2.3 Assembly overview - fuel tank, engine code BWA
    118
  • 2.4 Emptying fuel tank
    119
  • 2.5 Removing and installing fuel tank
    122
  • 3 Repairing fuel supply system
    125
  • 3.1 Safety precautions when working on fuel supply system
    125
  • 3.2 Rules for cleanliness
    126
  • 3.3 Removing and installing fuel delivery unit
    126
  • 3.4 Removing and installing fuel gauge sender G
    128
  • 3.5 Checking fuel pump
    129
  • 3.6 Assembly overview - high-pressure pump
    137
  • 3.7 Removing and installing high-pressure pump
    138
  • 4 Electronic power control (EPC)
    140
  • 4.1 Function of EPC system
    140
  • 4.2 Assembly overview - accelerator module
    141
  • 4.3 Removing and installing accelerator module
    141
  • 5 Activated charcoal filter system, engine code BWA
    143
  • 5.1 Function
    143
  • 5.2 Assembly overview - activated charcoal filter system
    144
  • 5.3 Checking fuel tank breather
    144
  • 6 Activated charcoal filter system, engine code BPY
    147
  • 6.1 Schematic diagram of activated charcoal filter system
    147
  • 6.2 Assembly overview - activated charcoal filter system
    149
  • 6.3 Removing and installing activated charcoal filter
    149
  • 6.4 Removing and installing fuel system diagnostic pump V144
    151
  • 6.5 Checking fuel system for leaks
    152
  • Turbocharging/supercharging
    155
  • 1 Turbocharger
    155
  • 1.1 Rules for cleanliness
    155
  • 1.2 Assembly overview - turbocharger
    156
  • 1.3 Removing and installing turbocharger
    160
  • 1.4 Checking turbocharger vacuum unit
    167
  • 1.5 Removing and installing turbocharger vacuum unit
    168
  • 1.6 Adjusting turbocharger vacuum unit
    169
  • 2 Charge air system
    172
  • 2.1 Assembly overview - charge air cooling
    172
  • 2.2 Schematic diagram of turbocharging system
    173
  • 2.3 Checking charge air system for leaks
    173
  • Mixture preparation - injection
    176
  • 1 Injection system
    176
  • 1.1 General notes on injection
    176
  • 1.2 Rules for cleanliness
    177
  • 1.3 Technical data
    177
  • 1.4 Assembly overview - intake manifold
    178
  • 1.5 Assembly overview - fuel rail
    179
  • 1.6 Assembly overview - air filter/engine cover
    180
  • 1.7 Removing and dismantling air filter/engine cover
    180
  • 1.8 Removing and installing throttle valve module J338
    181
  • 1.9 Removing and installing intake manifold
    182
  • 1.10 Removing and installing fuel pressure sender G247
    185
  • 1.11 Removing and installing injectors
    187
  • 1.12 Renewing Teflon seal on injector
    188
  • 2 Checking components
    191
  • 2.1 Checking double non-return valve
    191
  • 3 Engine control unit
    192
  • 3.1 Removing and installing engine control unit
    192
  • 3.2 Removing and installing anti-theft engine control unit
    192
  • Exhaust system
    196
  • 1 Removing and installing parts of exhaust system
    196
  • 1.1 Assembly overview - exhaust system
    196
  • 1.2 Separating middle and rear silencers
    198
  • 1.3 Removing and installing front exhaust pipe with catalytic converter
    199
  • 1.4 Aligning exhaust system stress free
    201
  • Ignition system
    202
  • 1 Repairing ignition system
    202
  • 1.1 General notes on ignition system
    202
  • 1.2 Assembly overview - ignition system
    203
  • 1.3 Removing and installing ignition coils with output stage
    203
  • 1.4 Spark plug test data
    204
Manufacturer's designation 4-cylinder injection engine (2.0 l engine, turbocharger)
Manufacturer Volkswagen
Suitable for EOS (2006)
Suitable car types 1F
Engine code BWA
Category Reparaturanleitung

There are no reviews for this product at the moment.

Similar repair manuals

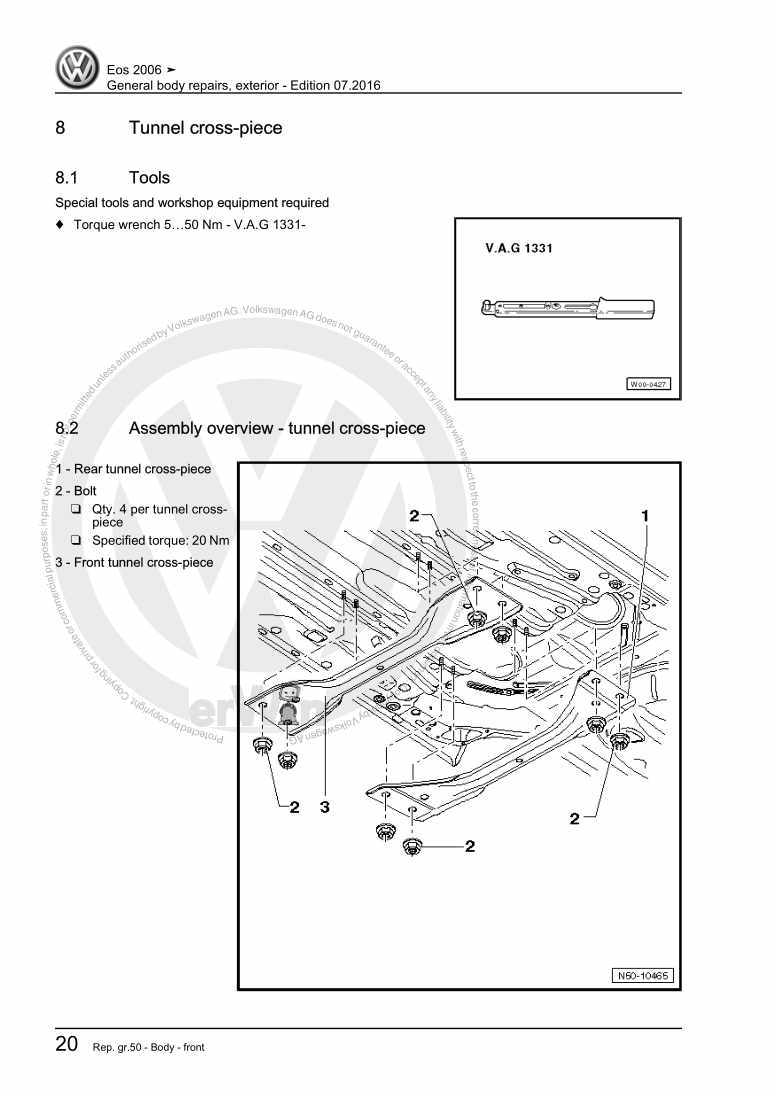
General body repairs, exterior

Examplepage for repair manual General body repairs, exterior

For EOS (2006)

34,33 € Details

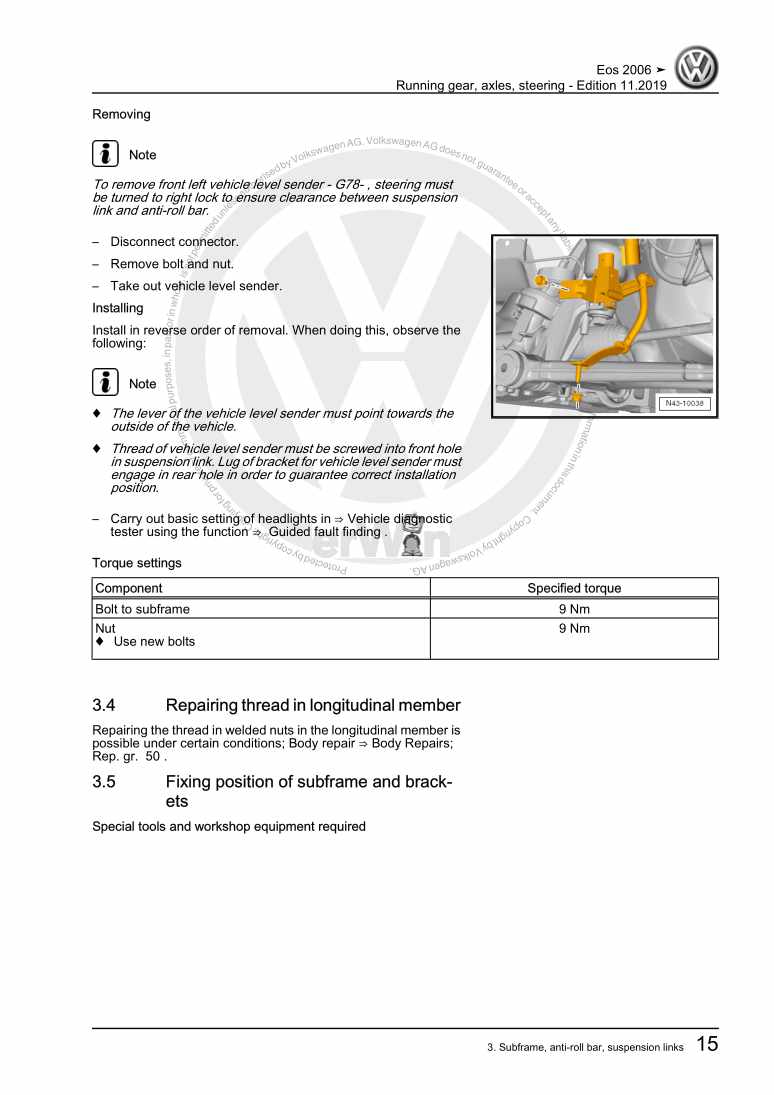
Running gear, axles, steering

Examplepage for repair manual Running gear, axles, steering

For EOS (2006)

28,09 € Details

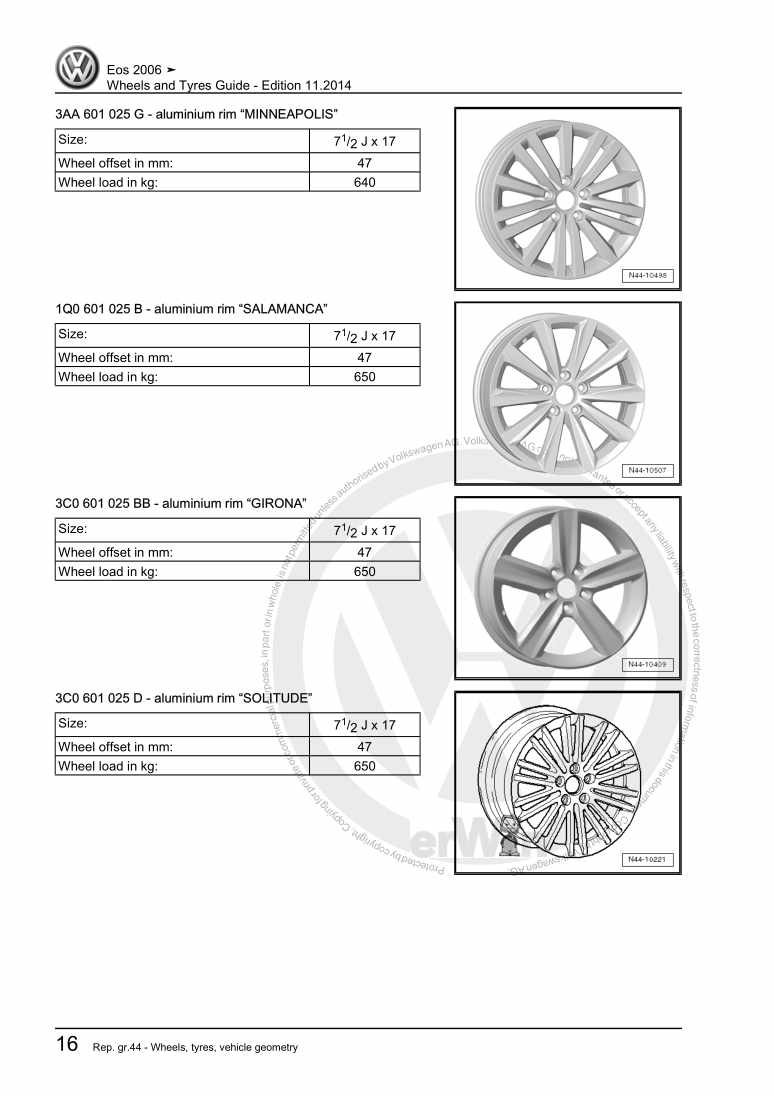
Wheels and Tyres Guide

Examplepage for repair manual Wheels and Tyres Guide

For EOS (2006)

5,11 € Details

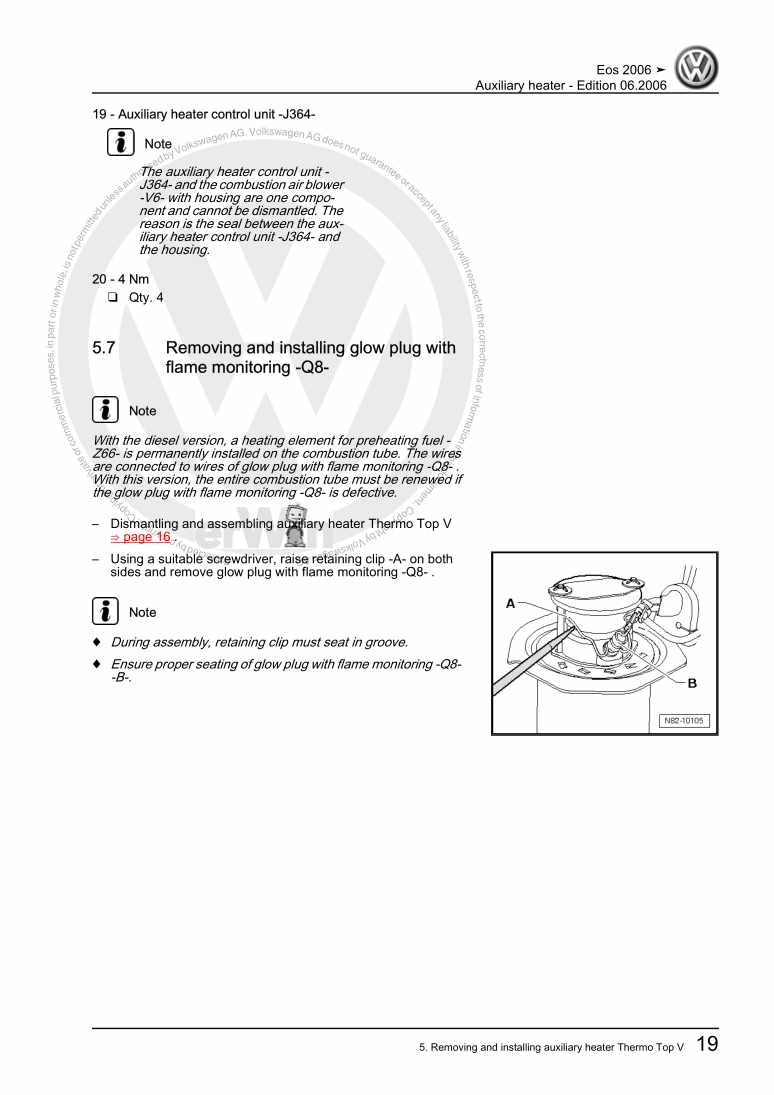
Auxiliary heater

Examplepage for repair manual Auxiliary heater

For EOS (2006)

5,62 € Details

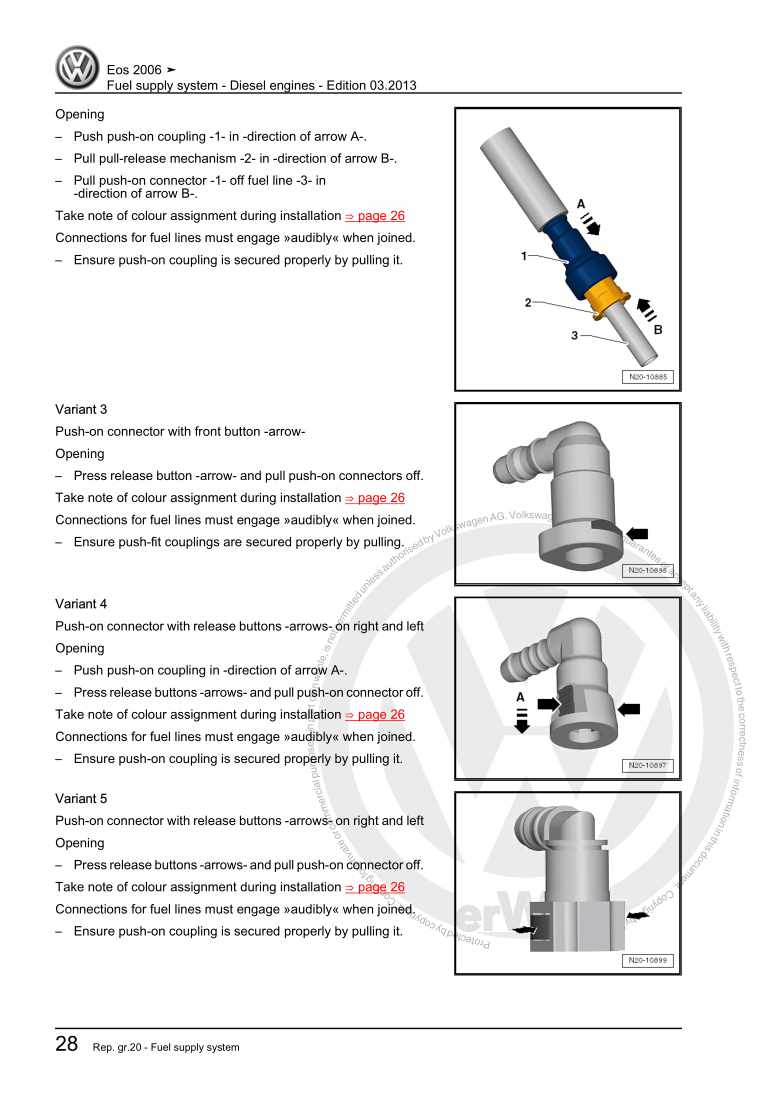
Fuel supply system - Diesel engines

Examplepage for repair manual Fuel supply system - Diesel engines

For EOS (2006)

6,52 € Details

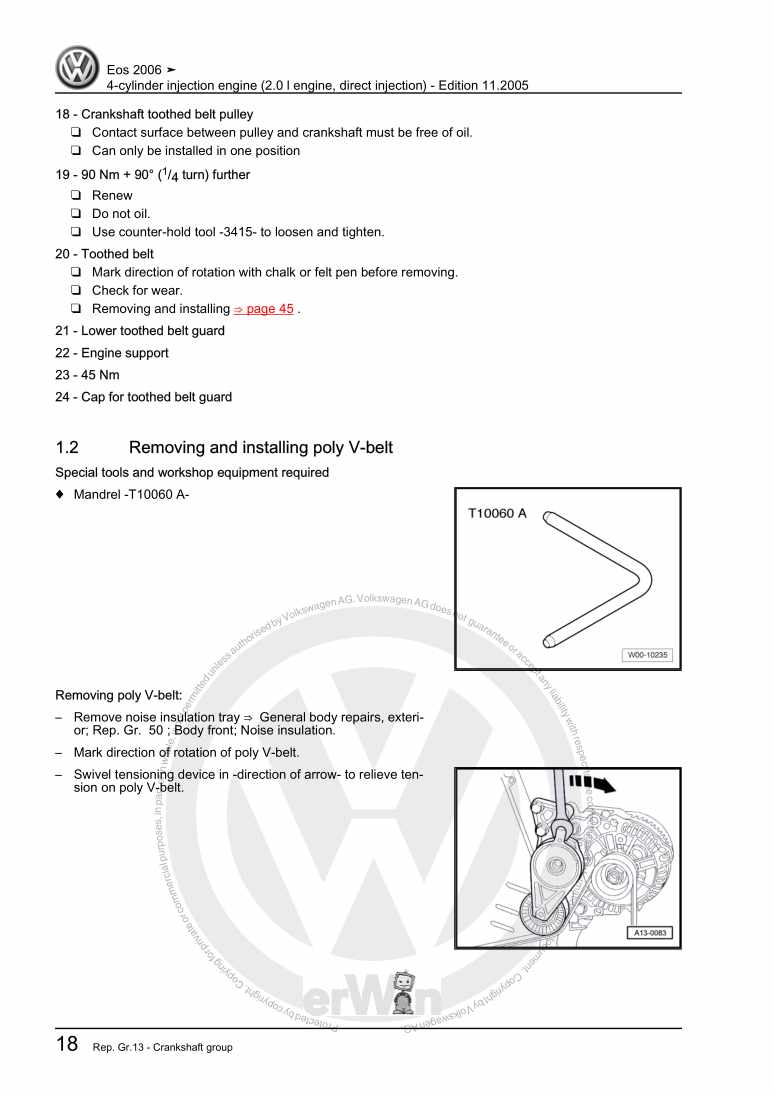
4-cylinder injection engine (2.0 l engine, direct injection)

Examplepage for repair manual 4-cylinder injection engine (2.0 l engine, direct injection)

For EOS (2006)

15,24 € Details

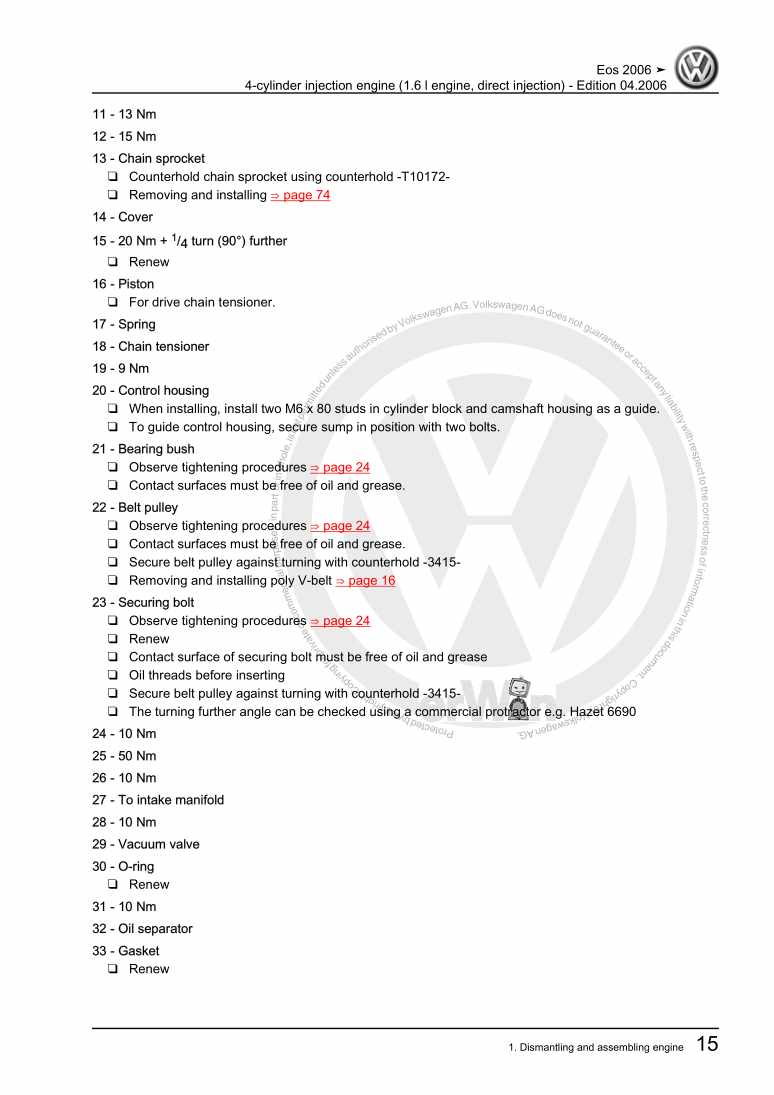
4-cylinder injection engine (1.6 l engine, direct injection)

Examplepage for repair manual 4-cylinder injection engine (1.6 l engine, direct injection)

For EOS (2006)

13,70 € Details

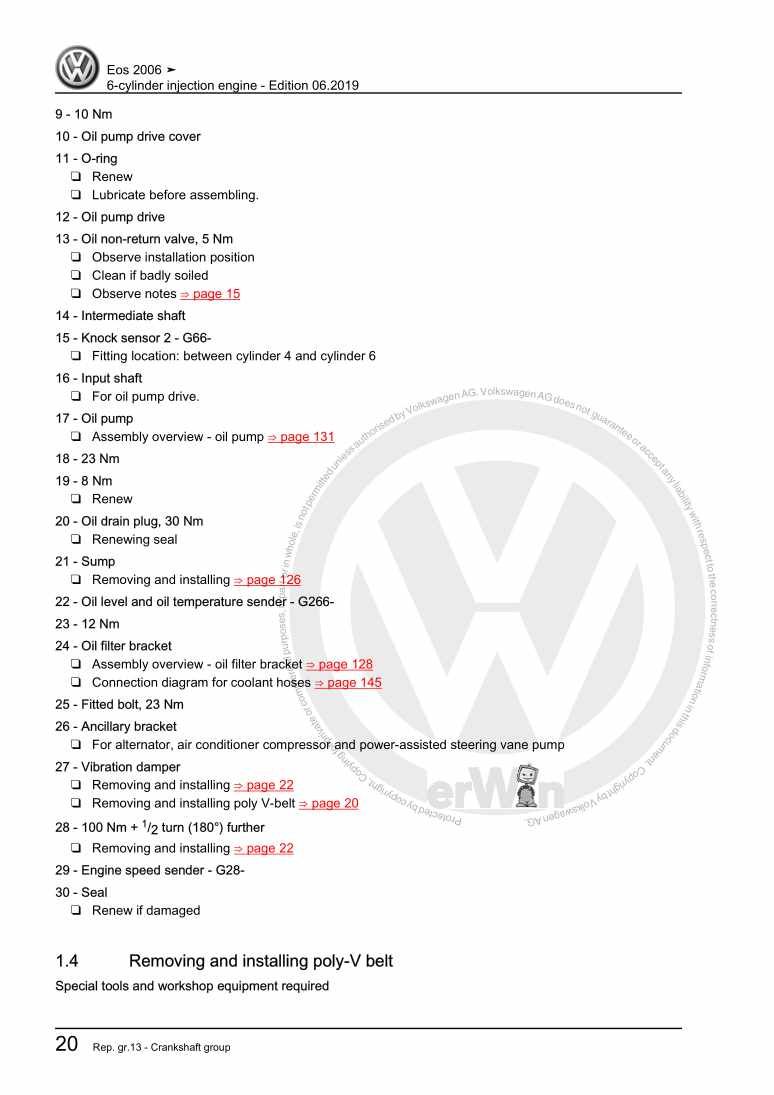
6-cylinder injection engine

Examplepage for repair manual 6-cylinder injection engine

For EOS (2006)

21,70 € Details

Body Repairs

Examplepage for repair manual Body Repairs

For EOS (2006)

15,82 € Details

Maintenance

Examplepage for repair manual Maintenance

For EOS (2006)

16,33 € Details

Our Best Sellers

Did you know? We also offer original spare parts.

car part 5N0941607 Kappe

5N0941607

Kappe

24,22 €

Details
car part 077103221AM Schlauch

077103221AM

Schlauch

68,01 €

Details
car part 3G9877439 Dichtung

3G9877439

Dichtung

112,63 €

Details
car part 8R0906961CA Cd Rom

8R0906961CA

Cd Rom

13,14 €

Details
car part 3Q0253574 Leitung

3Q0253574

Leitung

36,27 €

Details

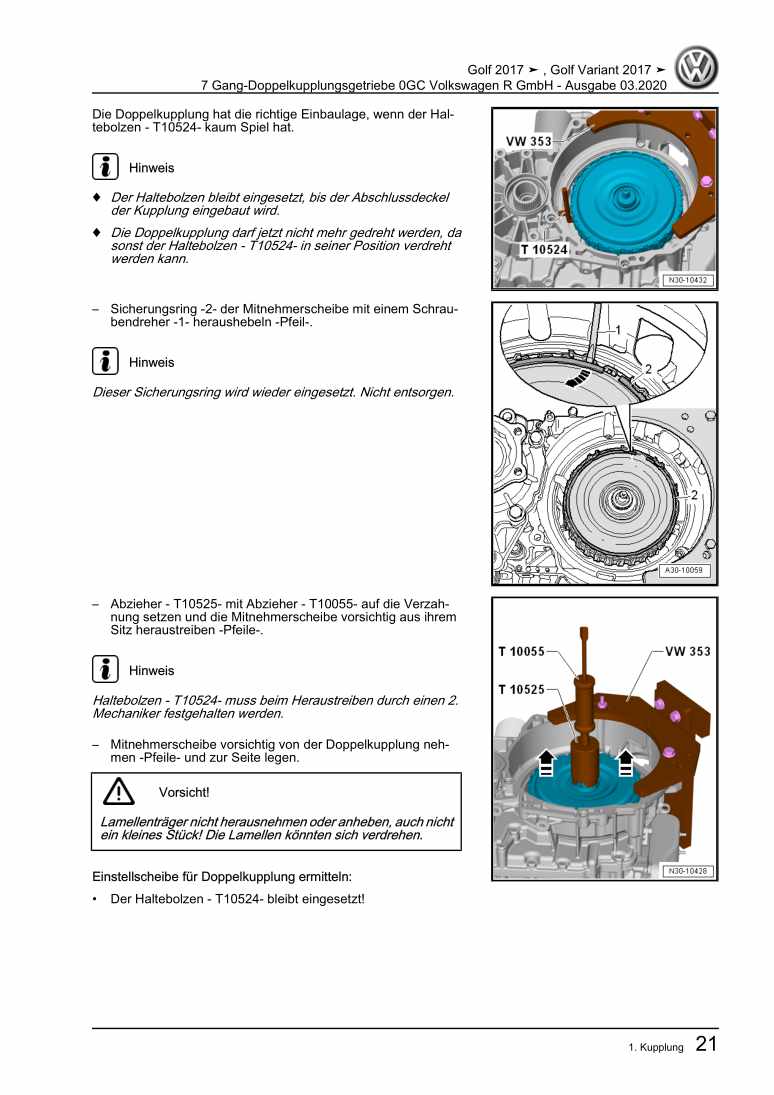
7 Gang-Doppelkupplungsgetriebe 0GC Volkswagen R GmbH

Examplepage for repair manual 7 Gang-Doppelkupplungsgetriebe 0GC Volkswagen R GmbH

For Golf VII (2017) / Golf (2017)

10,54 € Details

4-Zylinder-Dieselmotor, Mechanik CS,JX,KY

Examplepage for repair manual 4-Zylinder-Dieselmotor, Mechanik CS,JX,KY

For Typ 2 / Typ 2 7-9-Sitzer / Typ 2 Doppelkabine / Typ 2 Pritsche (1968 - 2007) / MICROBUS / Typ 2 Bus/Caravelle / Typ 2 Kasten / Typ 2 Kombi/... / VAN (1980 - 1999)

8,15 € Details

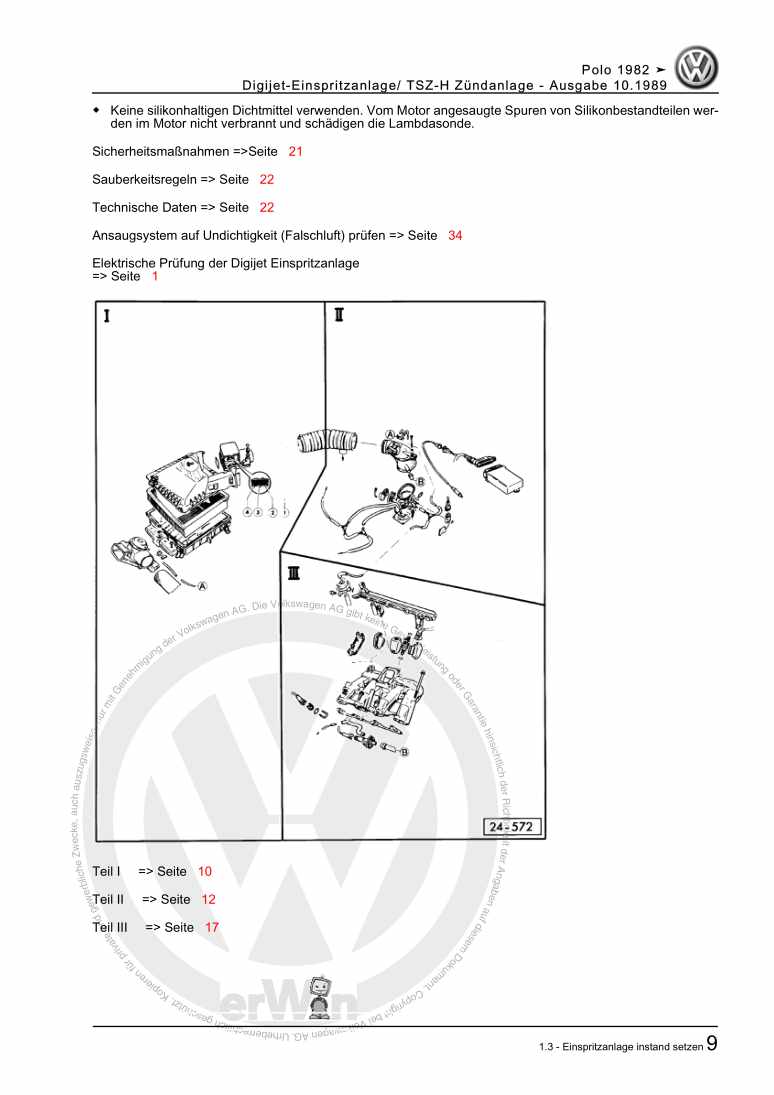
Digijet-Einspritzanlage/ TSZ-H Zündanlage

Examplepage for repair manual Digijet-Einspritzanlage/ TSZ-H Zündanlage

For Polo / Polo Coupe / Polo Steilheck / Polo Stufenheck (1987 - 1994)

6,35 € Details

image/svg+xml About Clonck

Original repair manuals und spare parts

Our repair manuals are original, come directly from Volkswagen and meet the highest quality standards.

In our original parts shop we sell high-quality original spare parts from car manufacturers. Use the search function to enter the desired part number (OE number) and order the required spare part quickly and easily.

Highest quality standards

At Clonck, we want to make car mechanics and car professionals happy. That's why you will only find professional and high-quality repair manuals at Clonck that will help you to repair your vehicle professionally.

Our partners

Autohaus Schmidt GmbH
Automag GmbH Filiale Laim
KFZ-VERLAG GmbH
Zimpel und Franke GmbH

Clonck: The car repair shop - also as app!

Clonck App Logo Play Store

Clonck: Fitting car parts for your car repair

4,5 90

With Clonck you can order the right original spare parts in no time.

  • Add your car model
  • Select assembly group
  • Enter vehicle identification number (VIN)
  • Access to over 5,000 original repair manuals
Start app now
Clonck App Preview Car Mobilephone Carparts