DER AUTOREPARATUR-SHOP
0
Home » Anleitungen » Supplementary heating
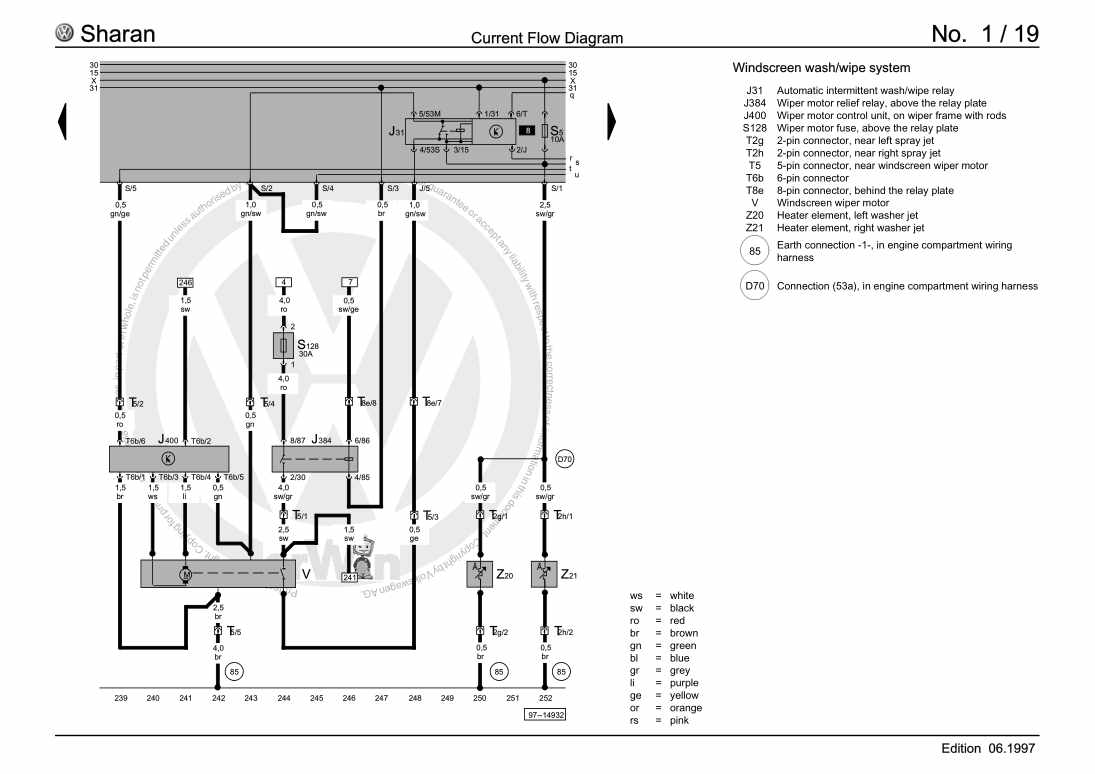
  • Beispielseite für Reparaturanleitung Supplementary heating
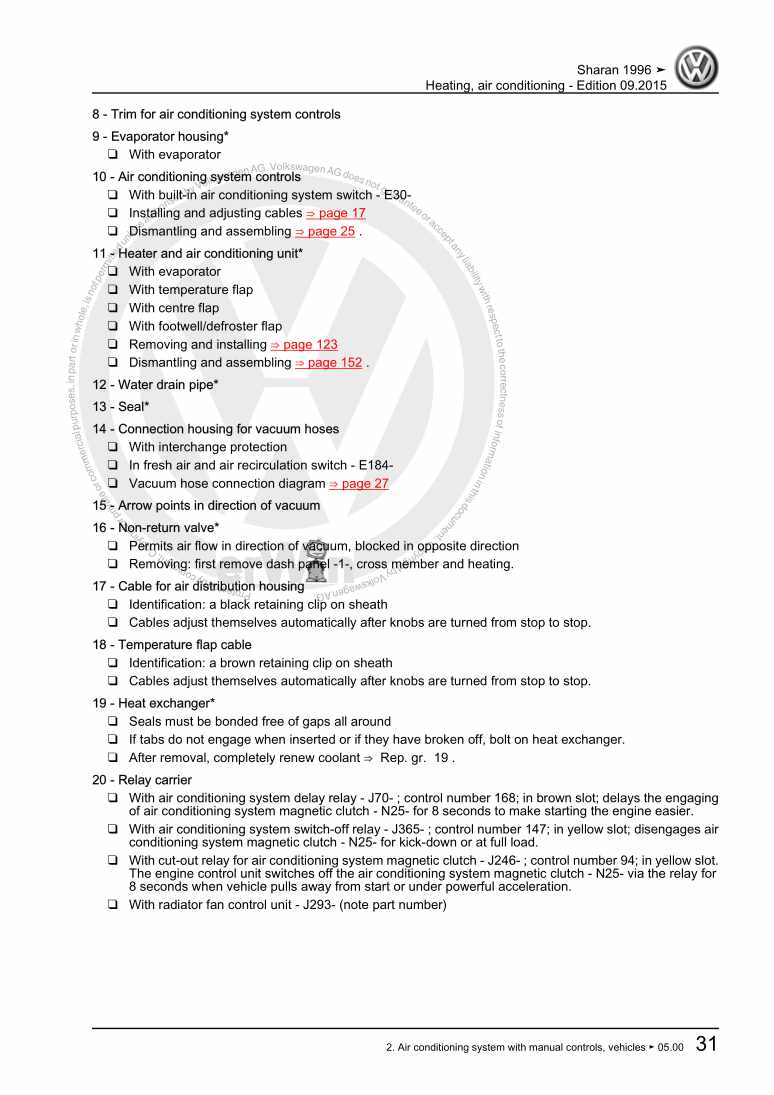
  • Beispielseite für Reparaturanleitung 2 Supplementary heating
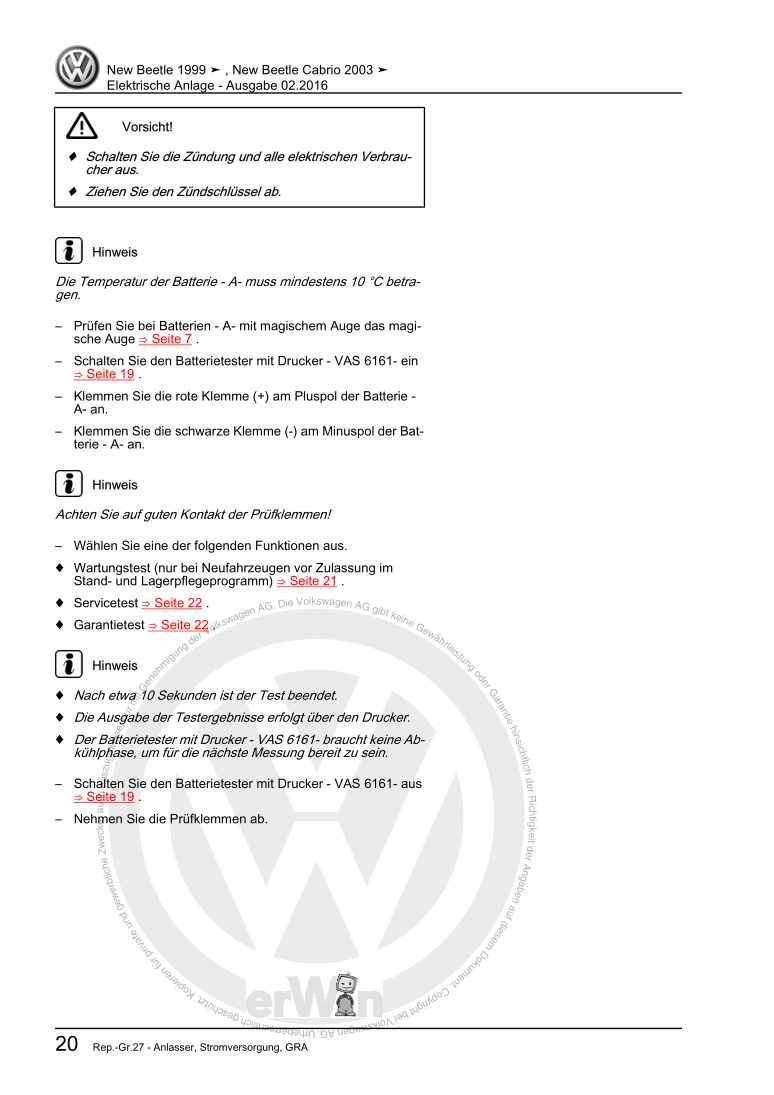
  • Beispielseite für Reparaturanleitung 3 Supplementary heating
  • Beispielseite für Reparaturanleitung Supplementary heating
  • Beispielseite für Reparaturanleitung 2 Supplementary heating
  • Beispielseite für Reparaturanleitung 3 Supplementary heating

Supplementary heating

Für Sharan

Original VW-Reparaturanleitung


9,70 €inkl. 7% MwSt.

  • Deutsch
  • English

Sofort als Download verfügbar

Sprache: English

Digitale PDF Version

1.841 KB

104 Seiten

Detaillierte technische Daten

Sofort lesbar

Diese Reparaturanleitung umfasst: Auxiliary heater -D3W- (supplementary heater), vehicles: ▸ 05.00, Auxiliary heater -D5W- Z (supplementary heater), vehicles 06.2000 ▸, Auxiliary heater -B4W/ D4W-, vehicles ▸ 05.2000, Auxiliary heater -B5W- S / -D5W- S, vehicles 06.2000 ▸, Auxiliary heater -D5Z- F, vehicles 05.2004 ▸ und Auxiliary heater -D5S- F / -B5S- F, vehicles 05.2004 ▸. Mehr anzeigen
Sichere Zahlung per PayPal, Kreditkarte, Lastschrift, Sofort-Überweisung oder Giropay
PayPal Logo SEPA Lastschrift Logo Giropay Logo Sofort Überweisung Logo

Reparaturanleitung Sharan Supplementary heating pdf Download mit dem Inhalt:

Kapitelübersicht

  • Self-diagnosis
    1
  • Supplementary heating
    2
  • 1 Auxiliary heater -D3W- (supplementary heater), vehicles: ▸ 05.00
    2
  • 1.1 Repairing auxiliary heater -D3W- (supplementary heater)
    2
  • 1.2 Removing and installing exhaust system
    4
  • 1.3 Removing and installing auxiliary heater -D3W-
    6
  • 1.4 Dismantling and assembling auxiliary heater -D3W-
    9
  • 1.5 Removing heater control unit J162
    10
  • 1.6 Removing glow plug for heater Q9
    11
  • 1.7 Removing flame monitor G64
    11
  • 1.8 Connecting auxiliary heater -D3W- to coolant circuit
    12
  • 1.9 Coolant hose routing
    12
  • 1.10 Coolant hose routing on vehicles with 2nd heat exchanger
    13
  • 1.11 Auxiliary heater -D3W- fuel supply
    14
  • 1.12 Removing and installing metering pump V54
    15
  • 1.13 Regulation of auxiliary heater -D3W-
    16
  • 1.14 Start sequence
    17
  • 2 Auxiliary heater -D5W- Z (supplementary heater), vehicles 06.2000 ▸
    19
  • 2.1 Repairing auxiliary heater -D5W- Z (supplementary heater)
    19
  • 2.2 Connecting auxiliary heater -D5W- Z to coolant circuit
    21
  • 2.3 Coolant hose routing on vehicles with 2nd heat exchanger
    22
  • 2.4 Regulation of auxiliary heater -D5W- Z
    23
  • 3 Auxiliary heater -B4W/ D4W-, vehicles ▸ 05.2000
    25
  • 3.1 Diagnosis with the diagnostic tester 5019
    25
  • 3.2 Bleeding coolant circuit
    30
  • 3.3 Road test for auxiliary heater in vehicle without Climatronic
    31
  • 3.4 Road test for auxiliary heater in vehicle with Climatronic
    33
  • 3.5 Repairing auxiliary heater -B4W- / -D4W-
    35
  • 3.6 Removing and installing heater unit -B4W- / -D4W-
    37
  • 3.7 Dismantling and assembling heater unit -B4W- (petrol)
    39
  • 3.8 Dismantling and assembling heater unit -D4W- (diesel)
    42
  • 3.9 Removing heater control unit J162
    43
  • 3.10 Renewing combustion air blower V6
    44
  • 3.11 Removing flame monitor G64
    44
  • 3.12 Removing overheating sensor G189
    44
  • 3.13 Removing coolant temperature sender for heater G241
    45
  • 3.14 Removing glow plug for heater Q9
    45
  • 3.15 Checking flame monitor G64
    45
  • 3.16 Checking overheating sensor G189
    46
  • 3.17 Checking coolant temperature sender for heater G241
    46
  • 3.18 Connecting auxiliary heater -B4W- and -D4W- to coolant circuit
    47
  • 3.19 Fuel supply to auxiliary heaters -B4W- / -D4W-
    47
  • 3.20 Removing and installing metering pump V54
    50
  • 3.21 Regulation of auxiliary heaters -B4W- and -D4W-
    51
  • 4 Auxiliary heater -B5W- S / -D5W- S, vehicles 06.2000 ▸
    53
  • 4.1 Repairing auxiliary heater -B5W- S / -D5W- S
    53
  • 4.2 Removing ambient temperature switch F38
    55
  • 4.3 Removing circulation pump V55
    55
  • 4.4 Removing pre-selection clock E111
    56
  • 4.5 Removing and installing exhaust system
    56
  • 4.6 Road test for auxiliary heater in vehicle without Climatronic
    58
  • 4.7 Road test for auxiliary heater in vehicle with Climatronic
    60
  • 4.8 Removing and installing heater unit
    61
  • 4.9 Dismantling and assembling heater unit
    64
  • 4.10 Removing heat exchanger
    66
  • 4.11 Removing flame monitor G64
    67
  • 4.12 Removing glow plug for heater Q9
    67
  • 4.13 Removing heater control unit J162
    68
  • 4.14 Renewing combustion air blower V6
    68
  • 4.15 Removing overheating sensor G189
    69
  • 4.16 Removing coolant temperature sender for heater G241
    69
  • 4.17 Checking flame monitor G64
    69
  • 4.18 Checking overheating sensor G189
    70
  • 4.19 Checking coolant temperature sender for heater G241
    70
  • 4.20 Checking ambient temperature switch F38
    70
  • 4.21 Connecting auxiliary heaters -B5W- S and -D5W- S to coolant circuit
    72
  • 4.23 Coolant hose routing on vehicles with 2nd heat exchanger
    75
  • 4.25 Fuel supply to auxiliary heaters -B5W- S, -D5W- S or -D5W- Z
    76
  • 4.26 Removing and installing metering pump V54
    78
  • 4.27 Testing quantity of fuel delivered
    79
  • 4.28 Regulation of auxiliary heaters -B5W- S and -D5W- S
    80
  • 4.29 Start sequence
    82
  • 5 Auxiliary heater -D5Z- F, vehicles 05.2004 ▸
    83
  • 5.1 Repairing auxiliary heater -D5Z- F
    83
  • 5.2 Removing ambient temperature switch F38
    83
  • 5.3 Removing circulation pump V55
    83
  • 5.4 Removing and installing exhaust system
    83
  • 5.5 Road test for auxiliary heater in vehicle without Climatronic
    83
  • 5.6 Road test for auxiliary heater in vehicle with Climatronic
    83
  • 5.7 Removing and installing heater unit
    83
  • 5.8 Dismantling and assembling heater unit
    83
  • 5.9 Removing heat exchanger
    85
  • 5.10 Removing and installing flame monitor G64
    86
  • 5.11 Removing glow plug for heater Q9
    87
  • 5.12 Removing heater control unit J162
    87
  • 5.13 Renewing combustion air blower V6
    87
  • 5.14 Removing overheating sensor G189
    88
  • 5.15 Removing coolant temperature sender for heater G241
    88
  • 5.16 Checking flame monitor G64
    89
  • 5.17 Checking overheating sensor G189
    89
  • 5.18 Checking coolant temperature sender for heater G241
    90
  • 5.19 Checking ambient temperature switch F38
    91
  • 5.20 Connecting auxiliary heater -D5Z- F to coolant circuit
    91
  • 5.21 Coolant hose routing on vehicles with 2nd heat exchanger
    91
  • 5.22 Bleeding coolant circuit in vehicles with auxiliary heater -D5Z- F
    91
  • 5.23 Fuel supply to auxiliary heater -D5Z- F
    91
  • 5.24 Removing and installing metering pump V54
    91
  • 5.25 Testing quantity of fuel delivered
    91
  • 5.26 Regulation of auxiliary heater -D5Z- F
    91
  • 5.27 Start sequence
    92
  • 6 Auxiliary heater -D5S- F / -B5S- F, vehicles 05.2004 ▸
    94
  • 6.1 Repairing auxiliary heater -D5S- F / -B5S- F
    94
  • 6.2 Removing ambient temperature switch F38
    94
  • 6.3 Removing circulation pump V55
    94
  • 6.4 Removing pre-selection clock E111
    94
  • 6.5 Removing and installing exhaust system
    94
  • 6.6 Road test for auxiliary heater in vehicle without Climatronic
    94
  • 6.7 Road test for auxiliary heater in vehicle with Climatronic
    95
  • 6.8 Removing and installing heater unit
    95
  • 6.9 Dismantling and assembling heater unit
    95
  • 6.10 Removing heat exchanger
    95
  • 6.11 Removing and installing flame monitor G64
    95
  • 6.12 Removing glow plug for heater Q9
    95
  • 6.13 Removing heater control unit J162
    95
  • 6.14 Renewing combustion air blower V6
    95
  • 6.15 Removing overheating sensor G189
    95
  • 6.16 Removing coolant temperature sender for heater G241
    95
  • 6.17 Checking flame monitor G64
    96
  • 6.18 Checking overheating sensor G189
    96
  • 6.19 Checking coolant temperature sender for heater G241
    96
  • 6.20 Checking ambient temperature switch F38
    96
  • 6.21 Connecting auxiliary heater -D5S- F / -B5S- F to coolant circuit
    96
  • 6.22 Coolant hose routing on vehicles with 2nd heat exchanger
    96
  • 6.23 Bleeding coolant circuit in vehicles with auxiliary heater -D5S- F / -B5S- F
    96
  • 6.24 Fuel supply to auxiliary heater -D5S- F / -B5S- F
    96
  • 6.25 Removing and installing metering pump V54
    96
  • 6.26 Testing quantity of fuel delivered
    97
  • 6.27 Regulation of auxiliary heater -D5S- F / -B5S- F
    97
  • 6.28 Start sequence
    97
Hersteller­bezeichnung Supplementary heating
Hersteller Volkswagen
Passend für Sharan (1995 - 2010)
Passende Autotypen 7M
Kategorie Reparaturanleitung

Im Moment sind noch keine Bewertungen für dieses Produkt vorhanden.

Ähnliche Reparaturanleitungen

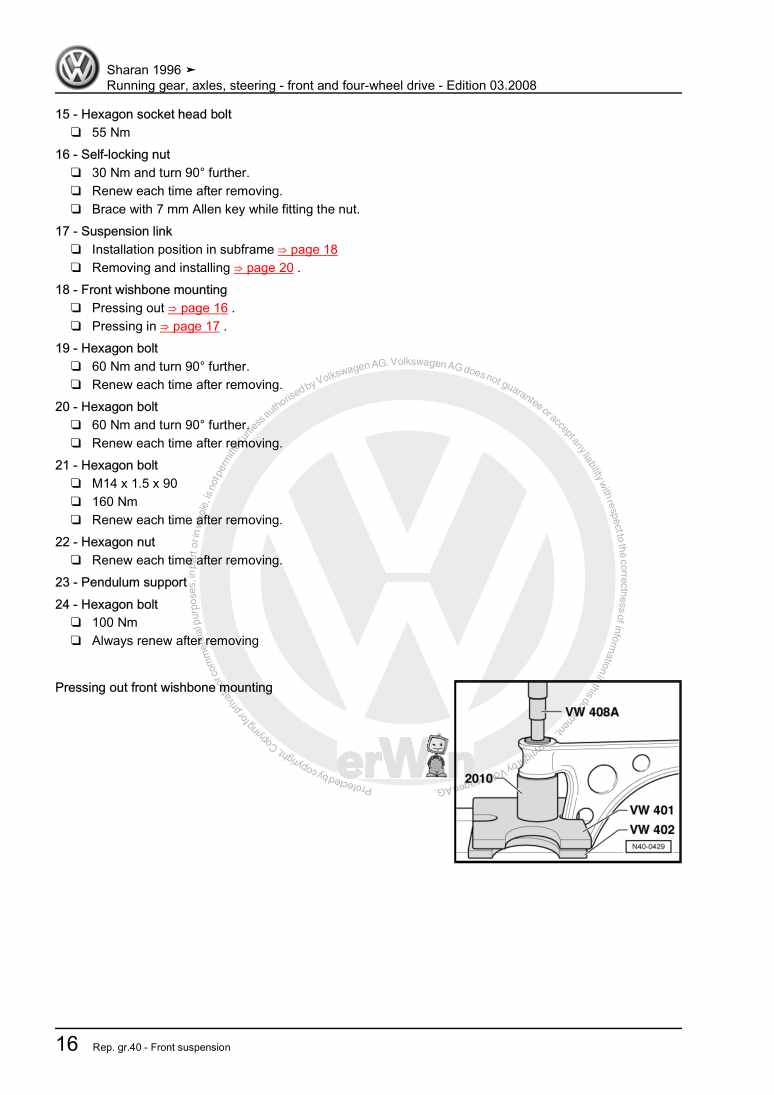
Running gear, axles, steering - front and four-wheel drive

Beispielseite für Reparaturanleitung Running gear, axles, steering - front and four-wheel drive

Für Sharan (1995 - 2010)

16,91 € Details

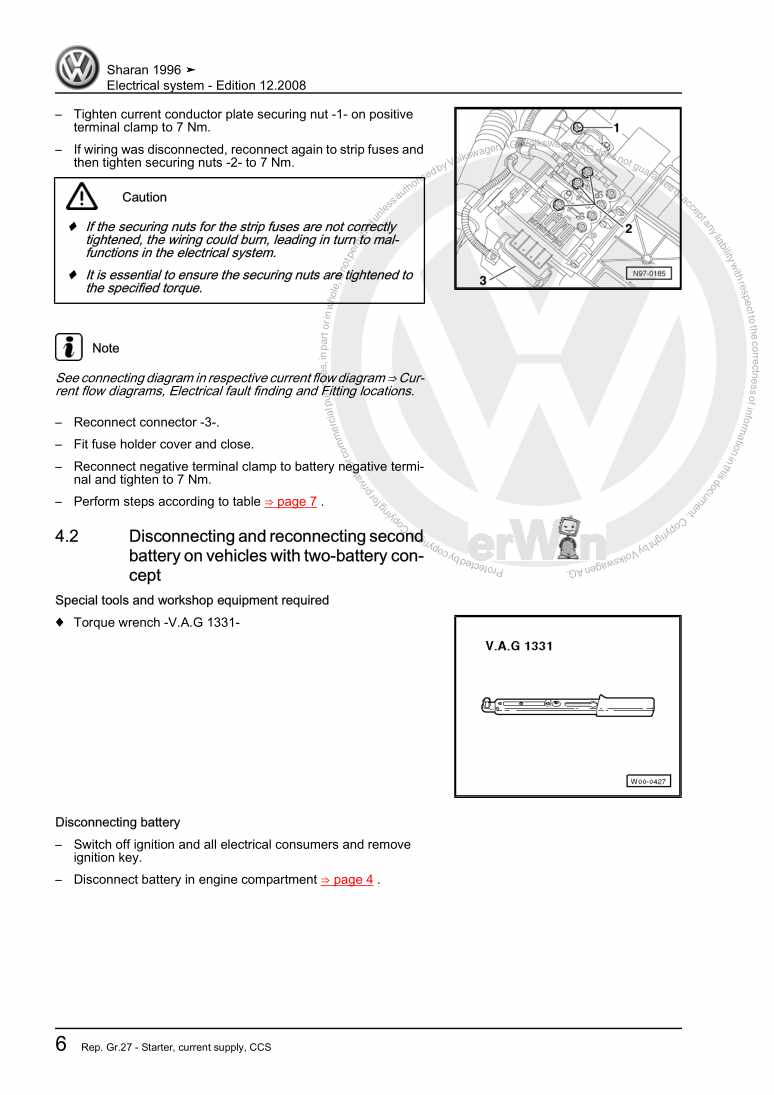
Electrical system

Beispielseite für Reparaturanleitung Electrical system

Für Sharan (1995 - 2010)

20,79 € Details

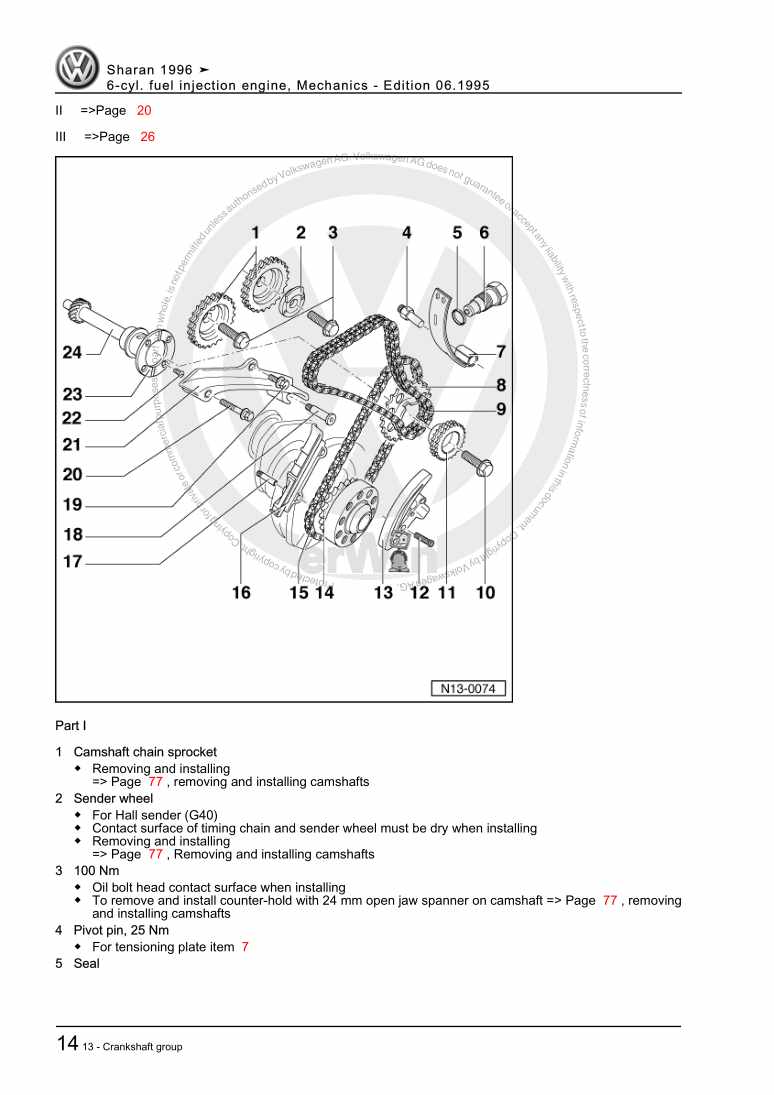
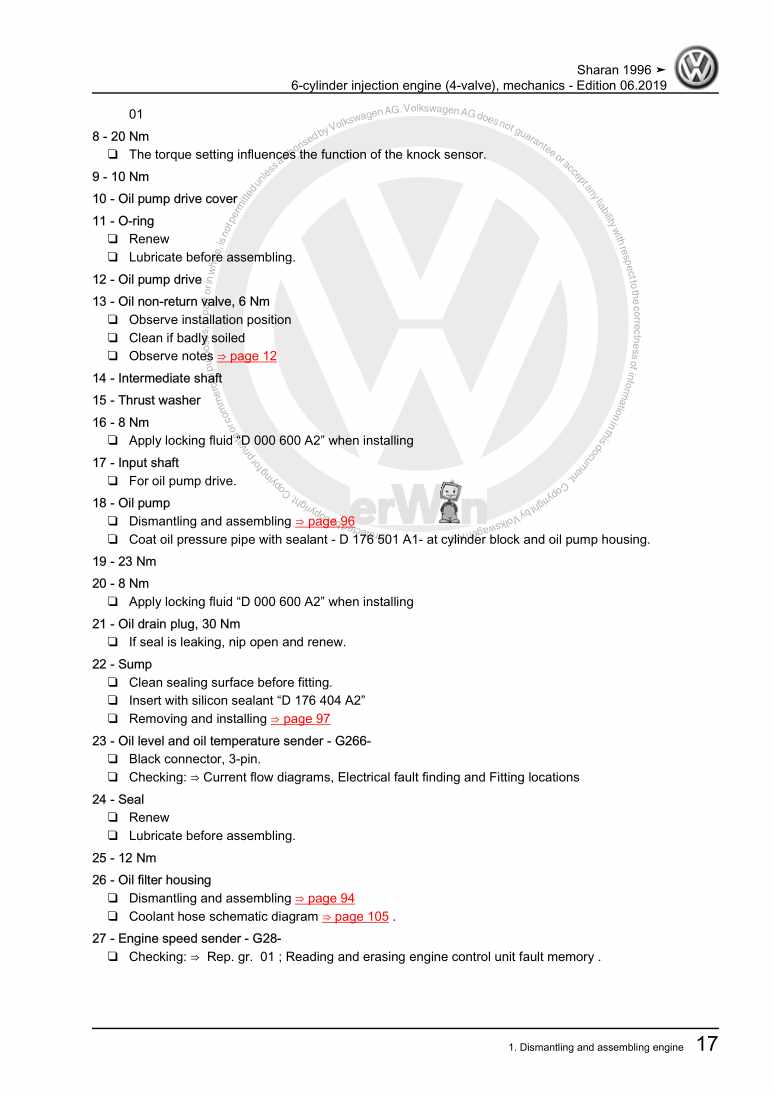
6-cyl. fuel injection engine, Mechanics

Beispielseite für Reparaturanleitung 6-cyl. fuel injection engine, Mechanics

Für Sharan (1995 - 2010)

14,21 € Details

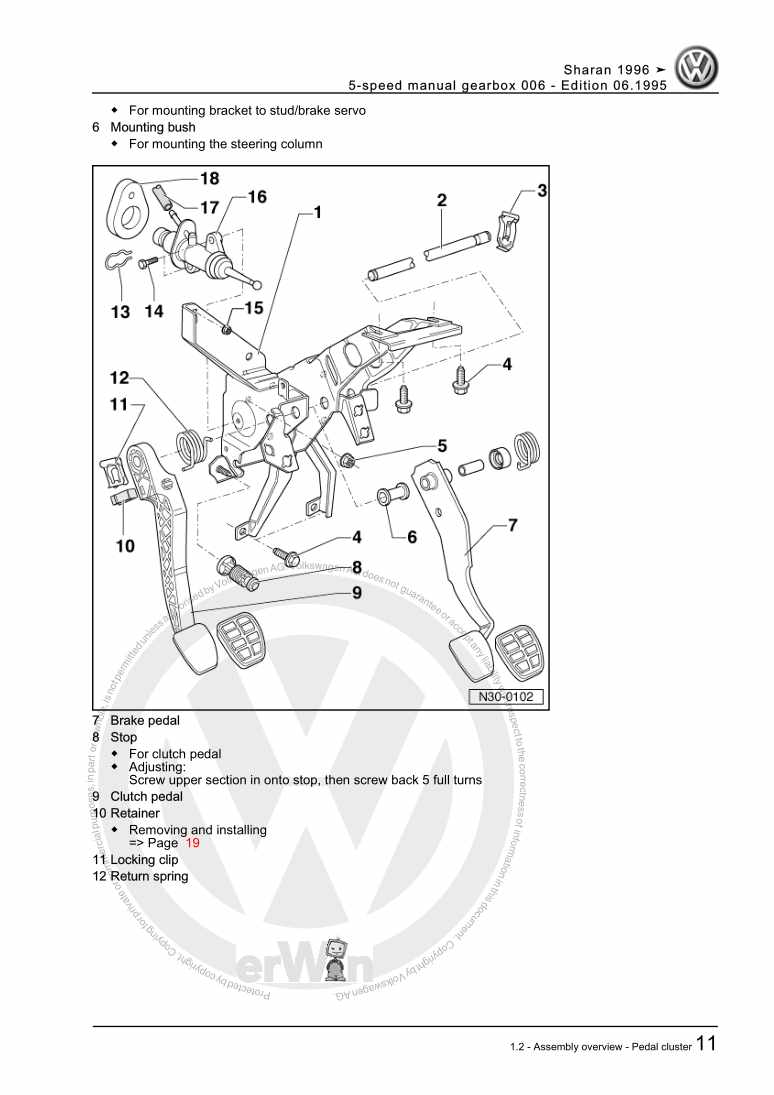
5-speed manual gearbox 006

Beispielseite für Reparaturanleitung 5-speed manual gearbox 006

Für Sharan (1995 - 2010)

13,70 € Details

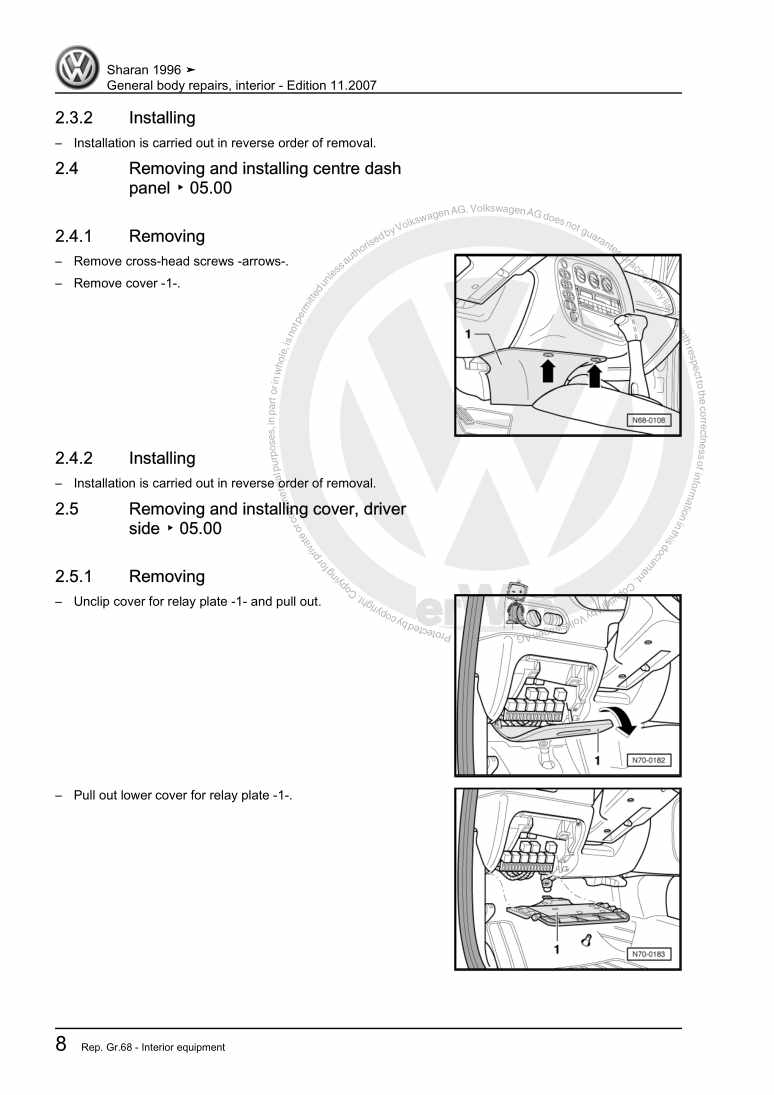
General body repairs, interior

Beispielseite für Reparaturanleitung General body repairs, interior

Für Sharan (1995 - 2010)

15,97 € Details

6-cylinder injection engine (4-valve), mechanics

Beispielseite für Reparaturanleitung 6-cylinder injection engine (4-valve), mechanics

Für Sharan (1995 - 2010)

14,29 € Details

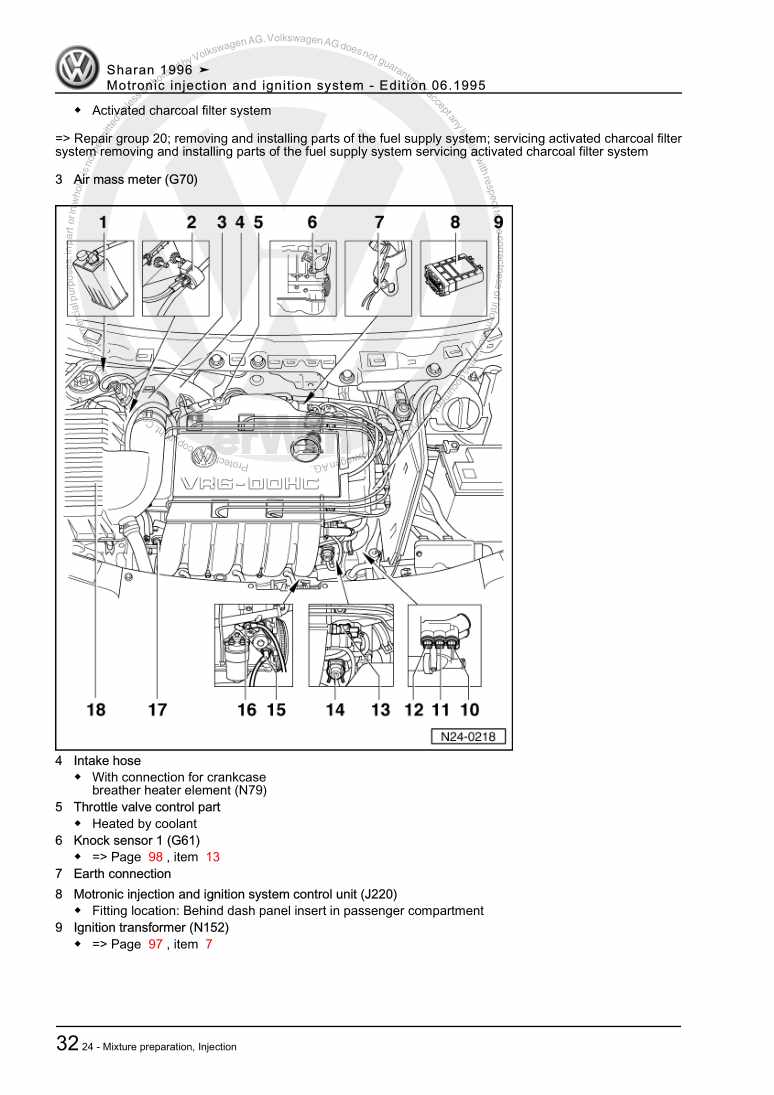
Motronic injection and ignition system

Beispielseite für Reparaturanleitung Motronic injection and ignition system

Für Sharan (1995 - 2010)

10,26 € Details

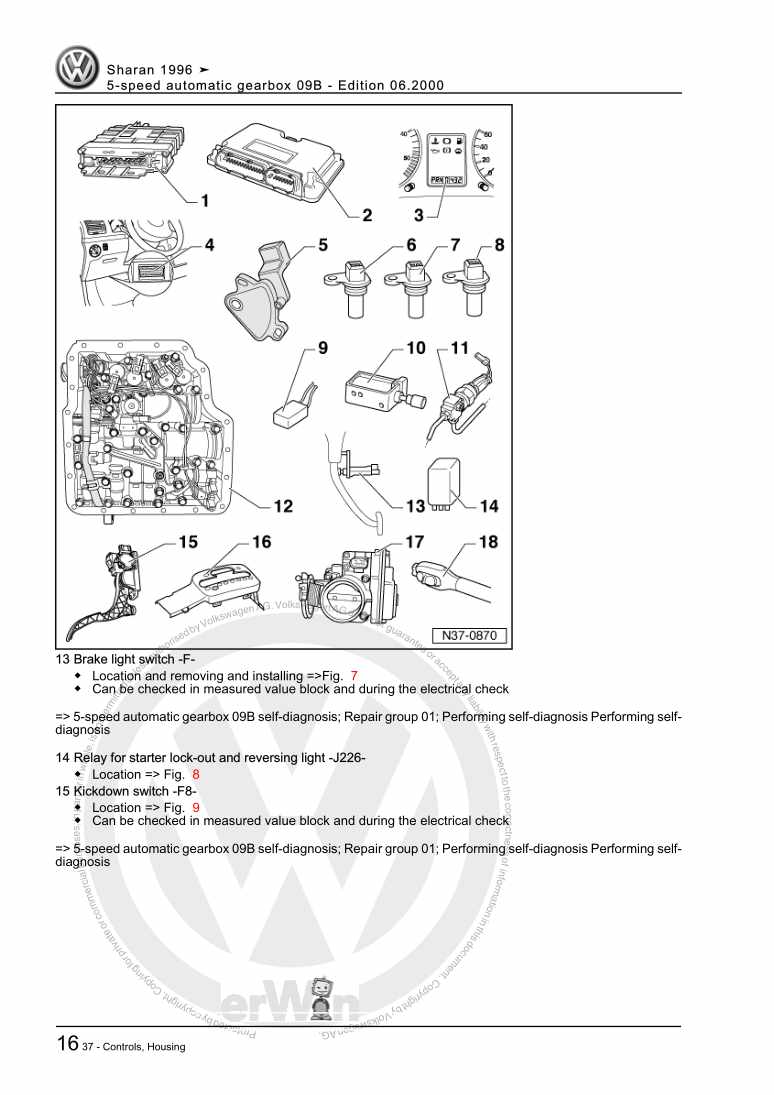
5-speed automatic gearbox 09B

Beispielseite für Reparaturanleitung 5-speed automatic gearbox 09B

Für Sharan (1995 - 2010)

10,54 € Details

Sharan - basic equipment, from June 1995

Beispielseite für Reparaturanleitung Sharan - basic equipment, from June 1995

Für Sharan (1995 - 2010)

31,20 € Details

Heating, air conditioning

Beispielseite für Reparaturanleitung Heating, air conditioning

Für Sharan (1995 - 2010)

13,63 € Details

Unsere Best Seller

Schon gewusst? Wir bieten auch originale Autoteile an.

Autoteil 8W6807134A Halter

8W6807134A

Halter

70,89 €

Details
Autoteil 4G0919268H Aufnahme

4G0919268H

Aufnahme

22,44 €

Details
Autoteil 021133687A Halter

021133687A

Halter

10,33 €

Details
Autoteil ASE43522200000 Fettstein

ASE43522200000

Fettstein

56,23 €

Details
Autoteil N91005902 Schraube

N91005902

Schraube

3,22 €

Details

Elektrische Anlage

Beispielseite für Reparaturanleitung Elektrische Anlage

Für New Beetle Cabrio (2003 - 2010) / New Beetle / New Beetle (USA) (1998 - 2007) / New Beetle (Europe) (1999 - 2002)

21,63 € Details

1AV Einspritz- und Zündanlage

Beispielseite für Reparaturanleitung 1AV Einspritz- und Zündanlage

Für Golf / Golf Variant / Vento (1992 - 1999)

8,28 € Details

Heizung, Klimaanlage

Beispielseite für Reparaturanleitung Heizung, Klimaanlage

Für Caddy (2004 - 2010) / Caddy KA / Caddy Maxi (2011)

12,76 € Details

image/svg+xml Über Clonck

Originale Reparaturanleitungen und Ersatzteile

Unsere Reparaturanleitungen sind Originale, kommen direkt von Volkswagen und erfüllen die höchsten Qualitätsstandards.

In unserem Originalteile-Shop verkaufen wir hochwertige Originalersatzteile der Fahrzeughersteller. Mithilfe der Suche gibst du die gewünschte Teilenummer (OE-Nummer) ein und bestellst schnell und einfach das benötigte Ersatzteil.

Höchste Qualitätsstandards

Bei Clonck wollen wir Autoschrauber und Kfz-Profis glücklich machen. Aus diesem Grund findest du bei Clonck ausschließlich professionelle und hochwertige Reparaturanleitungen, mit deren Hilfe du dein Fahrzeug fachgerecht reparieren kannst.

Unsere Partner

Autohaus Schmidt GmbH
Automag GmbH Filiale Laim
KFZ-VERLAG GmbH
Zimpel und Franke GmbH

Clonck: Der Autoreparatur-Shop - gibt's auch als App!

Clonck App Logo Play Store

Clonck: Passende Autoteile für deine Autoreparatur

4,5 90

Mit Clonck bestellst du die richtigen Originalersatzteile im Handumdrehen.

  • Fahrzeugmodell hinzufügen
  • Baugruppe auswählen
  • Fahrzeug-Identifizierungsnummer (FIN) eingeben
  • Über 5.000 originale Reparaturanleitungen einsehen
Jetzt App starten
Clonck App Preview Auto Mobiltelefon Autoteile