DER AUTOREPARATUR-SHOP
0
Home » Anleitungen » Running gear, Axles, Steering, Front and four wheel drive
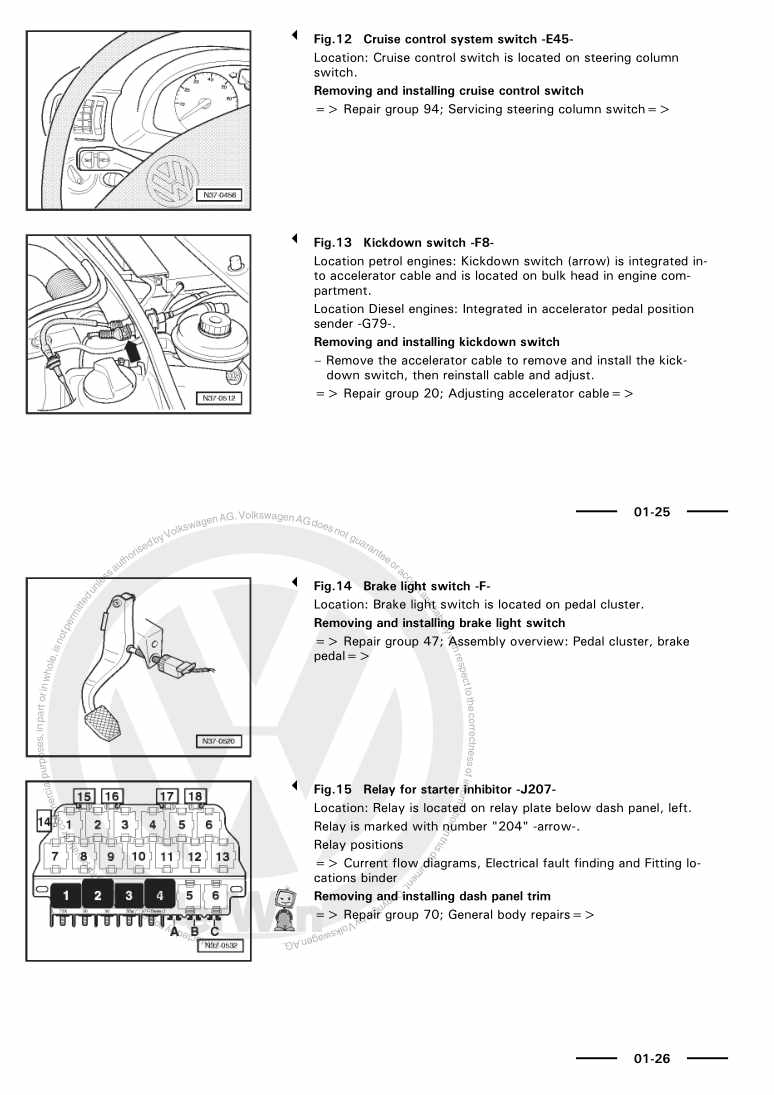
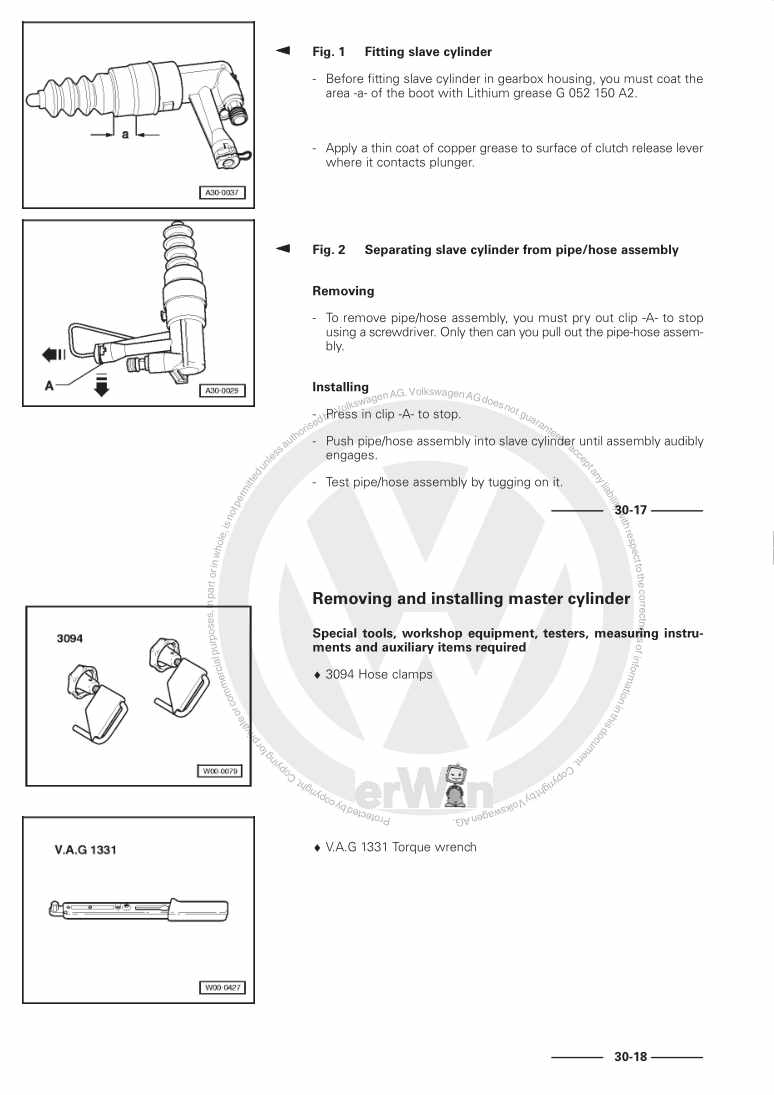
  • Beispielseite für Reparaturanleitung Running gear, Axles, Steering, Front and four wheel drive
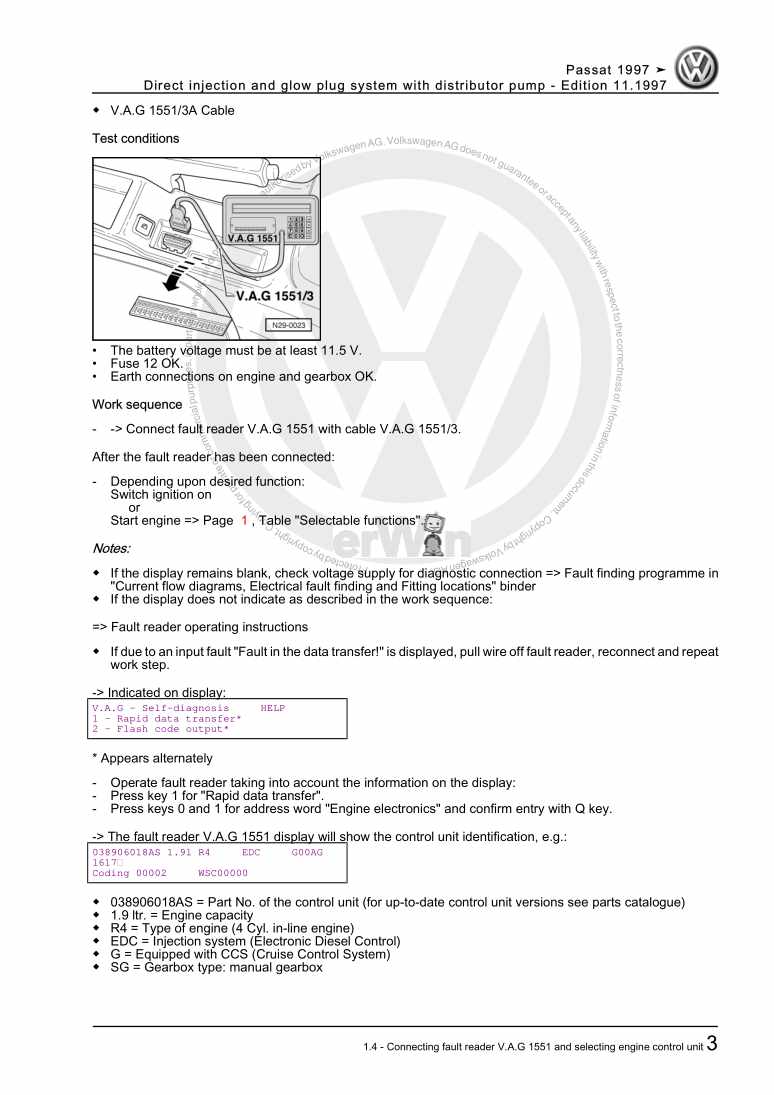
  • Beispielseite für Reparaturanleitung 2 Running gear, Axles, Steering, Front and four wheel drive
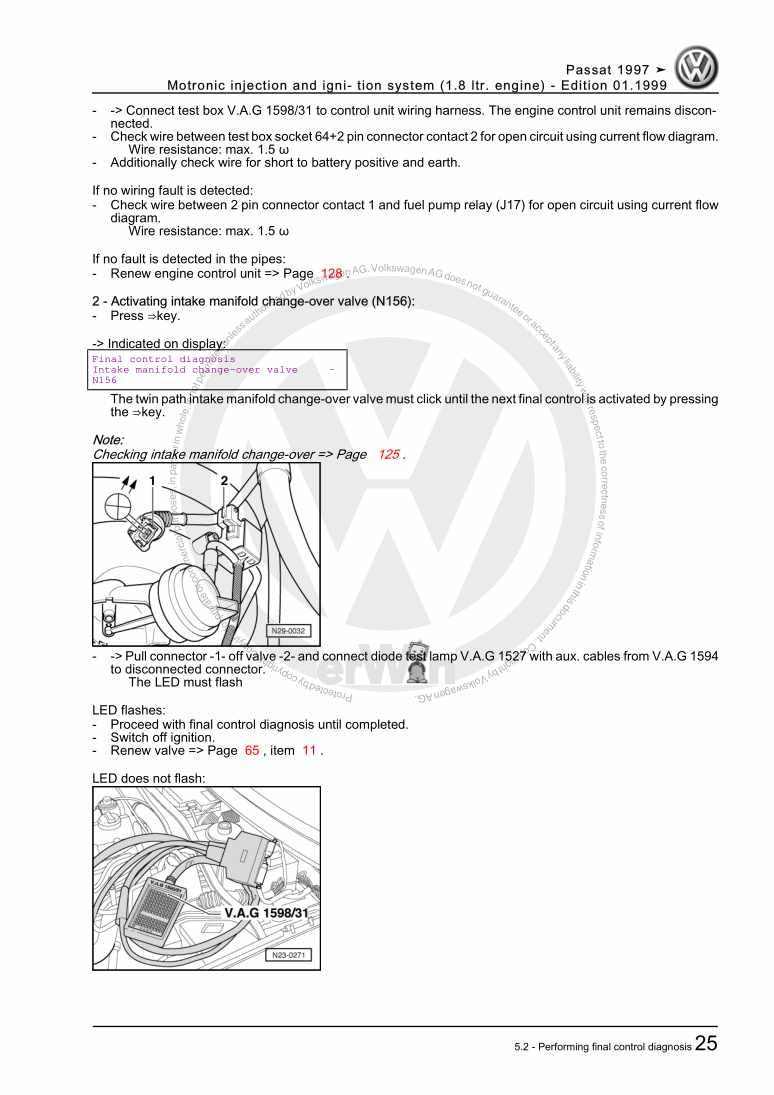
  • Beispielseite für Reparaturanleitung 3 Running gear, Axles, Steering, Front and four wheel drive

Running gear, Axles, Steering, Front and four wheel drive

Für Passat / Passat Variant

Original VW-Reparaturanleitung


21,63 €inkl. 7% MwSt.

  • Deutsch
  • English

Sofort als Download verfügbar

Sprache: English

Digitale PDF Version

7.694 KB

270 Seiten

Detaillierte technische Daten

Sofort lesbar

Diese Reparaturanleitung umfasst: Appraisal of accident vehicles, Electrical/electronic components and locations, Repairing drive shafts, Fitting wheel and tyre, Instructions for changing or fitting wheels, Protecting wheel centring seat against corrosion, Dismantling and assembling power steering rack und Vane pump, reservoir, hydraulic lines on vehicles with 4 or 5-cylinder engine. Mehr anzeigen
Sichere Zahlung per PayPal, Kreditkarte, Lastschrift, Sofort-Überweisung oder Giropay
PayPal Logo SEPA Lastschrift Logo Giropay Logo Sofort Überweisung Logo

Reparaturanleitung Passat / Passat Variant Running gear, Axles, Steering, Front and four wheel drive pdf Download mit dem Inhalt:

Kapitelübersicht

  • Technical data
    1
  • 1 Checklist for evaluating running gear of accident vehicles
    1
  • 2 Technical data
    3
  • 2.1 Running gear
    3
  • 2.2 Steering
    4
  • 2.3 Wheels, tyres
    4
  • Front suspension
    5
  • 1 Appraisal of accident vehicles
    5
  • 2 Electrical/electronic components and locations
    6
  • 2.2 Front left vehicle level sender G78 on front axle
    7
  • 2.4 Rear left vehicle level sender G76 on rear axle of vehicles with four-wheel drive
    9
  • 3 Repairing front suspension
    11
  • 3.1 Raising wheel suspension to unladen position
    15
  • 3.2 Modified wheel bearing housing/track rod ball joint
    17
  • 3.3 Modified wheel bearing housing from model year 2002
    17
  • 3.4 Modified track control link from model year 2002
    17
  • 3.5 Modified coupling rod for anti-roll bar
    18
  • 3.6 Repairing threads in longitudinal member
    19
  • 3.7 Separating upper suspension link joint at wheel bearing housing
    19
  • 3.8 Removing and installing suspension strut
    22
  • 3.9 Repairing suspension strut
    24
  • 3.10 Removing and installing spring
    26
  • 3.11 Removing and installing wheel bearing housing
    30
  • 3.12 Pressing out and pressing in front wheel bearing
    33
  • 3.14 Checking the track control link
    42
  • 3.15 Removing and installing track control link
    42
  • 3.16 Renewing track control link bushes
    44
  • 3.17 Removing and installing guide link
    46
  • 3.18 Renewing guide link bushes
    48
  • 3.19 Renewing anti-roll bar bushes
    50
  • 3.20 Removing and installing mounting bracket
    50
  • 3.21 Renewing bushes for front and rear upper links
    54
  • 3.22 Removing and installing subframe
    55
  • 3.23 Renewing subframe bushes
    61
  • 4 Repairing drive shafts
    65
  • 4.1 Removing and installing drive shafts
    65
  • 4.2 Repairing drive shaft with constant velocity joint
    66
  • 4.3 Repairing drive shaft with triple roller joint
    72
  • 4.4 Dismantling and assembling triple roller joint
    75
  • Rear suspension
    80
  • 1 Appraisal of accident vehicles
    80
  • 2 Repairing rear axle (front-wheel drive vehicles)
    81
  • 2.1 Rear axle in unladen position
    81
  • 2.2 Removing and installing rear axle
    82
  • 2.3 Assembly overview - rear axle beam
    86
  • 2.4 Removing and installing shock absorber/spring
    88
  • 2.5 Assembly overview - shock absorber on vehicle with front-wheel drive
    89
  • 3 Repairing wheel bearing
    91
  • 3.1 Removing and installing wheel bearing/wheel hub unit
    91
  • 3.2 Assembly overview - wheel mounting for vehicles with front-wheel drive
    91
  • 4 Repairing rear axle (vehicles with four-wheel drive)
    93
  • 4.3 Repairing suspension strut, vehicles with four-wheel drive
    97
  • 4.4 Dismantling and assembling suspension strut
    98
  • 4.5 Assembly overview of rear axle with four-wheel drive
    100
  • 4.6 Removing and installing subframe
    103
  • 4.7 Aligning subframe to vehicle
    106
  • 4.8 Renewing bonded rubber bushes in subframe
    107
  • 4.9 Assembly overview of subframe/final drive
    110
  • 4.10 Pressing bonded rubber bush for cross member in and out
    111
  • 4.11 Pressing bonded rubber bush for gearbox support in and out
    112
  • 5.1 Removing and installing wheel bearing
    117
  • 5.2 Pressing rear wheel bearing out and in with wheel bearing housing installed
    120
  • 5.3 Removing and installing steel wheel bearing housing
    123
  • 5.4 Removing and installing bonded rubber bush for steel wheel bearing housing
    125
  • 5.5 Removing and installing upper links
    127
  • 5.6 Renewing front and rear bonded rubber bushes for upper suspension link
    127
  • 5.7 Removing and installing lower suspension link
    129
  • 5.8 Repairing lower suspension link
    130
  • 5.9 Removing and installing coupling rod for anti-roll bar
    133
  • 6.1 Removing and installing wheel bearing
    137
  • 6.2 Removing and installing aluminium wheel bearing housing
    140
  • 6.4 Removing and installing coupling rod for anti-roll bar
    145
  • 7 Repairing rear drive shaft
    147
  • 7.1 Removing and installing drive shafts
    147
  • 7.2 Repairing drive shaft with constant velocity joint
    148
  • Self-levelling suspension
    153
  • Wheels, tyres, vehicle geometry
    154
  • 1 Appraisal of accident vehicles
    154
  • 2 Fitting wheel and tyre
    155
  • 2.1 Fitting wheels
    155
  • 3 Wheel alignment
    156
  • 3.1 General
    156
  • 3.2 Vehicle alignment specifications, vehicles with front-wheel drive
    157
  • 3.5 Test prerequisites
    161
  • 3.6 Test preparations
    162
  • 3.7 Assignment of adapters to running gear versions (for wheel alignment)
    164
  • 3.8 Toe constant “S”
    164
  • 3.9 Preparatory measures for checking/adjusting track constant “S”
    165
  • 3.10 Vehicles pulling to one side; accident vehicles
    167
  • 3.11 Averaging front axle camber
    168
  • 3.12 Checking camber at rear wheels (front-wheel drive vehicles)
    169
  • 3.13 Centralising toe setting at rear wheels (front-wheel drive vehicles)
    169
  • 3.14 Adjusting rear axle camber, vehicles with four-wheel drive
    170
  • 3.15 Adjusting rear axle toe, vehicles with four-wheel drive
    170
  • 3.16 Adjusting toe constant “S”
    170
  • 3.17 Adjusting toe at front axle
    171
  • 4 Wheels, tyres
    172
  • 4.1 Models with breakdown set
    172
  • 4.2 Tyre sealant
    172
  • 4.3 Removing a tyre
    172
  • 4.4 Fitting a new tyre
    173
  • 4.5 Tyre sealant disposal
    173
  • 5 Instructions for changing or fitting wheels
    174
  • 5.1 Fitting wheels
    175
  • 6 Protecting wheel centring seat against corrosion
    176
  • 7 Vibration due to wheels/tyres - causes and rectification
    177
  • 7.1 Causes of vibration
    177
  • 7.2 Balancing wheels
    177
  • 7.3 Conducting a road test before balancing wheels
    177
  • 7.4 Balancing wheels on stationary wheel balancing machine
    178
  • 7.5 Vibration control system VAS 6230
    180
  • 7.6 Finish balancer
    180
  • 7.7 Radial and lateral run-out of wheels and tyres
    181
  • 7.9 Checking radial and lateral run-out on wheel rim
    182
  • 7.10 Matching
    183
  • 7.11 Flat spots caused by storage or handling
    184
  • Steering
    186
  • 1 Appraisal of accident vehicles
    186
  • 2 Steering column
    187
  • 2.1 Removing and installing steering column
    187
  • 2.2 Checking steering column for damage
    191
  • 2.3 Removing and installing steering lock housing
    191
  • 3 Steering rack
    194
  • 3.1 Assembly overview - steering rack, LHD vehicles
    194
  • 3.2 Assembly overview - steering rack, RHD vehicles
    195
  • 3.3 Removing and installing track rods
    195
  • 3.6 Removing and installing right-hand drive steering rack
    207
  • 4 Dismantling and assembling power steering rack
    214
  • 4.2 Dismantling and assembling power steering rack on vehicles with 5, 6 or 8-cylinder engine
    215
  • 4.3 Checking power steering fluid level
    216
  • 4.4 Bleeding steering system
    216
  • 4.5 Checking steering system for leaks
    217
  • 4.6 Adjusting power steering rack
    217
  • 5 Vane pump, reservoir, hydraulic lines on vehicles with 4 or 5-cylinder engine
    219
  • 5.1 Assembly overview for 4 or 5-cylinder engine
    219
  • 5.2 Checking vane pump delivery pressure on 4 or 5-cylinder engine
    221
  • 5.3 Removing and installing vane pump on 4 or 5-cylinder engine
    222
  • 6.1 Assembly overview for 6-cylinder injection engine
    227
  • 6.2 Checking vane pump delivery pressure, 6-cylinder injection engine
    229
  • 6.3 Assembly overview of vane pump for 6-cylinder injection engine
    231
  • 7.1 Assembly overview, 6-cylinder injection engine, 5 valves
    235
  • 7.2 Checking vane pump delivery pressure, 6-cylinder injection engine, 5 valves
    237
  • 7.3 Removing and installing power steering vane pump, 6-cylinder injection engine, 5 valves
    239
  • 7.4 Assembly overview - vane pump, 6-cylinder injection engine, 5 valves
    242
  • 8 Vane pump, reservoir, hydraulic lines on vehicles with V6 TDI engine
    244
  • 8.1 Assembly overview of V6 TDI engine
    244
  • 8.2 Checking vane pump delivery pressure, V6 TDI engine
    245
  • 8.3 Removing and installing power steering vane pump for V6 TDI engine
    247
  • 8.4 Assembly overview of vane pump for V6 TDI engine
    252
  • 9.1 Assembly overview for 8-cylinder injection engine
    254
  • 9.2 Checking vane pump delivery pressure, 8-cylinder injection engine
    256
  • 9.3 Removing and installing power steering vane pump on 8-cylinder injection engine
    258
Hersteller­bezeichnung Running gear, Axles, Steering, Front and four wheel drive
Hersteller Volkswagen
Passend für Passat / Passat Variant (1997 - 2005)
Passende Autotypen 3B
Kategorie Reparaturanleitung

Im Moment sind noch keine Bewertungen für dieses Produkt vorhanden.

Ähnliche Reparaturanleitungen

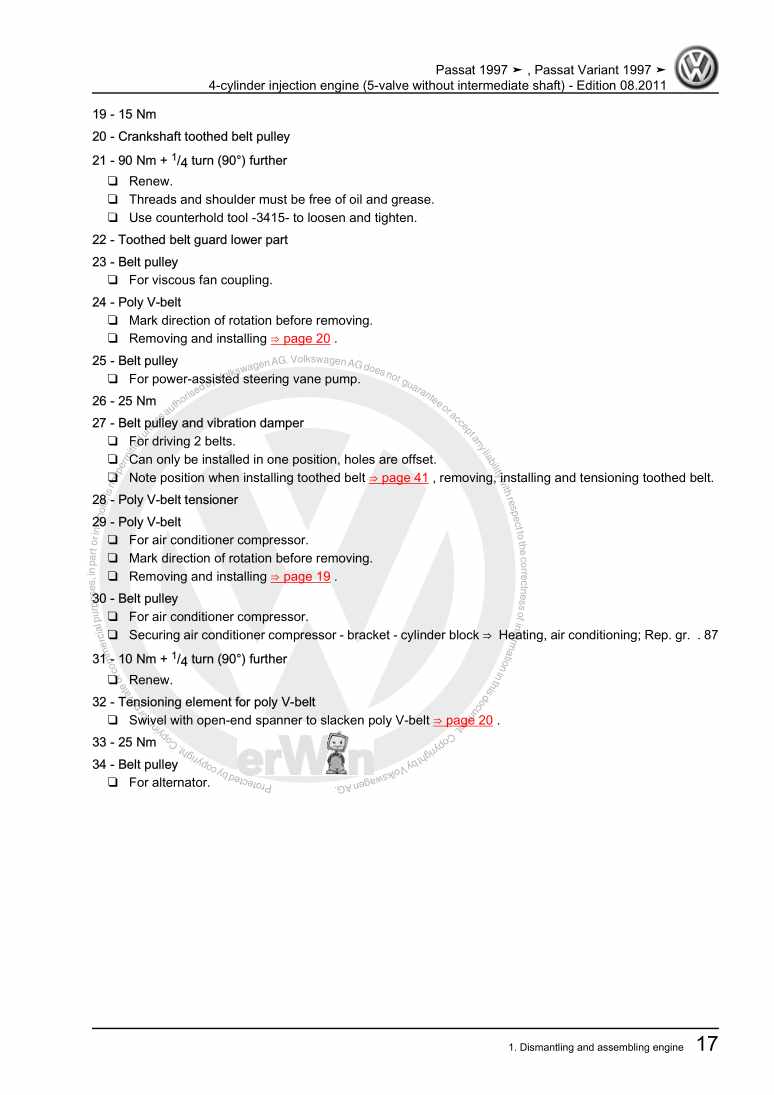
4-cylinder injection engine (5-valve without intermediate shaft)

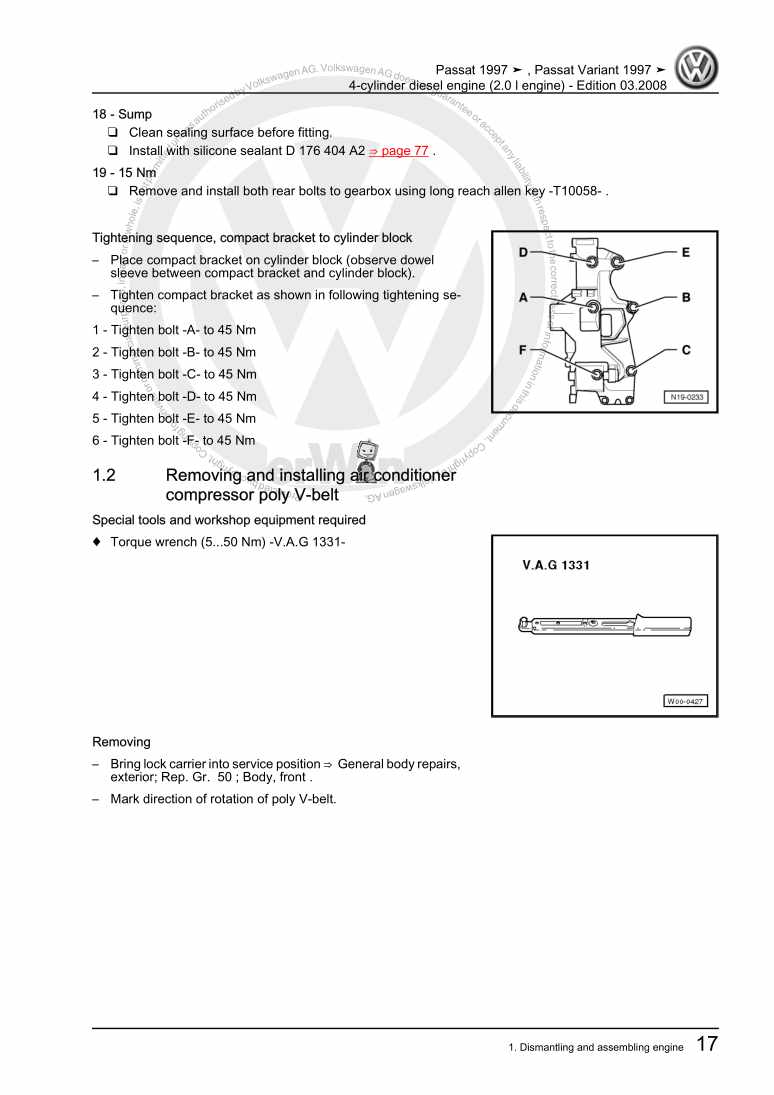
Beispielseite für Reparaturanleitung 4-cylinder injection engine (5-valve without intermediate shaft)

Für Passat / Passat Variant (1997 - 2005)

18,65 € Details

4-cylinder diesel engine (2.0 l engine)

Beispielseite für Reparaturanleitung 4-cylinder diesel engine (2.0 l engine)

Für Passat / Passat Variant (1997 - 2005)

13,78 € Details

Maintenance

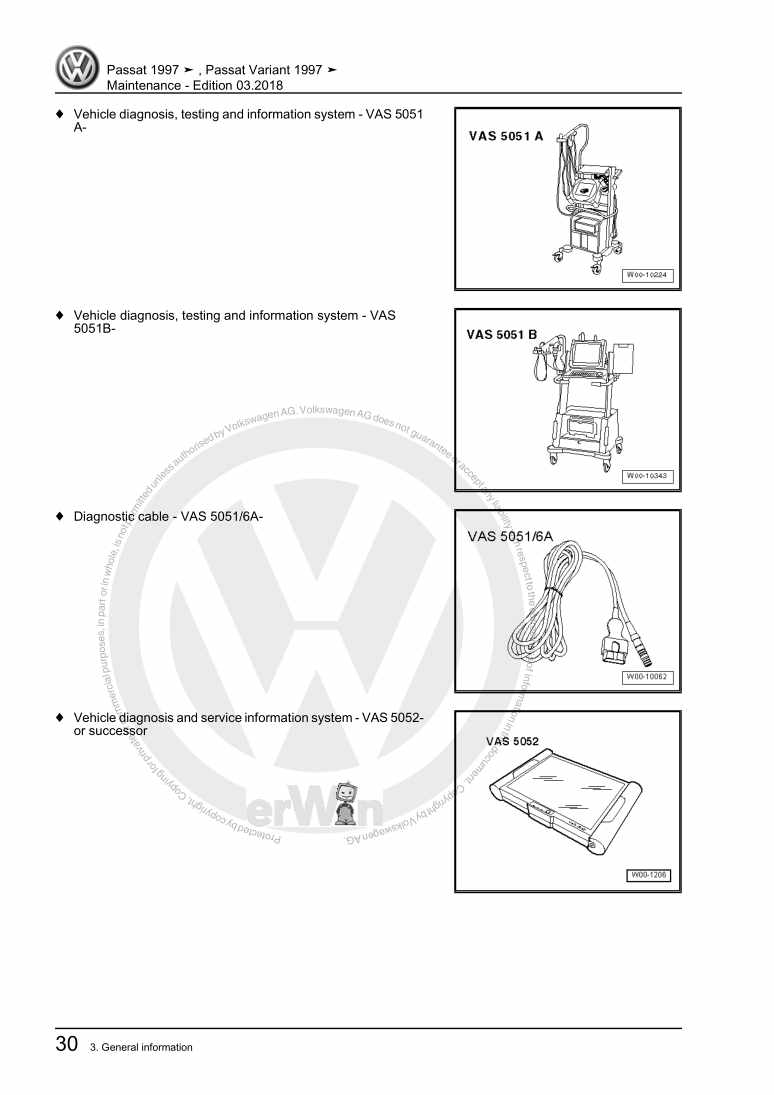
Beispielseite für Reparaturanleitung Maintenance

Für Passat / Passat Variant (1997 - 2005)

15,82 € Details

4-Cyl. injection engine (2 valve), Mechanics

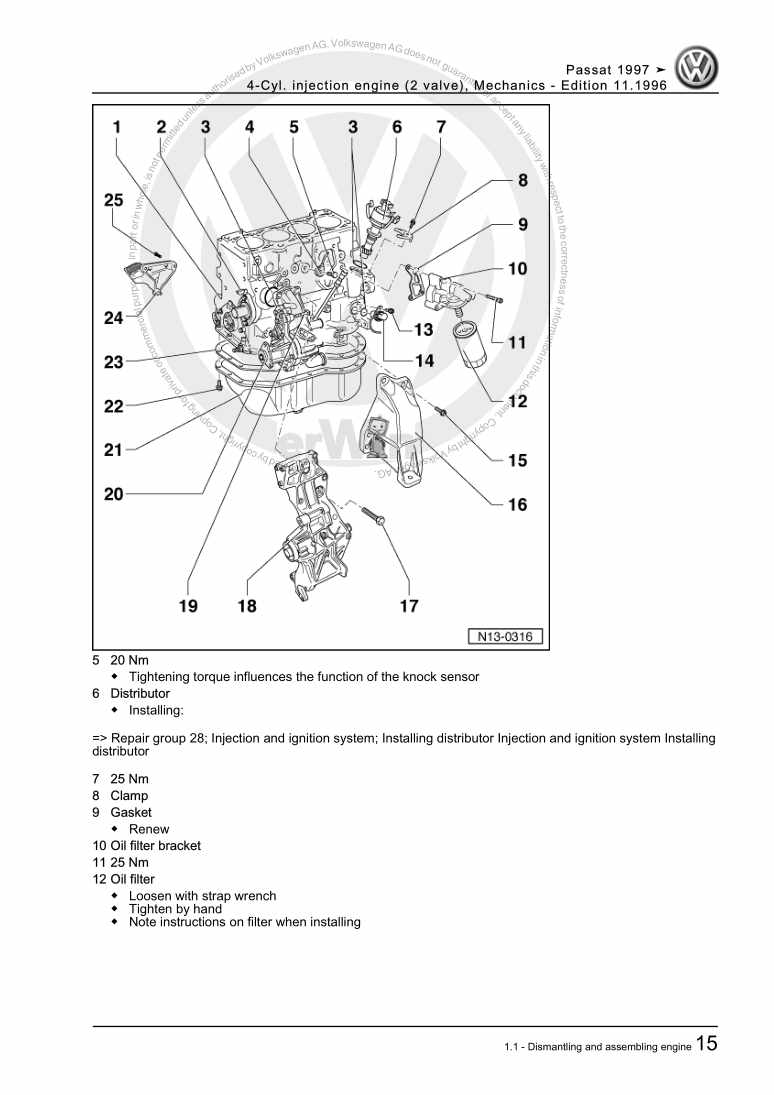
Beispielseite für Reparaturanleitung 4-Cyl. injection engine (2 valve), Mechanics

Für Passat / Passat Variant (1997 - 2005)

12,40 € Details

5-speed automatic gearbox 01V - self-diagnosis

Beispielseite für Reparaturanleitung 5-speed automatic gearbox 01V - self-diagnosis

Für Passat / Passat Variant (1997 - 2005)

6,76 € Details

6-speed manual gearbox 01E 4 wheel drive/final drive

Beispielseite für Reparaturanleitung 6-speed manual gearbox 01E 4 wheel drive/final drive

Für Passat / Passat Variant (1997 - 2005)

21,00 € Details

Direct injection and glow plug system with distributor pump

Beispielseite für Reparaturanleitung Direct injection and glow plug system with distributor pump

Für Passat / Passat Variant (1997 - 2005)

10,33 € Details

Motronic injection and igni- tion system (1.8 ltr. engine)

Beispielseite für Reparaturanleitung Motronic injection and igni- tion system (1.8 ltr. engine)

Für Passat / Passat Variant (1997 - 2005)

14,36 € Details

Motronic injection and ignition system (5-cyl., 4V)

Beispielseite für Reparaturanleitung Motronic injection and ignition system (5-cyl., 4V)

Für Passat / Passat Variant (1997 - 2005)

15,68 € Details

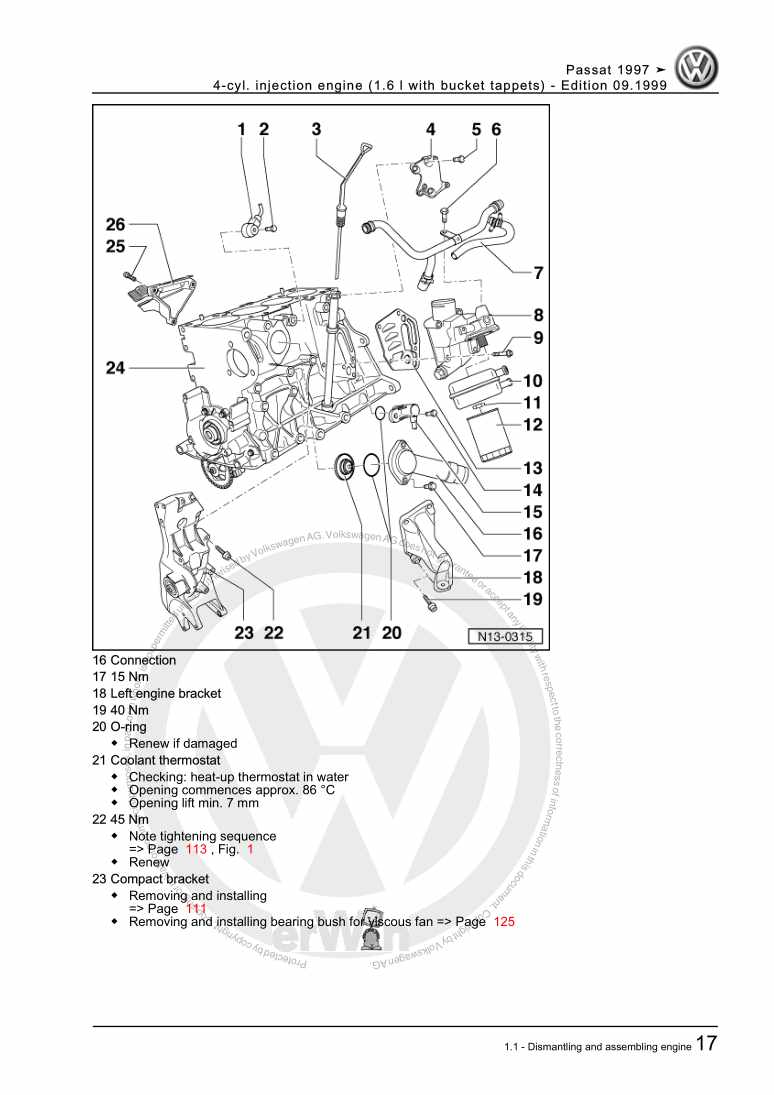
4-cyl. injection engine (1.6 l with bucket tappets)

Beispielseite für Reparaturanleitung 4-cyl. injection engine (1.6 l with bucket tappets)

Für Passat / Passat Variant (1997 - 2005)

18,80 € Details

Unsere Best Seller

Schon gewusst? Wir bieten auch originale Autoteile an.

Autoteil 2K5863328 Einlage

2K5863328

Einlage

6,02 €

Details
Autoteil 6Q0810221 Schlieteil

6Q0810221

Schlieteil

48,10 €

Details
Autoteil 070109153 Deckel

070109153

Deckel

38,73 €

Details
Autoteil N904162024PK Schraube

N904162024PK

Schraube

1,29 €

Details
Autoteil 06D103469N Zyl.Kopfha

06D103469N

Zyl.Kopfha

257,96 €

Details

Verteilergetriebe und Achsantriebe

Beispielseite für Reparaturanleitung Verteilergetriebe und Achsantriebe

Für Touareg (2003 - 2007)

12,83 € Details

Ratgeber Räder, Reifen

Beispielseite für Reparaturanleitung Ratgeber Räder, Reifen

Für Touran (2016 > )

5,52 € Details

Nr. 526: Die Dieselmotoren-Baureihe EA288 mit Abgasnorm EU6

Beispielseite für Reparaturanleitung Nr. 526: Die Dieselmotoren-Baureihe EA288 mit Abgasnorm EU6

5,89 € Details

image/svg+xml Über Clonck

Originale Reparaturanleitungen und Ersatzteile

Unsere Reparaturanleitungen sind Originale, kommen direkt von Volkswagen und erfüllen die höchsten Qualitätsstandards.

In unserem Originalteile-Shop verkaufen wir hochwertige Originalersatzteile der Fahrzeughersteller. Mithilfe der Suche gibst du die gewünschte Teilenummer (OE-Nummer) ein und bestellst schnell und einfach das benötigte Ersatzteil.

Höchste Qualitätsstandards

Bei Clonck wollen wir Autoschrauber und Kfz-Profis glücklich machen. Aus diesem Grund findest du bei Clonck ausschließlich professionelle und hochwertige Reparaturanleitungen, mit deren Hilfe du dein Fahrzeug fachgerecht reparieren kannst.

Unsere Partner

Autohaus Schmidt GmbH
Automag GmbH Filiale Laim
KFZ-VERLAG GmbH
Zimpel und Franke GmbH

Clonck: Der Autoreparatur-Shop - gibt's auch als App!

Clonck App Logo Play Store

Clonck: Passende Autoteile für deine Autoreparatur

4,5 90

Mit Clonck bestellst du die richtigen Originalersatzteile im Handumdrehen.

  • Fahrzeugmodell hinzufügen
  • Baugruppe auswählen
  • Fahrzeug-Identifizierungsnummer (FIN) eingeben
  • Über 5.000 originale Reparaturanleitungen einsehen
Jetzt App starten
Clonck App Preview Auto Mobiltelefon Autoteile