DER AUTOREPARATUR-SHOP
0
Home » Anleitungen » General body repairs, exterior
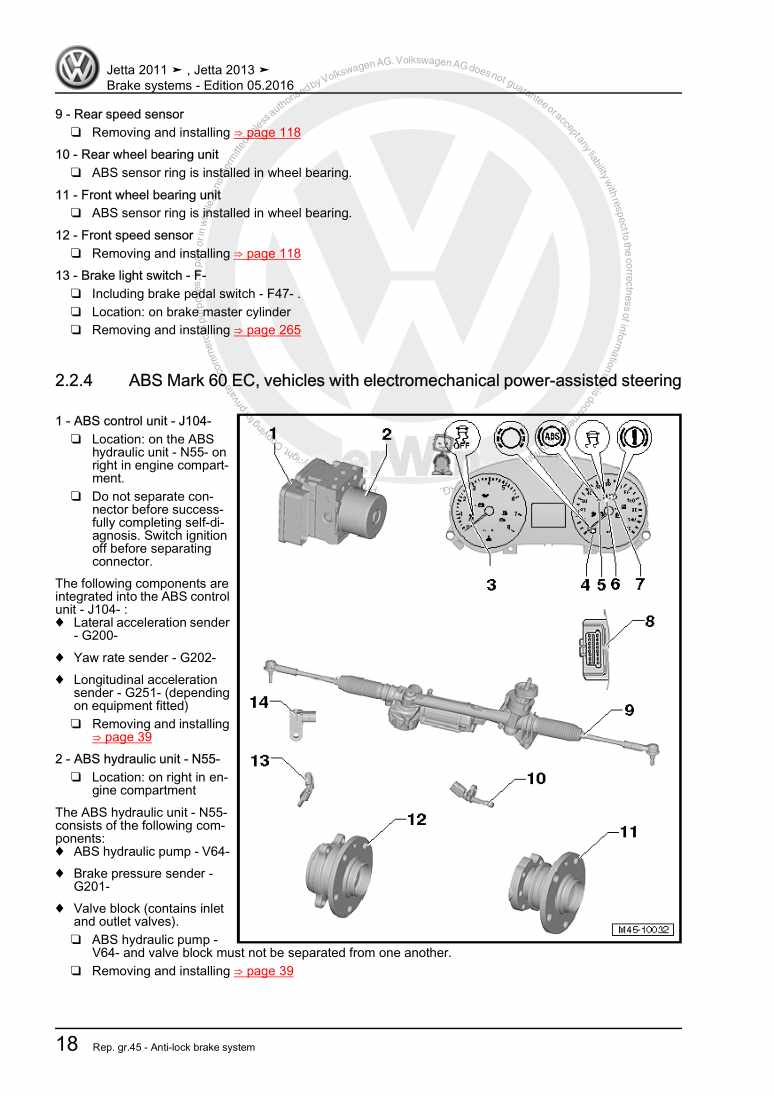
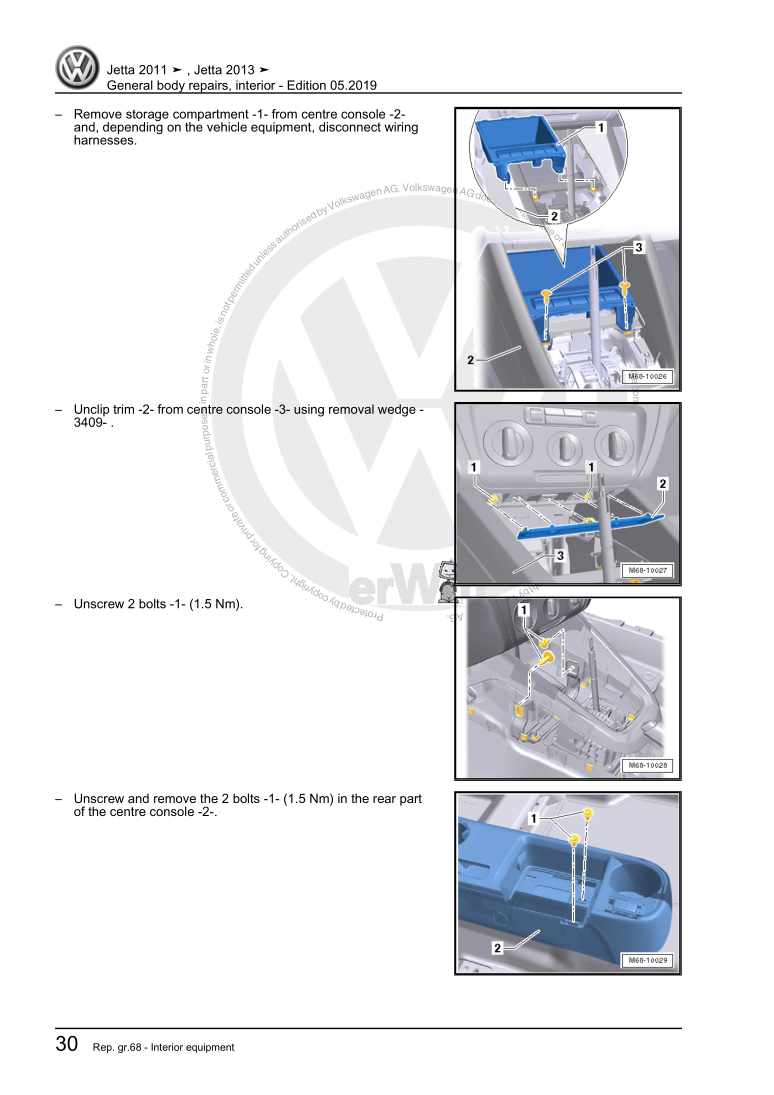
  • Beispielseite für Reparaturanleitung General body repairs, exterior
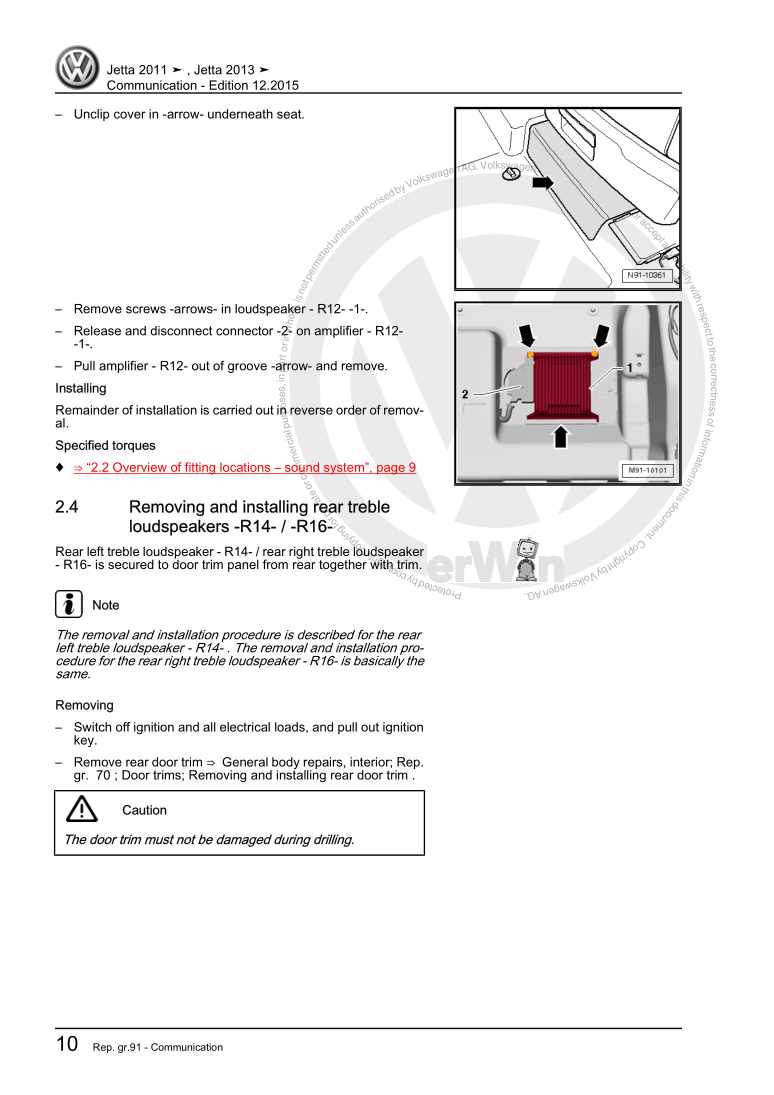
  • Beispielseite für Reparaturanleitung 2 General body repairs, exterior
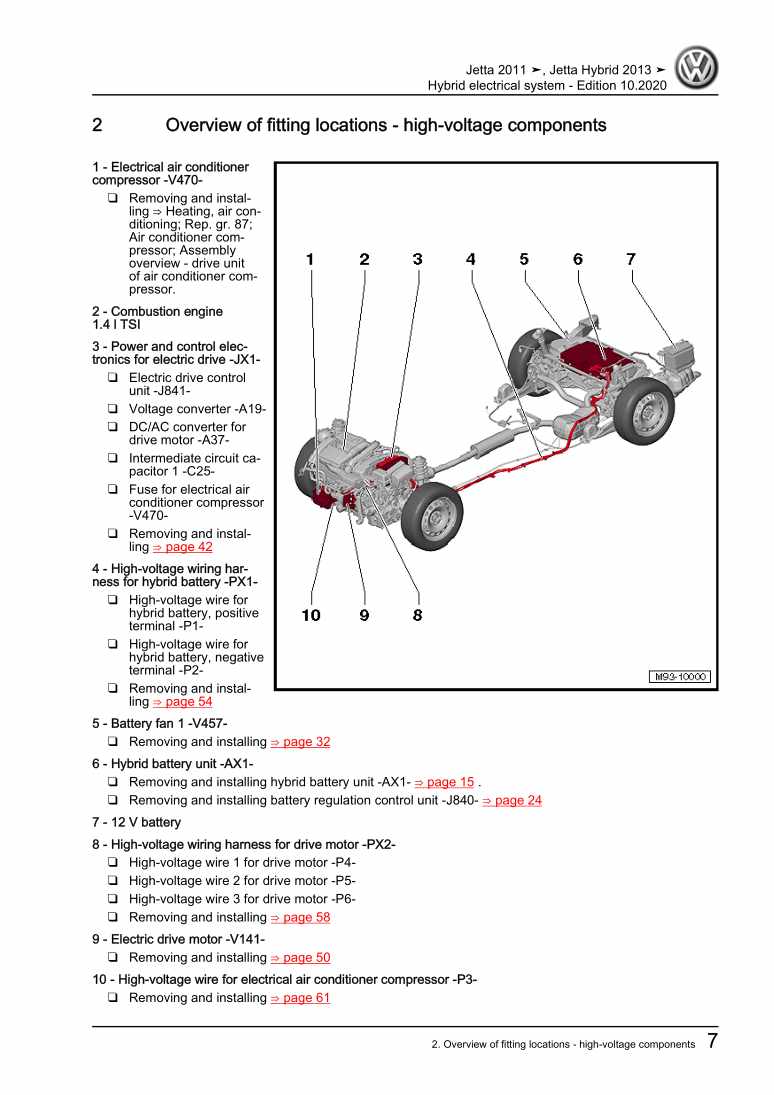
  • Beispielseite für Reparaturanleitung 3 General body repairs, exterior
  • Beispielseite für Reparaturanleitung General body repairs, exterior
  • Beispielseite für Reparaturanleitung 2 General body repairs, exterior
  • Beispielseite für Reparaturanleitung 3 General body repairs, exterior

General body repairs, exterior

Für Jetta 2-türig Rl / Jetta

Original VW-Reparaturanleitung


26,04 €inkl. 7% MwSt.

Sofort als Download verfügbar

Sprache: English

Digitale PDF Version

34.975 KB

335 Seiten

Detaillierte technische Daten

Sofort lesbar

Diese Reparaturanleitung umfasst: Lock carrier, Wings, Plenum chamber cover, Underbody cladding, Bulkhead, Tunnel cross-piece, Bonnet, Tank flap unit, Central locking, Sunroof with glass panel, Flush bonded windows, Exterior mirror und Mouldings and trims. Mehr anzeigen
Sichere Zahlung per PayPal, Kreditkarte, Lastschrift, Sofort-Überweisung oder Giropay
PayPal Logo SEPA Lastschrift Logo Giropay Logo Sofort Überweisung Logo

Reparaturanleitung Jetta 2-türig Rl / Jetta General body repairs, exterior pdf Download mit dem Inhalt:

Kapitelübersicht

  • Body - front
    1
  • 1 Lock carrier
    1
  • 1.1 Tools
    1
  • 1.2 Lock carrier - add-on parts
    1
  • 1.3 Service position
    5
  • 1.4 Removing and installing lock carrier with attachments
    8
  • 1.5 Removing and installing pressure hoses
    11
  • 2 Wings
    14
  • 2.1 Tools
    14
  • 2.2 Assembly overview - front wing
    14
  • 2.3 Removing and installing front wing
    15
  • 2.4 Insulation and foam elements for wing and wing end plate
    18
  • 2.5 Wing end plate
    18
  • 2.6 Removing and installing wing bracket
    19
  • 3 Plenum chamber cover
    21
  • 3.1 Assembly overview - plenum chamber cover
    21
  • 3.2 Removing and installing plenum chamber covers
    21
  • 4 Underbody cladding
    25
  • 4.1 Tools
    25
  • 4.2 Assembly overview - underbody cladding
    25
  • 4.3 Rear right underbody cladding
    26
  • 5 Bulkhead
    28
  • 5.1 Tools
    28
  • 5.2 Materials
    28
  • 5.3 Assembly overview - bulkhead
    29
  • 6 Tunnel cross-piece
    30
  • 6.1 Tools
    30
  • 6.2 Assembly overview - tunnel cross-piece
    30
  • Bonnet, rear lid
    32
  • 1 Bonnet
    32
  • 1.1 Tools
    32
  • 1.2 Assembly overview - bonnet
    32
  • 1.3 Removing and installing bonnet
    33
  • 1.4 Removing and installing bonnet hinge
    35
  • 1.5 Removing and installing insulation
    37
  • 1.6 Assembly overview - seals
    39
  • 1.7 Removing and installing bonnet stay
    40
  • 1.8 Assembly overview - bonnet lock and release components
    42
  • 1.9 Removing and installing bonnet lock
    43
  • 1.10 Removing and installing Bowden cable
    46
  • 1.11 Removing and installing striker pin
    47
  • 1.12 Removing and installing release lever
    49
  • 1.13 Adjusting bonnet
    52
  • 2 Rear lid
    55
  • 2.1 Tools
    55
  • 2.2 Assembly overview - rear lid
    55
  • 2.3 Removing and installing rear lid
    56
  • 2.4 Assembly overview - gas strut
    57
  • 2.5 Removing and installing gas strut
    58
  • 2.6 Releasing gas from gas strut
    60
  • 2.7 Assembly overview - rear lid hinge
    61
  • 2.8 Removing and installing rear lid hinge
    62
  • 2.9 Removing and installing hinge covers
    63
  • 2.10 Removing and installing striker plate
    65
  • 2.11 Adjusting rear lid
    66
  • 2.12 Removing and installing rear lid handle release button E234
    67
  • 2.13 Removing and installing bonnet lock
    68
  • 2.14 Rear lid seal
    70
  • 2.15 Removing and installing rear lid seal
    71
  • 2.16 Number plate carrier
    72
  • 3 Tank flap unit
    74
  • 3.1 Tools
    74
  • 3.2 Assembly overview - tank flap unit
    74
  • 3.3 Removing and installing tank flap unit
    75
  • 3.4 Removing and installing tank filler flap locking motor V155
    78
  • Front doors, door components, central locking
    80
  • 1 Rear door
    80
  • 1.1 Tools
    80
  • 1.2 Assembly overview - door hinges
    81
  • 1.3 Removing and installing door
    83
  • 1.4 Installing after renewing A-pillar
    85
  • 1.5 Door alignment
    86
  • 2 Door components
    89
  • 2.1 Tools
    89
  • 2.2 Assembly overview - front door
    89
  • 2.3 Removing and installing door cover
    91
  • 2.4 Removing and installing door retaining strap
    93
  • 2.5 Removing and installing striker pin
    94
  • 2.6 Assembly overview - door handle and door lock
    95
  • 2.7 Removing and installing lock cylinder cover cap
    97
  • 2.8 Removing and installing lock cylinder
    98
  • 2.9 Removing and installing cover cap (without lock cylinder)
    101
  • 2.10 Removing and installing door handle
    104
  • 2.11 Removing and installing door lock
    106
  • 2.12 Removing and installing mounting bracket
    109
  • 2.13 Removing and installing inner window slot seal
    111
  • 2.14 Removing and installing outer window slot seal
    114
  • 2.15 Removing and installing inner door seal
    115
  • 2.16 Removing and installing outer door seal
    118
  • 2.17 Assembly overview - insulation
    119
  • 3 Central locking
    121
  • 3.1 Fitting location overview - central locking components
    121
  • 3.2 Adapting keys with remote control
    123
  • 3.3 Assembly overview - battery for folding key with remote control
    123
  • 3.4 Removing and installing battery for folding key with remote control
    124
  • 3.5 Assembly overview - battery for folding key with cover cap
    126
  • 3.6 Removing and installing battery for folding key with cover cap
    127
  • Rear doors, door components
    129
  • 1 Rear door
    129
  • 1.1 Tools
    129
  • 1.2 Assembly overview - door hinges
    130
  • 1.3 Removing and installing door
    132
  • 1.4 Installing after renewing B-pillar
    134
  • 1.5 Door alignment
    135
  • 2 Door components
    137
  • 2.1 Tools
    137
  • 2.2 Assembly overview - rear door
    137
  • 2.3 Removing and installing cover
    139
  • 2.4 Removing and installing door retaining strap
    141
  • 2.5 Removing and installing striker pin
    142
  • 2.6 Assembly overview - door handle and door lock
    143
  • 2.7 Removing and installing cap
    144
  • 2.8 Removing and installing door handle
    147
  • 2.9 Removing and installing door lock
    149
  • 2.10 Removing and installing mounting bracket
    152
  • 2.11 Removing and installing inner window slot seal
    154
  • 2.12 Removing and installing outer window slot seal
    156
  • 2.13 Removing and installing inner door seal
    159
  • 2.14 Removing and installing outer door seal
    162
  • 2.15 Assembly overview - insulation
    164
  • Sunroof
    166
  • 1 Sunroof with glass panel
    166
  • 1.1 Tools
    166
  • 1.2 Functional check
    166
  • 1.3 Assembly overview
    167
  • 1.4 Removing and installing sliding/tilting sunroof glass panel
    169
  • 1.5 Height-adjustment of glass panel
    170
  • 1.6 Checking parallel running of glass panel
    172
  • 1.7 Adjusting parallel running of glass panel
    173
  • 1.8 Renewing panel seal
    173
  • 1.9 Removing and installing wind deflector
    174
  • 1.10 Removing and installing sliding headliner
    175
  • 1.11 Removing and installing sliding/tilting sunroof drive
    176
  • 1.12 Setting drive for sliding/tilting sunroof to zero position
    177
  • 1.13 Performing programming run for drive for sliding/tilting sunroof
    177
  • 1.14 Removing pre-selector control for sliding/tilting sunroof
    178
  • 1.15 Removing and installing carrier unit
    178
  • 1.16 Cleaning water drain hoses
    181
  • Bumpers
    183
  • 1 Front bumper cover
    183
  • 1.1 Tools
    183
  • 1.2 Repairing front bumper cover
    183
  • 1.3 Installing brackets for parking aid system
    183
  • 1.4 Assembly overview - front bumper cover
    188
  • 1.5 Removing and installing front bumper cover
    189
  • 1.6 Front bumper cover add-on parts
    191
  • 1.7 Installing front number plate carrier
    192
  • 1.8 Assembly overview - guides for front bumper cover
    193
  • 1.9 Assembly overview - front bumper carrier
    194
  • 2 Rear bumper cover
    196
  • 2.1 Tools
    196
  • 2.2 Repairing rear bumper cover
    196
  • 2.3 Installing brackets for parking aid system
    196
  • 2.4 Assembly overview - rear bumper cover
    201
  • 2.5 Removing and installing rear bumper cover
    202
  • 2.6 Assembly overview - guides for rear bumper cover
    204
  • 2.7 Assembly overview - rear bumper carrier
    204
  • 2.8 Assembly overview - towing bracket
    205
  • Glazing
    207
  • 1 Flush bonded windows
    207
  • 1.1 Tools
    207
  • 1.2 Materials
    208
  • 1.3 Repairing windscreen
    209
  • 1.4 Assembly overview - windscreen
    209
  • 1.5 Remove windscreen
    210
  • 1.6 Install windscreen
    212
  • 1.7 Assembly overview - rear window
    212
  • 1.8 Removing undamaged rear window
    213
  • 1.9 Removing broken rear window
    215
  • 1.10 Installing rear window
    215
  • 1.11 Preparing old undamaged window for glazing
    216
  • 1.12 Preparing new window without precoating for glazing
    217
  • 1.13 Preparing body flange for glazing
    217
  • 1.14 Fitting instructions
    218
  • 1.15 Minimum curing period
    219
  • 1.16 Touching up paint damage
    220
  • 1.17 Removing soiling caused by adhesive sealant
    220
  • 2 Front door window
    221
  • 2.1 Tools
    221
  • 2.2 Assembly overview - front door window
    221
  • 2.3 Removing and installing door window
    222
  • 2.4 Removing and installing window regulator motor
    228
  • 2.5 Removing and installing window regulator
    234
  • 2.6 Removing and installing window channel
    236
  • 3 Rear door window
    239
  • 3.1 Tools
    239
  • 3.2 Assembly overview - rear door windows
    239
  • 3.3 Removing and installing door window
    240
  • 3.4 Removing and installing window regulator motor
    244
  • 3.5 Removing and installing window regulator
    249
  • 3.6 Removing and installing window channel
    251
  • 3.7 Removing and installing fixed door-window
    253
  • Exterior equipment
    257
  • 1 Wheel housing liner
    257
  • 1.1 Tools
    257
  • 1.2 Assembly overview - front wheel housing liner
    257
  • 1.3 Removing and installing front wheel housing liner
    258
  • 1.4 Assembly overview - rear wheel housing liner
    260
  • 1.5 Removing and installing rear wheel housing liner
    261
  • 2 Exterior mirror
    265
  • 2.1 Tools
    265
  • 2.2 Assembly overview - exterior mirror (manual operation)
    265
  • 2.4 Assembly overview - exterior mirror, electrically operated, with turn signal repeater
    267
  • 2.5 Removing and installing mirror glass
    269
  • 2.6 Removing and installing exterior mirror trim, without turn signal repeater
    270
  • 2.7 Removing and installing exterior mirror trim, with turn signal repeater
    272
  • 2.8 Removing and installing exterior mirror housing, without turn signal repeater
    274
  • 2.9 Removing and installing exterior mirror housing, with turn signal repeater
    275
  • 2.10 Removing and installing adjustment unit with motor for exterior mirror
    277
  • 2.11 Removing and installing assembly bracket
    280
  • 2.12 Removing and installing exterior mirror (manual operation)
    281
  • 2.13 Removing and installing exterior mirror (electrical operation)
    285
  • 3 Radiator grille
    290
  • 3.1 Tools
    290
  • 3.2 Removing and installing radiator grille
    290
  • 3.3 Removing and installing emblem
    292
  • 4 Rear spoiler
    297
  • 4.1 Removing and installing rear spoiler
    297
  • 5 Mouldings and trims
    304
  • 5.1 Water deflector
    304
  • 5.2 Assembly overview - side member cover
    308
  • 5.3 Assembly overview - B-pillar trim
    309
  • 5.4 Removing and installing B-pillar trim
    310
  • 5.5 Side member extension
    312
  • 6 Lettering
    317
  • 6.1 Tools
    317
  • 6.2 Installation instructions for lettering and emblems
    317
  • 6.3 Dimensions - lettering on rear lid
    318
  • 6.4 Dimensions - lettering on wing
    320
  • 7 Noise insulation
    322
  • 7.1 Assembly overview - noise insulation
    322
  • 7.2 Removing and installing noise insulation
    324
Hersteller­bezeichnung General body repairs, exterior
Hersteller Volkswagen
Passend für Jetta 2-türig Rl (1980 - 1984) / Jetta (2014 >) / Jetta (Malaysia) (2013 >)
Passende Autotypen 162, AY2
Kategorie Reparaturanleitung

Im Moment sind noch keine Bewertungen für dieses Produkt vorhanden.

Ähnliche Reparaturanleitungen

4-cylinder injection engine (1.6 l engine, MPI)
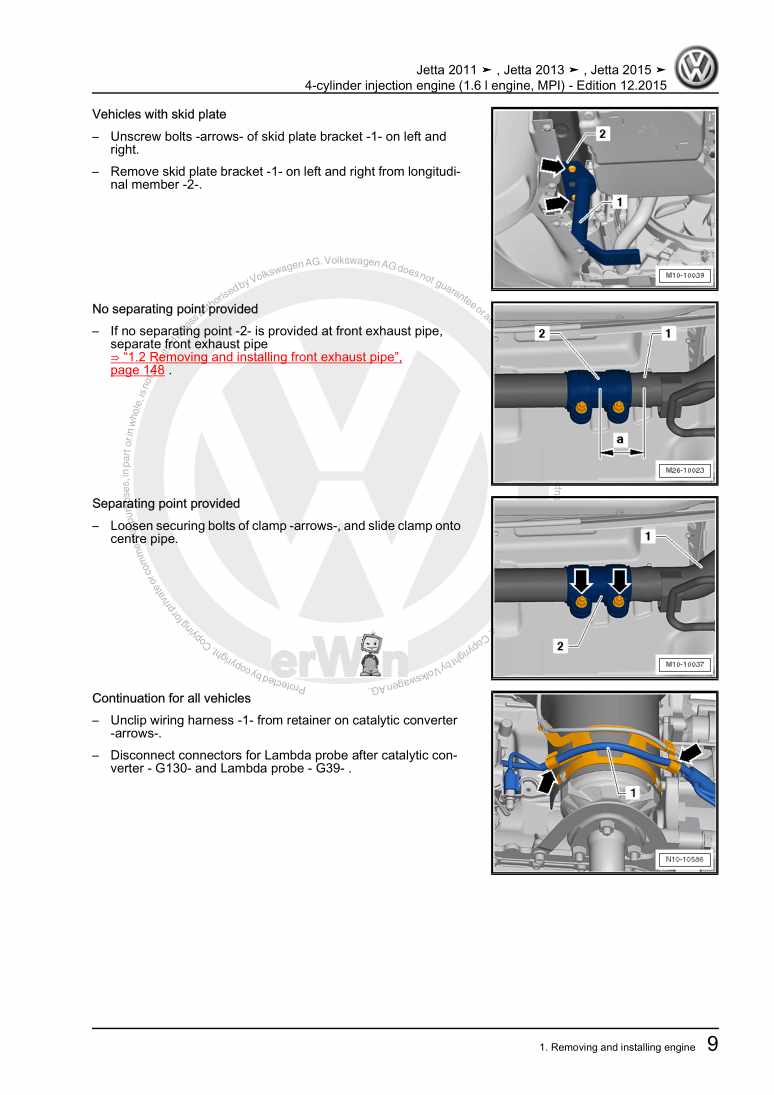
Beispielseite für Reparaturanleitung 4-cylinder injection engine (1.6 l engine, MPI)

Für Jetta 2-türig Rl (1980 - 1984) / Jetta 4-türig Ll (1980 - 1984) / Jetta (2014 >) / Jetta GP (Russland) (2015)

14,07 € Details

4-cyl. injection engine (2.0 l engine, EA 888, chain drive)
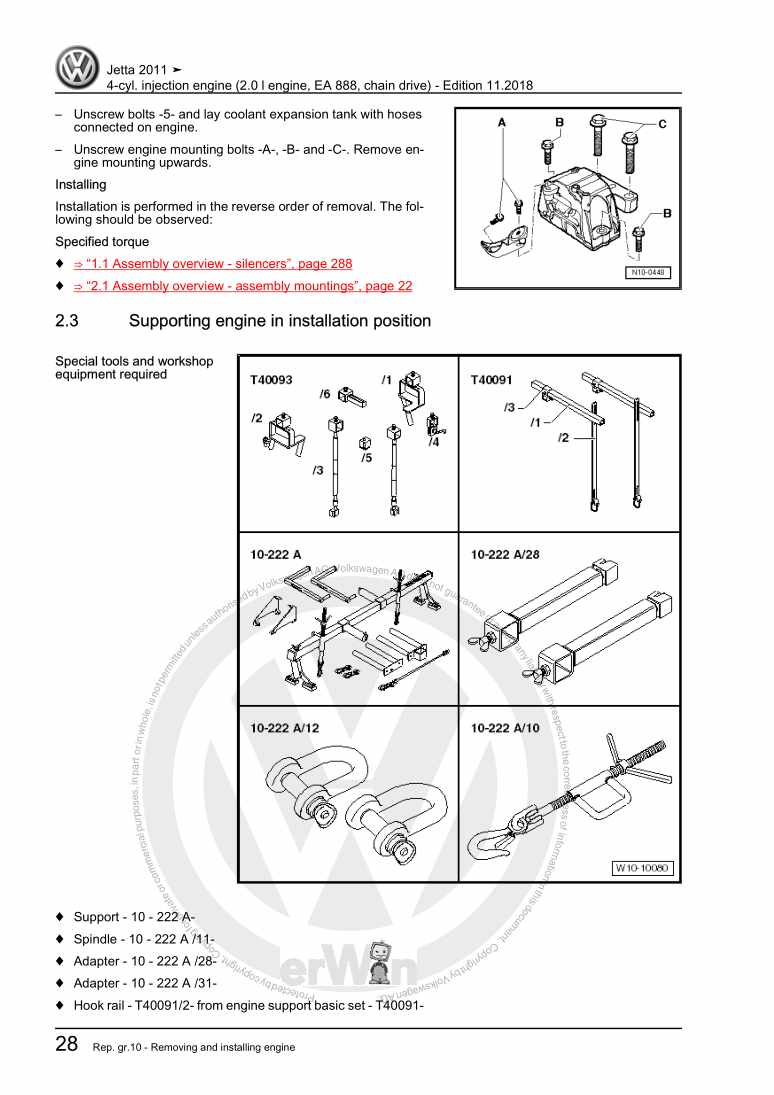
Beispielseite für Reparaturanleitung 4-cyl. injection engine (2.0 l engine, EA 888, chain drive)

Für Jetta 2-türig Rl (1980 - 1984)

24,44 € Details

Brake systems

Beispielseite für Reparaturanleitung Brake systems

Für Jetta 2-türig Rl (1980 - 1984) / Jetta (2014 >) / Jetta (Malaysia) (2013 >)

30,07 € Details

Communication

Beispielseite für Reparaturanleitung Communication

Für Jetta 2-türig Rl (1980 - 1984) / Jetta (2014 >) / Jetta (Malaysia) (2013 >)

12,04 € Details

Hybrid electrical system

Beispielseite für Reparaturanleitung Hybrid electrical system

Für Jetta (1980 - 1988) / Jetta 2-türig Rl (1980 - 1984)

7,57 € Details

Manual for Troubleshooting and Diagnosing Noises
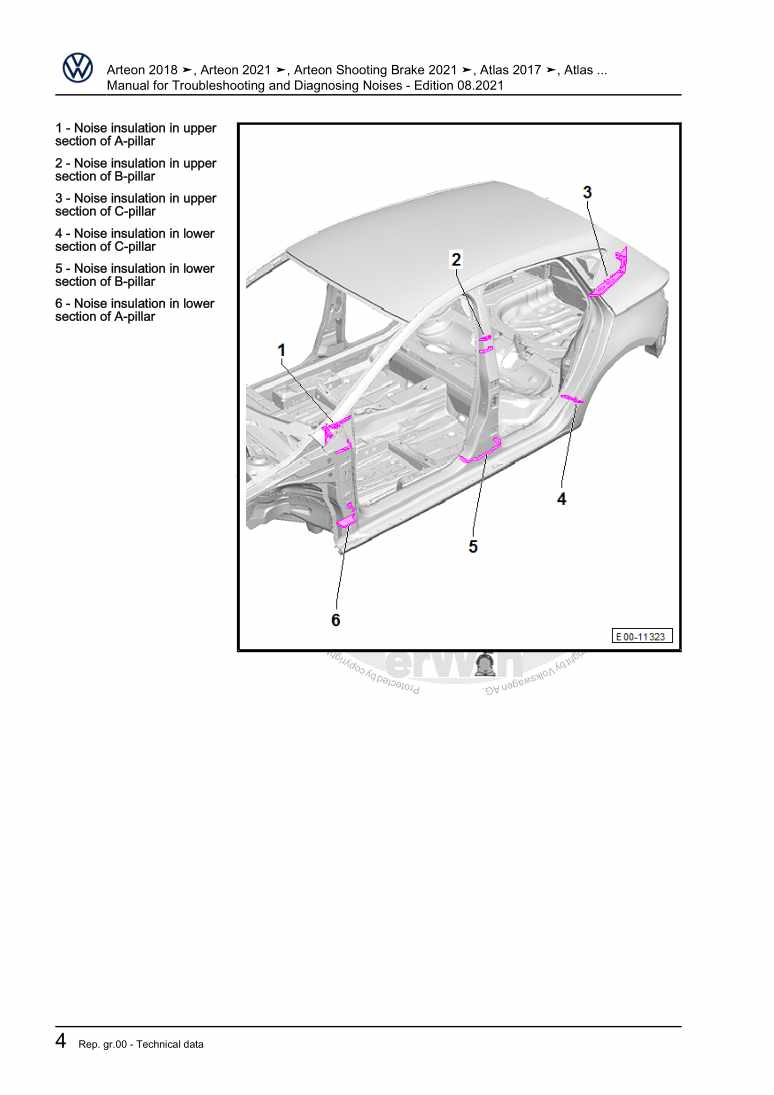
Beispielseite für Reparaturanleitung Manual for Troubleshooting and Diagnosing Noises

Für Touran (2003 - 2011) / EOS (2006) / Passat Variant (2006 - 2007) / Jetta 2-türig Rl (1980 - 1984) / Passat (2005 - 2008) / Jetta 4-türig Ll (1980 - 1984) / Tiguan (2008) / Passat CC (2009) / Scirocco (2008) / Golf (2009) / Golf Plus (2009) / Golf VI Variant (2010) / Touareg (2011) / Sharan (2011) / Polo (Russ.) (2010) / Polo A05 (2010) / Passat/Passat Variant (2011 >) / Passat/Passat Variant (2011 >) / Golf Cabriolet (2012) / Beetle (NBL) Limousine (2012) / Passat (NMS - US) (2012) / Passat CC (2009) / Beetle (NBC) Cabrio (2012) / Up! (2012) / Golf VII (2013) / Golf Variant (2014) / Polo MY (KH) (2014) / Polo MY (LIM) (2014) / Jetta (2014 >) / eUp! (ab 2014) / eGolf (ab 2014) / Polo (2014) / Golf (Mexiko) (2014 >) / Jetta (Malaysia) (2013 >) / Golf Sportsvan (2014 >) / Scirocco GP (2015) / Polo (Malaysia) (2015 >) / Passat Lim (2015 >) / Polo G (Indien) (2015) / Touareg FL (2015 > ) / Passat Var. (2015 >) / Sharan (2016 > ) / Polo G (Indien) (2015) / Polo (Russland) (2015 >) / Polo Malaysia (2016) / Touran (2016 > ) / Passat (2016) / Tiguan (2016) / VW eUP (2012) / VW Beetle (2011) / Golf VII (2017) / Arteon () / Tiguan RUS (2017) / e-Golf (2017) / e-UP! (2017) / Golf [MX] (2018 >) / Polo (2018) / T-Roc (2018 >) / Jetta [MX] (2018 >) / Golf Sportsvan (2018 >) / Passat (USA) (2019 >) / T-Roc Cabriolet (2020 >) / Tiguan (2021 >) / Arteon (2021 >) / Arteon Shooting Brake (2021 >)

4,97 € Details

Maintenance

Beispielseite für Reparaturanleitung Maintenance

Für Golf Variant (2007) / Jetta (2005 - 2007) / Jetta 2-türig Rl (1980 - 1984) / Golf VI Variant (2010)

27,39 € Details

General body repairs, interior

Beispielseite für Reparaturanleitung General body repairs, interior

Für Jetta 2-türig Rl (1980 - 1984) / Jetta (2014 >) / Jetta (Malaysia) (2013 >)

25,38 € Details

4-cylinder injection engine (2.0 l engine)
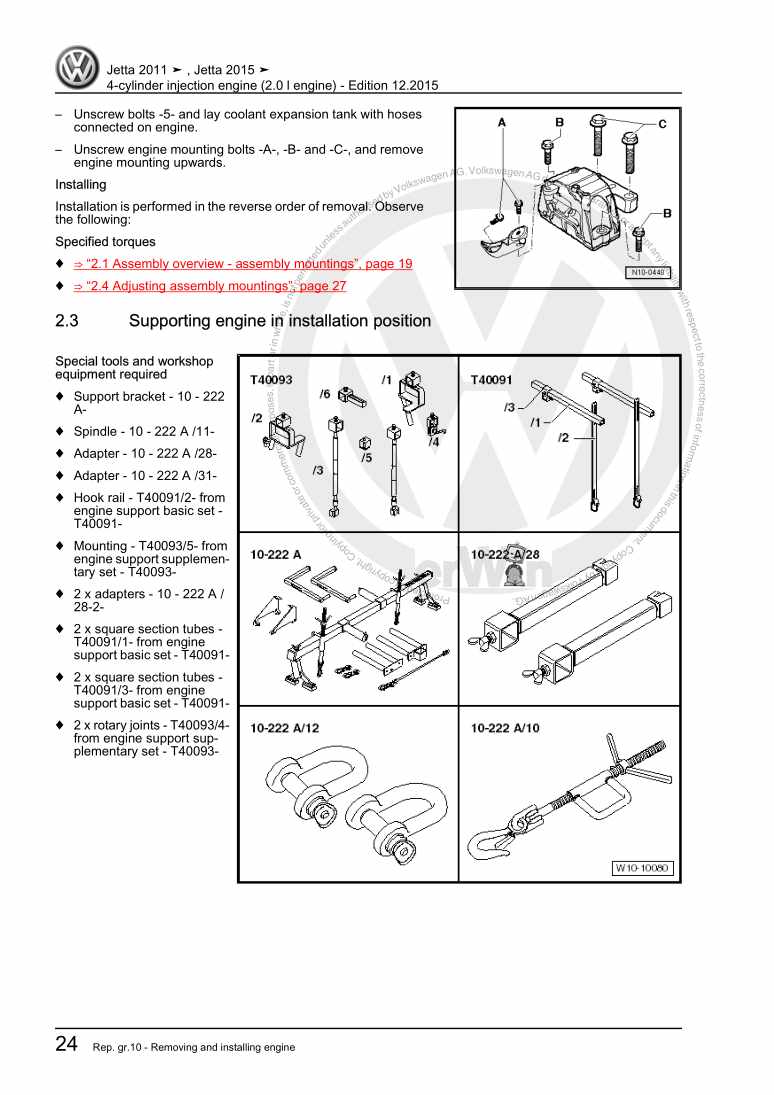
Beispielseite für Reparaturanleitung 4-cylinder injection engine (2.0 l engine)

Für Jetta 2-türig Rl (1980 - 1984) / Jetta 4-türig Ll (1980 - 1984)

13,05 € Details

Wheels and Tyres Guide - General Information
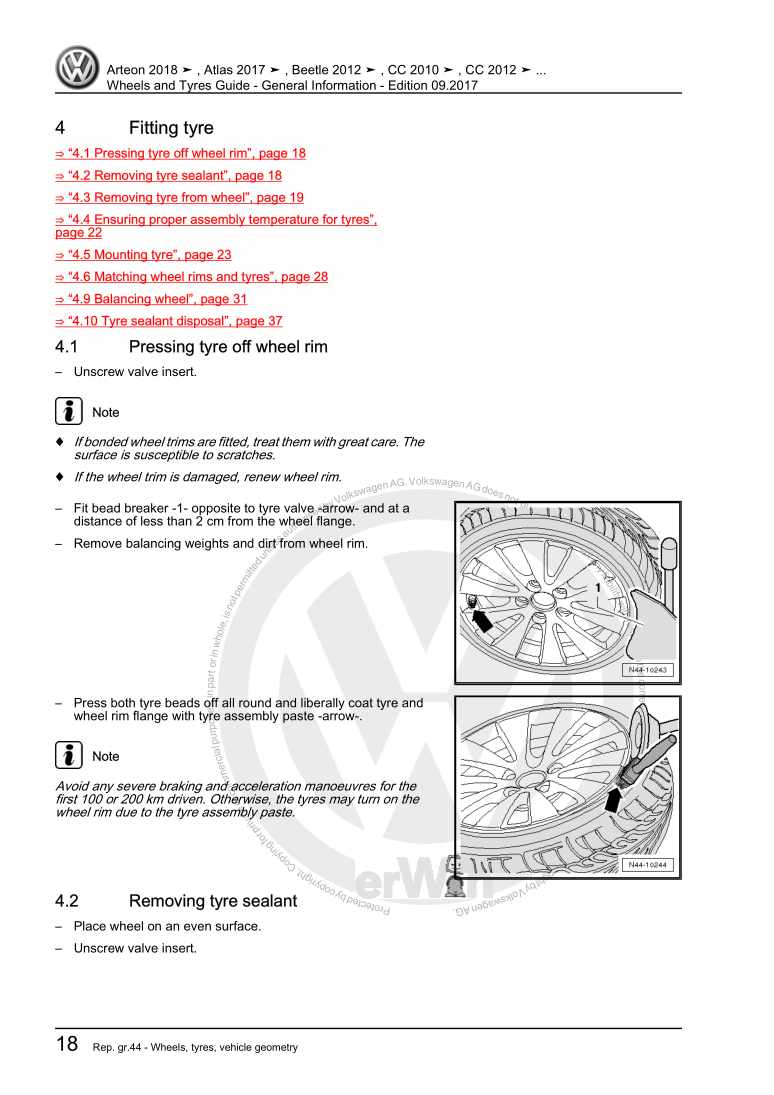
Beispielseite für Reparaturanleitung Wheels and Tyres Guide - General Information

Für Phaeton (2001 - 2008) / Touran (2003 - 2011) / EOS (2006) / Jetta 2-türig Rl (1980 - 1984) / Jetta 4-türig Ll (1980 - 1984) / Tiguan (2008) / Passat CC (2009) / Golf (2009) / Scirocco (2008) / Golf Plus (2009) / Golf VI Variant (2010) / Touareg (2011) / Sharan (2011) / Polo A05 (2010) / Passat/Passat Variant (2011 >) / Passat/Passat Variant (2011 >) / Golf Cabriolet (2012) / Beetle (NBL) Limousine (2012) / Passat CC (2009) / Beetle (NBC) Cabrio (2012) / Up! (2012) / Golf VII (2013) / Golf Variant (2014) / eUp! (ab 2014) / eGolf (ab 2014) / Polo (2014) / Golf Sportsvan (2014 >) / Scirocco GP (2015) / Passat Lim (2015 >) / Touareg FL (2015 > ) / Passat Var. (2015 >) / Sharan (2016 > ) / Touran (2016 > ) / Tiguan (2016) / VW eUP (2012) / VW Beetle (2011) / Golf VII (2017) / Arteon () / Golf (2017) / Beetle (2017) / e-Golf (2017) / e-UP! (2017) / Polo (2018) / Atlas (2017 >)

11,39 € Details

Unsere Best Seller

Schon gewusst? Wir bieten auch originale Autoteile an.

Autoteil 1K0927904BA Leitg.Satz

1K0927904BA

Leitg.Satz

58,91 €

Details
Autoteil 06K010005F Kennschild

06K010005F

Kennschild

9,65 €

Details
Autoteil 06D103469N Zyl.Kopfha

06D103469N

Zyl.Kopfha

257,96 €

Details
Autoteil 2Q0129509A Luftfuehrg

2Q0129509A

Luftfuehrg

32,78 €

Details
Autoteil 059130319G Halter

059130319G

Halter

10,26 €

Details

4-Zylinder-Dieselmotor (1,9 l-Motor) 028.B / ADE / ADG

Beispielseite für Reparaturanleitung 4-Zylinder-Dieselmotor (1,9 l-Motor) 028.B / ADE / ADG

Für Industriemotoren - Industrial Engines ()

7,57 € Details

Nr. 528: Der Erdgasantrieb im Golf/Golf Variant TGI BlueMotion
Beispielseite für Reparaturanleitung Nr. 528: Der Erdgasantrieb im Golf/Golf Variant TGI BlueMotion

5,26 € Details

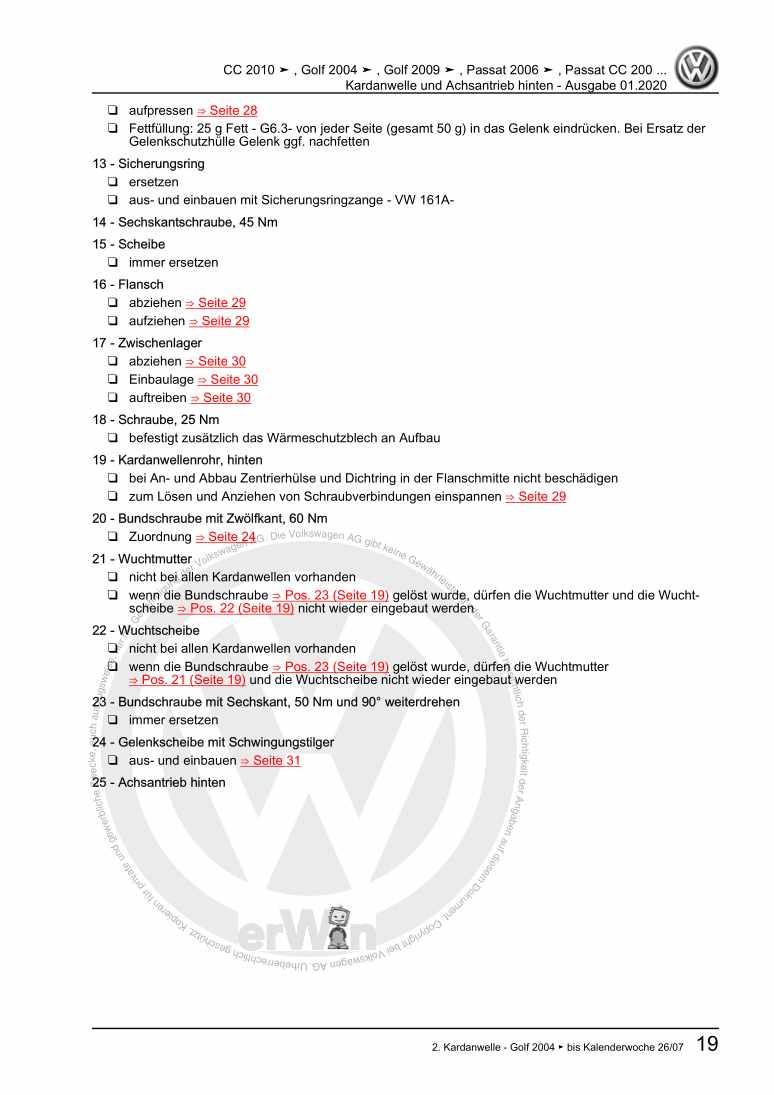
Kardanwelle und Achsantrieb hinten

Beispielseite für Reparaturanleitung Kardanwelle und Achsantrieb hinten

Für Passat / Passat Variant (2005 - 2008) / Golf (2004 - 2007) / Tiguan (2008) / Passat CC (2009) / Golf (2009) / Sharan (2011)

20,15 € Details

image/svg+xml Über Clonck

Originale Reparaturanleitungen und Ersatzteile

Unsere Reparaturanleitungen sind Originale, kommen direkt von Volkswagen und erfüllen die höchsten Qualitätsstandards.

In unserem Originalteile-Shop verkaufen wir hochwertige Originalersatzteile der Fahrzeughersteller. Mithilfe der Suche gibst du die gewünschte Teilenummer (OE-Nummer) ein und bestellst schnell und einfach das benötigte Ersatzteil.

Höchste Qualitätsstandards

Bei Clonck wollen wir Autoschrauber und Kfz-Profis glücklich machen. Aus diesem Grund findest du bei Clonck ausschließlich professionelle und hochwertige Reparaturanleitungen, mit deren Hilfe du dein Fahrzeug fachgerecht reparieren kannst.

Unsere Partner

Autohaus Schmidt GmbH
Automag GmbH Filiale Laim
KFZ-VERLAG GmbH
Zimpel und Franke GmbH

Clonck: Der Autoreparatur-Shop - gibt's auch als App!

Clonck App Logo Play Store

Clonck: Passende Autoteile für deine Autoreparatur

4,5 90

Mit Clonck bestellst du die richtigen Originalersatzteile im Handumdrehen.

  • Fahrzeugmodell hinzufügen
  • Baugruppe auswählen
  • Fahrzeug-Identifizierungsnummer (FIN) eingeben
  • Über 5.000 originale Reparaturanleitungen einsehen
Jetzt App starten
Clonck App Preview Auto Mobiltelefon Autoteile