DER AUTOREPARATUR-SHOP
0
Home » Anleitungen » Electrical system
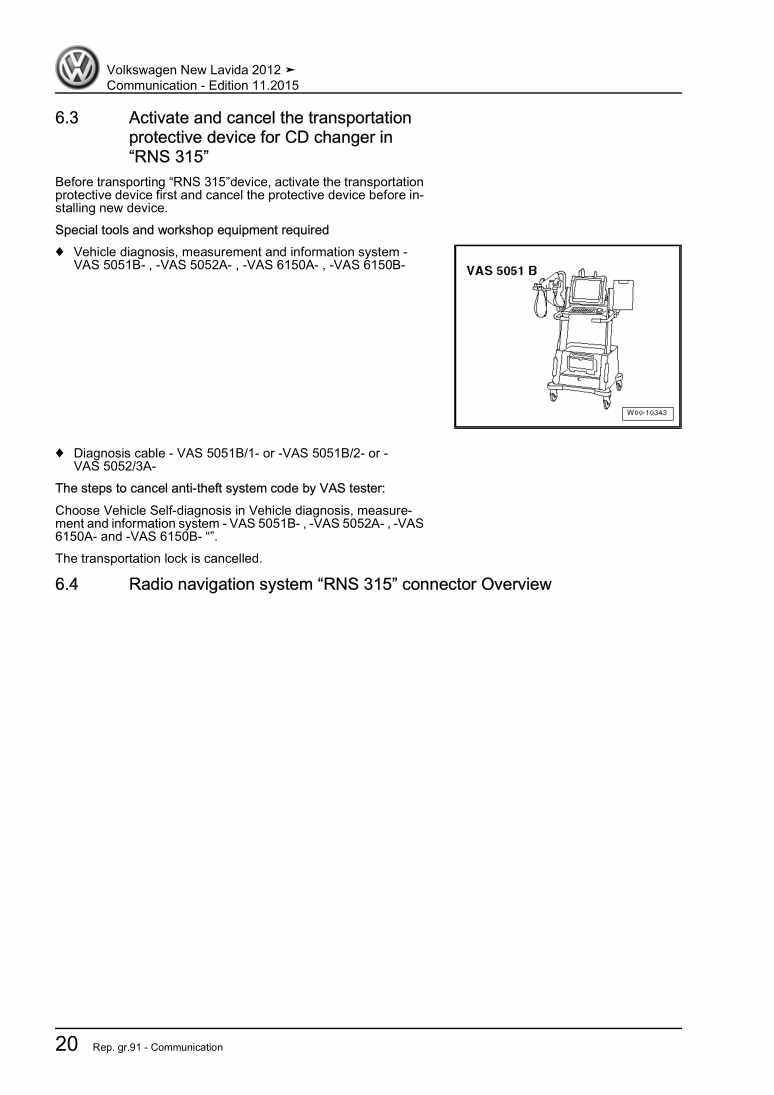
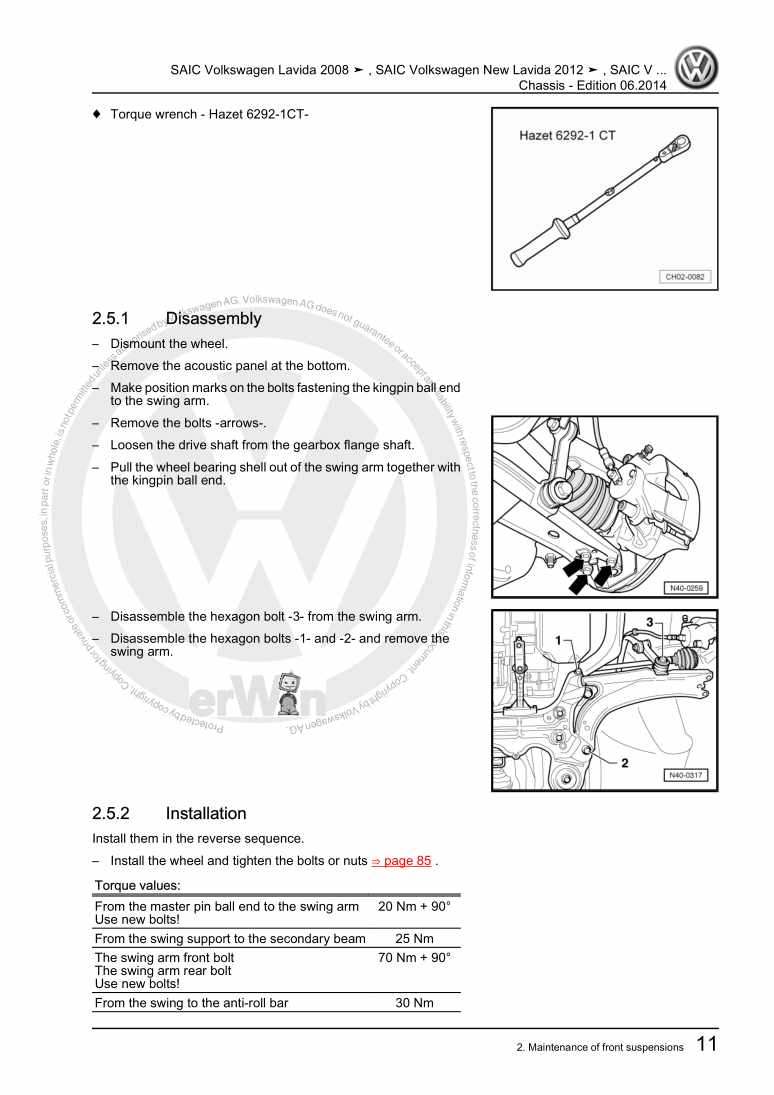
  • Beispielseite für Reparaturanleitung Electrical system
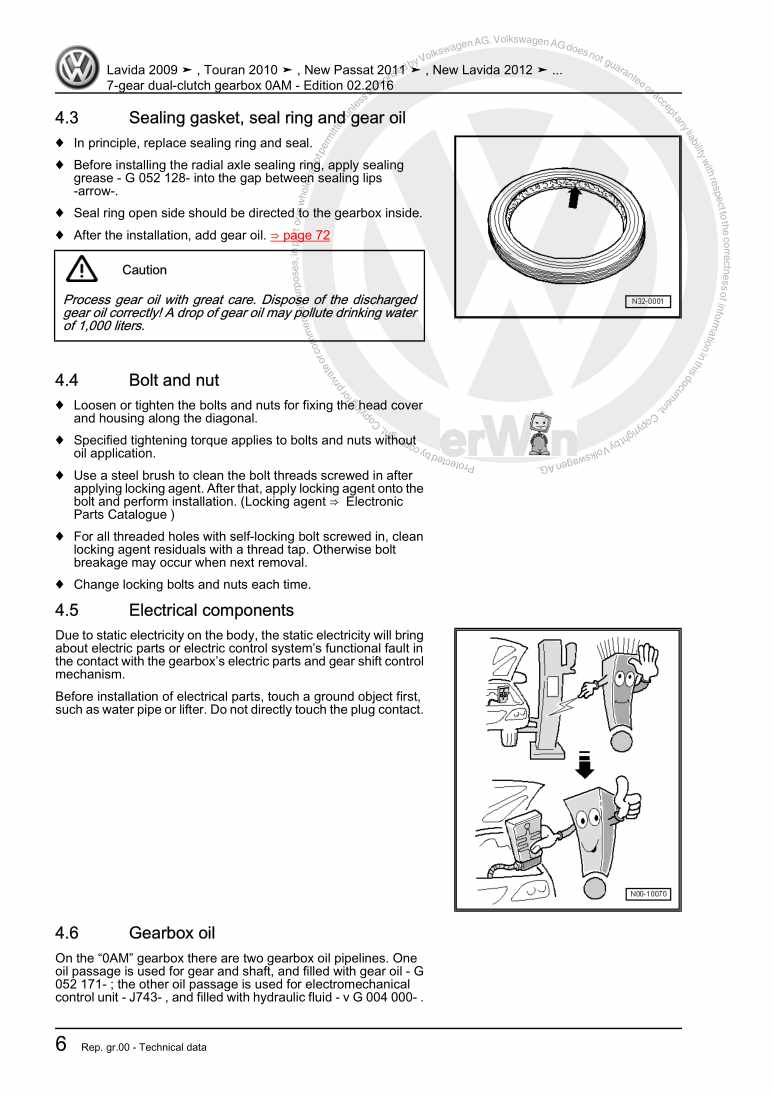
  • Beispielseite für Reparaturanleitung 2 Electrical system
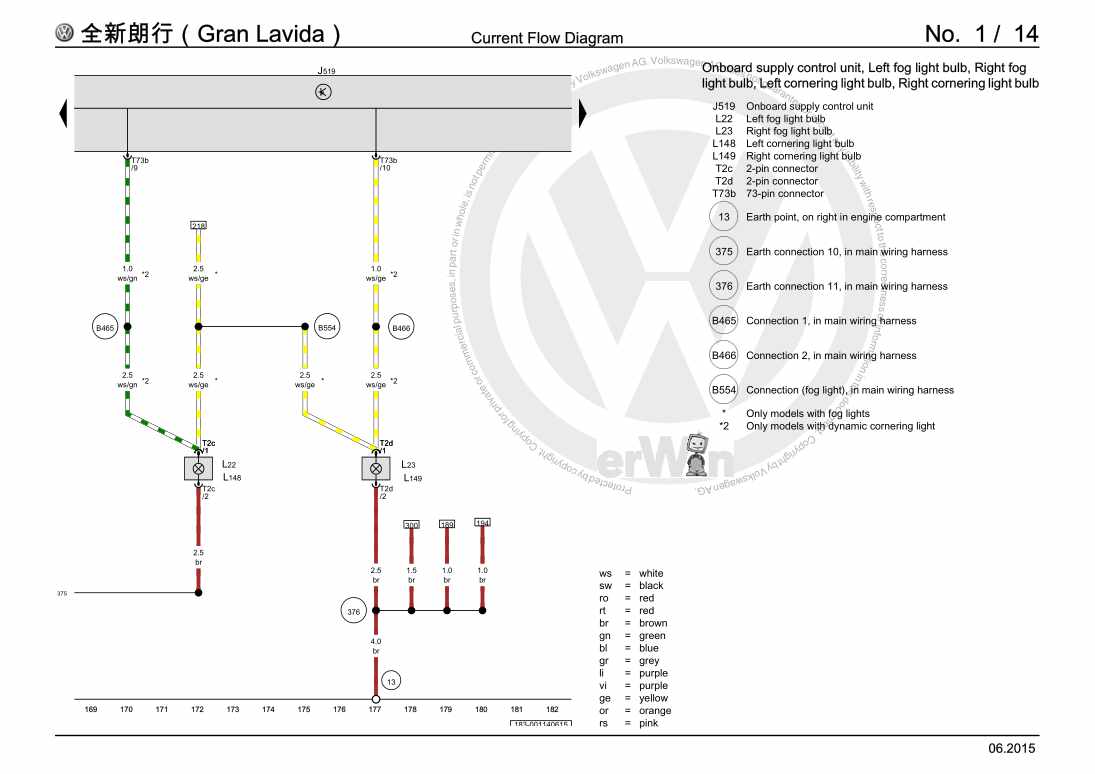
  • Beispielseite für Reparaturanleitung 3 Electrical system
  • Beispielseite für Reparaturanleitung Electrical system
  • Beispielseite für Reparaturanleitung 2 Electrical system
  • Beispielseite für Reparaturanleitung 3 Electrical system

Electrical system

Für Iltis / Modell 181 Rl / Lavida Family [CN]

Original VW-Reparaturanleitung


22,19 €inkl. 7% MwSt.

Sofort als Download verfügbar

Sprache: English

Digitale PDF Version

9.152 KB

278 Seiten

Detaillierte technische Daten

Sofort lesbar

Diese Reparaturanleitung umfasst: Battery, Disconnect and re-connect the battery earthing cable, Battery parametrization (applicable for models equipped with start/stop system), Start motor, Cruise control system (CCS), Maintenance interval display, Coupler of the hose for washer fluid, Fog light (applicable for New Lavida, Gran Lavida and Cross Lavida), Warning lamp inside exterior rear view mirror, High-level brake light, Ignition/starter switch and lock cylinder, Entry and start authorisation (KESSY), Horn, vehicle diagnosis, measurement and information systems und Repair harness and connector. Mehr anzeigen
Sichere Zahlung per PayPal, Kreditkarte, Lastschrift, Sofort-Überweisung oder Giropay
PayPal Logo SEPA Lastschrift Logo Giropay Logo Sofort Überweisung Logo

Reparaturanleitung Iltis / Modell 181 Rl / Lavida Family [CN] Electrical system pdf Download mit dem Inhalt:

Kapitelübersicht

  • Start motor, power supply, CCS
    1
  • 1 Battery
    1
  • 1.1 Battery type
    1
  • 1.2 Warming notes and safety regulation
    1
  • 1.3 Battery terminal connection
    1
  • 2 Check the battery
    2
  • 3 Chargeable battery
    3
  • 4 Disconnect and re-connect the battery earthing cable
    4
  • 4.1 Assembly Overview
    4
  • 4.2 Assembly Overview (applicable to models equipped with start/stop system) .
    6
  • 4.3 Disconnect the battery earthing cable
    7
  • 4.4 Connect battery earthing cable
    7
  • 5 Removal and installation of the battery
    9
  • 5.1 Removal and installation of the battery
    9
  • 5.2 Removal and installation of the battery bracket
    11
  • 6 Battery parametrization (applicable for models equipped with start/stop system)
    13
  • 8 Start motor
    15
  • 8.1 Start motor, models equipped with 5-speed manual gearbox 02J
    15
  • 8.2 Start motor, models equipped with 7-speed dual clutch gearbox 0AM
    18
  • 8.3 Start motor, models equipped with 5-speed manual gearbox 02T
    22
  • 8.4 Start motor, models equipped with 6-speed automatic gearbox 09G
    25
  • 9 Alternator
    30
  • 9.1 Check the ribbed belt
    30
  • 9.2 Connect B+cable (battery positive cable) to the alternator
    30
  • 9.3 Alternator, models equipped with 1.4L/1.2L TSI turbocharged engine
    31
  • 9.4 Alternator, models equipped with 1.6L gasoline engine
    33
  • 9.5 Removal and installation of the ribbed pulley on alternator
    35
  • 10 Cruise control system (CCS)
    40
  • 11 Start/stop system
    41
  • 11.1 General instruction
    41
  • 11.2 Start/stop mode button E693 (applicable for New Lavida)
    43
  • 11.3 Start/stop mode button E693 (applicable for New Lavida)
    43
  • 11.4 Voltage stabiliser J532 (applicable for New Lavida)
    44
  • 11.5 Voltage stabiliser J532 (applicable for New Lavida)
    45
  • Instrument, Electrics
    46
  • 1 Instrument cluster
    46
  • 1.1 Replace instrument cluster
    46
  • 1.2 Removal and installation of the instrument cluster
    47
  • 1.5 Description of the instrument cluster (applicable for models as of June, 2015)
    53
  • 2 Maintenance interval display
    55
  • 2.1 Maintenance interval display reset
    55
  • Window wiper/cleaning system
    56
  • 1 Window wiping system
    56
  • 1.1 General instruction
    56
  • 1.2 APP function of the wiper motor
    56
  • 1.3 Window wiper system-Assembly Overview
    56
  • 1.4 Removal and installation of the window wiping system
    57
  • 1.5 Adjust the stopping position of wiper blade
    63
  • 1.6 Removal and installation of boneless wiper blade
    64
  • 1.7 Rain and light sensor G397
    65
  • 2 Window clean system
    68
  • 2.1 Window clean system-Assembly Overview
    68
  • 2.2 Removal and installation of the washer fluid reservoir
    69
  • 2.3 Removal and installation of window washing pump V5
    70
  • 2.4 Removal and installation of spray nozzle of window wash system
    71
  • 2.5 Adjust the spray nuzzle of window wash system
    71
  • 3 Rear window wiper system (applicable for Gran Lavida and Cross Lavida)
    72
  • 3.1 General instruction
    72
  • 3.2 Rear window wiper system-Assembly Overview
    72
  • 3.3 Removal and installation of wiper arm
    74
  • 3.4 Removal and installation of the rear window wiper motor V12
    75
  • 3.5 Adjust the stop position of rear window wiper
    76
  • 3.6 Removal and installation of boneless wiper blade
    77
  • 4 Rear window wash system (applicable for Gran Lavida and Cross Lavida)
    78
  • 4.1 Window wash system - Assembly Overview
    78
  • 4.2 Removal and installation of the windscreen and rear window washer pump V59
    79
  • 4.3 Replace the spray nuzzle of rear window wash system
    79
  • 4.4 Adjust the spray nuzzle of rear window wash system
    79
  • 5 Coupler of the hose for washer fluid
    80
  • 6 Hose maintenance
    81
  • Lighting, bulb, switch-external
    82
  • 1 H7 headlight (applicable for New Lavida, Gran Lavida and Cross Lavida)
    82
  • 1.1 H4 headlight-Assembly Overview
    82
  • 1.2 Removal and installation of headlight
    84
  • 1.3 Adjust the installation location of headlight
    85
  • 1.4 Replace headlight bulb
    87
  • 1.5 Adjust the headlight
    92
  • 2.1 Halogen bulb H7 headlight-Assembly Overview
    93
  • 2.2 Removal and installation of headlight
    95
  • 2.3 Adjust the installation location of headlight
    96
  • 2.4 Replace headlight bulb
    98
  • 2.5 Adjust the headlight
    103
  • 3.1 Gas discharge headlight-Assembly Overview
    104
  • 3.2 Removal and installation of headlight
    106
  • 3.3 Adjust the installation location of headlight
    107
  • 3.4 Replace headlight bulb
    109
  • 3.6 The operation and safety instructions for gas discharge bulb
    113
  • 4 Fog light (applicable for New Lavida, Gran Lavida and Cross Lavida)
    116
  • 4.1 Fog lamp - Assembly Overview
    116
  • 4.2 Removal and installation of the fog light
    117
  • 4.3 Removal and installation of the fog light bulb
    119
  • 4.4 Adjust fog lamp
    120
  • 5 Fog light (applicable for New Lavida and Gran Lavida as of June, 2015)
    121
  • 5.1 Fog lamp - Assembly Overview
    121
  • 5.2 Removal and installation of the fog light
    122
  • 5.3 Removal and installation of the fog light bulb
    124
  • 5.4 Adjust fog lamp
    125
  • 6.1 Fog lamp - Assembly Overview
    126
  • 6.2 Removal and installation of the fog light
    127
  • 6.3 Removal and installation of the fog light bulb
    127
  • 6.4 Adjust fog lamp
    128
  • 7 Warning lamp inside exterior rear view mirror
    129
  • 7.1 General instruction
    129
  • 7.2 Removal and installation of warning lamp inside external rear view mirror
    129
  • 8 Tail light (tail light combination) (applicable for New Lavida)
    130
  • 8.1 Tail light on the body (tail light combination)
    130
  • 8.2 Tail light on the trunk lid (tail light combination)
    134
  • 9.1 Tail light on the body (tail light combination)
    141
  • 9.2 Tail light on the trunk lid (tail light combination)
    147
  • 10.1 Tail light on the body (tail light combination)
    152
  • 10.2 Tail light on the trunk lid (tail light combination)
    157
  • 11 Tail light (tail light combination) (applicable for Gran Lavida as of June, 2015)
    161
  • 11.1 Tail light on the body (tail light combination)
    161
  • 11.2 Tail light on the trunk lid (tail light combination)
    167
  • 12 High-level brake light
    174
  • 12.1 Removal and installation of the high-level brake bulb M25
    174
  • 13 High-level brake light (applicable for Gran Lavida and Cross Lavida)
    176
  • 13.1 Removal and installation of the high-level brake bulb M25
    176
  • 14 Number plate light
    178
  • 14.1 Removal and installation of license plate light
    178
  • 14.2 Replace the number plate light bulb
    179
  • 15 Steering column combination switch
    180
  • 15.1 General instruction
    180
  • 15.2 Steering column combination switch (models with entry and start authorisation)
    180
  • 15.4 Steering column electronic device control unit J527
    183
  • 15.5 Steering column combination switch
    186
  • 15.7 Removal and installation of steering column lock housing
    187
  • 15.8 Removal and installation of the electronic steering power control unit J764
    188
  • 15.9 Steering column combination switch
    190
  • 16 Ignition/starter switch and lock cylinder
    196
  • 16.1 Removal and installation of lock cylinder
    196
  • 16.2 Removal and installation of ignition/starter switch D
    198
  • 16.4 Check the ignition/starter switch D
    199
  • 16.5 Ignition key removal lock electromagnet N376 (applicable for New Lavida)
    199
  • 17 Parking Steering Device (applicable for New Lavida)
    202
  • 17.1 General instruction
    202
  • 17.2 Parking Steering Device - Assembly Overview
    202
  • 17.3 Parking assist control unit
    203
  • 17.4 Rear parking auxiliary sensor
    203
  • 17.5 Parking auxiliary warning buzzer
    205
  • 18.1 Parking Steering Device - Assembly Overview
    207
  • 18.2 Parking assist control unit
    209
  • 18.3 Removal and installation of the front parking auxiliary warning buzzer H22
    209
  • 18.4 Removal and installation of the rear parking auxiliary warning buzzer H15
    210
  • 18.5 Removal and installation of the front parking auxiliary sensor
    211
  • 18.6 Removal and installation of the rear parking auxiliary sensor
    213
  • 18.7 The installation position and bonding of the parking auxiliary sensor bracket
    214
  • 18.8 Replace the parking auxiliary sensor
    215
  • 18.9 Diagnosis of Parking auxiliary system
    216
  • 19 Entry and start authorisation (KESSY)
    218
  • 19.1 General instruction
    218
  • 19.2 Entry and start authorisation aerial and sensor - Assembly Overview
    218
  • 19.4 Removal and installation of the outer driver door handle
    221
  • 19.5 Removal and installation of the front passenger exterior door handle
    221
  • 19.8 Starter button E378
    223
  • 19.9 Removal and installation of the immobiliser reader coil D2
    224
  • 19.10 Removal and installation of the interior aerial 1 for entry and start system R138
    224
  • 19.11 Removal and installation of the interior aerial 2 for entry and start system R139
    225
  • 19.12 Removal and installation of the entry and start system aerial in the trunk R137
    226
  • 19.13 Check the entry and start authorisation aerial and sensor
    227
  • 20 Reversing camera system
    228
  • 20.1 General instruction
    228
  • 20.2 Reversing camera system-Assembly Overview
    228
  • 20.3 Removal and installation of the reversing camera R189 handle
    229
  • Lighting, bulb, switch-internal
    230
  • 1 Lighting and switch on instrument panel
    230
  • 1.1 Removal and installation of the light switch E1
    230
  • 1.2 Removal and installation of Headlight range regulator E102
    231
  • 2 Lighting and switch on door
    235
  • 2.3 Removal and installation of the mirror adjustment switch E43
    237
  • 2.8 Removal and installation of the Central locking SAFELOCK function warning light K133
    241
  • 2.11 Part-Front door lock
    243
  • 3 Trunk and lighting and switch inside the trunk lid
    245
  • 3.1 Removal and installation of left luggage compartment lighting W18
    245
  • 3.2 Removal and installation of the tailgate contact switch F111
    246
  • 4 Lighting and switch within the roof interior
    247
  • 4.3 Rear interior reading light
    253
  • 5 Switch on the gear selector cover plate
    256
  • 5.1 Removal and installation of the switch on the shift lever cover plate
    256
  • 6 Cigarette lighter U1
    257
  • 7 Horn
    258
  • 7.1 Removal and installation of the treble horn H2 and bass horn H7
    258
  • 7.2 Horn plate H
    259
  • 8 Anti-theft system
    260
  • 8.1 Immobiliser control unit J362
    260
  • 8.2 Ignition key
    261
  • 8.3 Replace the new identification of all parts of anti-theft system
    261
  • 8.4 FAZIT system test
    261
  • 9 Anti-theft system (ATA)
    262
  • 9.1 Turn on and off the anti-theft system
    262
  • Cable
    263
  • 1 vehicle diagnosis, measurement and information systems
    263
  • 2 Fuse bracket
    264
  • 2.1 Removal and installation of the fuse bracket
    264
  • 3 Relay bracket
    266
  • 3.1 Removal and installation of the relay bracket on vehicle power control unit
    266
  • 4 Control unit
    268
  • 4.1 Vehicle power control unit J519
    268
  • 4.2 Data bus diagnostic interface J533 (gateway)
    269
  • 5 Repair harness and connector
    270
Hersteller­bezeichnung Electrical system
Hersteller Volkswagen
Passend für Iltis (1979 - 1988) / Modell 181 Rl (1970 - 1979) / Lavida Family [CN] (2015 >)
Passende Autotypen 183, 184, 185
Kategorie Reparaturanleitung

Im Moment sind noch keine Bewertungen für dieses Produkt vorhanden.

Ähnliche Reparaturanleitungen

Maintenance
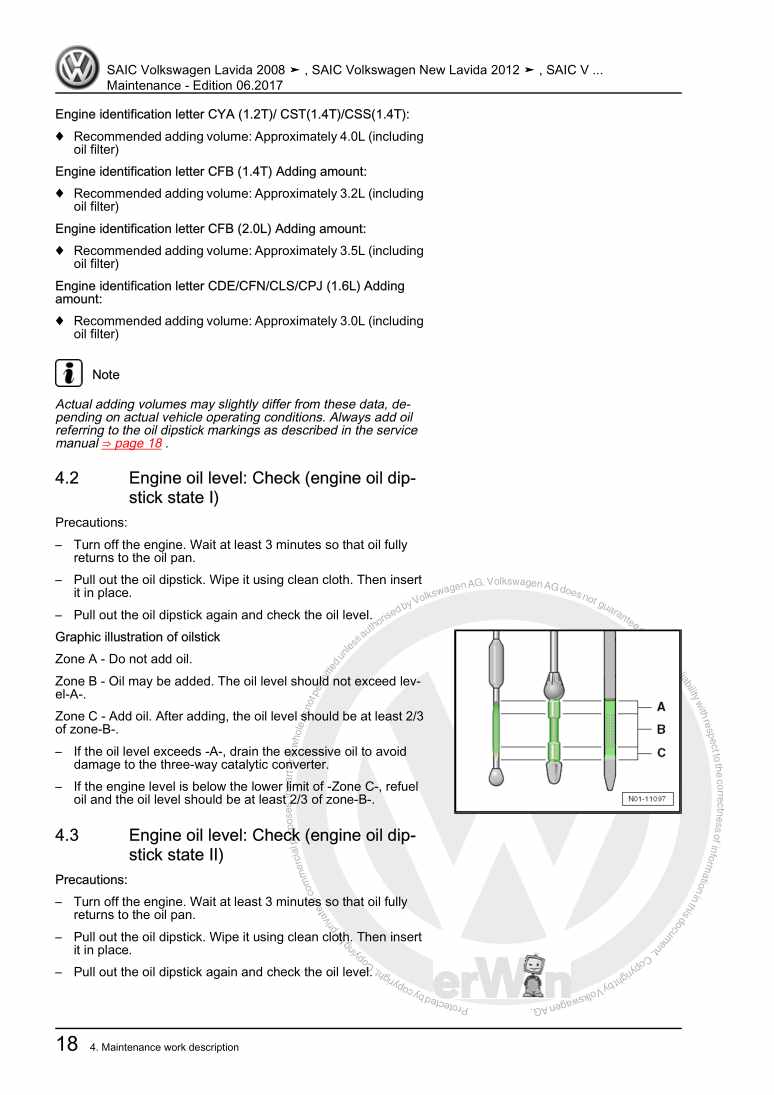
Beispielseite für Reparaturanleitung Maintenance

Für Iltis (1979 - 1988) / Modell 181 Ll (1970 - 1979) / Modell 181 Rl (1970 - 1979) / Lavida Family [CN] (2015 >) / Lavida Family [CN] (2015 >)

10,26 € Details

Communication

Beispielseite für Reparaturanleitung Communication

Für Iltis (1979 - 1988) / Modell 181 Rl (1970 - 1979) / Lavida Family [CN] (2015 >) / Lavida Family [CN] (2015 >)

11,75 € Details

7-gear dual-clutch gearbox 0AM

Beispielseite für Reparaturanleitung 7-gear dual-clutch gearbox 0AM

Für Iltis (1979 - 1988) / Modell 181 Ll (1970 - 1979) / Modell 181 Rl (1970 - 1979) / NMS [CN] (2012 >) / New Polo [CN] (2010 >) / Lavida Family [CN] (2015 >) / Lavida Family [CN] (2015 >) / NMS [CN] (2016 >) / Santana NF [CN] (2017 >) / Santana Derivat [CN] (2015 >) / Santana NF [CN] (2013 >) / Touran [CN] (2010 >)

16,55 € Details

5-Speed manual gearbox KBX/KBY/LVK/NMR/LVJ/NJS/NJV/PEA/NYZ/PCD/QNC/QVG/SCJ/SCL
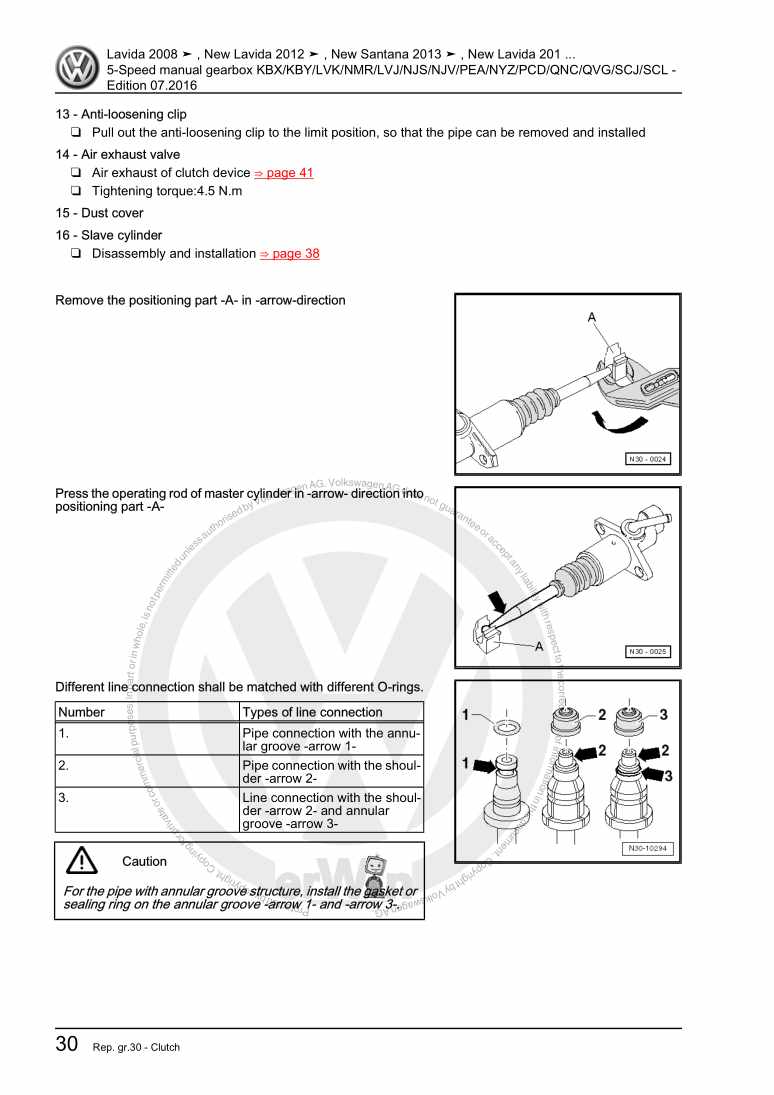
Beispielseite für Reparaturanleitung 5-Speed manual gearbox KBX/KBY/LVK/NMR/LVJ/NJS/NJV/PEA/NYZ/PCD/QNC/QVG/SCJ/SCL

Für Iltis (1979 - 1988) / Modell 181 Ll (1970 - 1979) / Modell 181 Rl (1970 - 1979) / Lavida Family [CN] (2015 >) / Lavida Family [CN] (2015 >) / Santana NF [CN] (2017 >) / Santana Derivat [CN] (2015 >) / Santana NF [CN] (2013 >)

15,68 € Details

1.4L 4-cylinder 4-valve TSI turbocharged engine CST/CSS
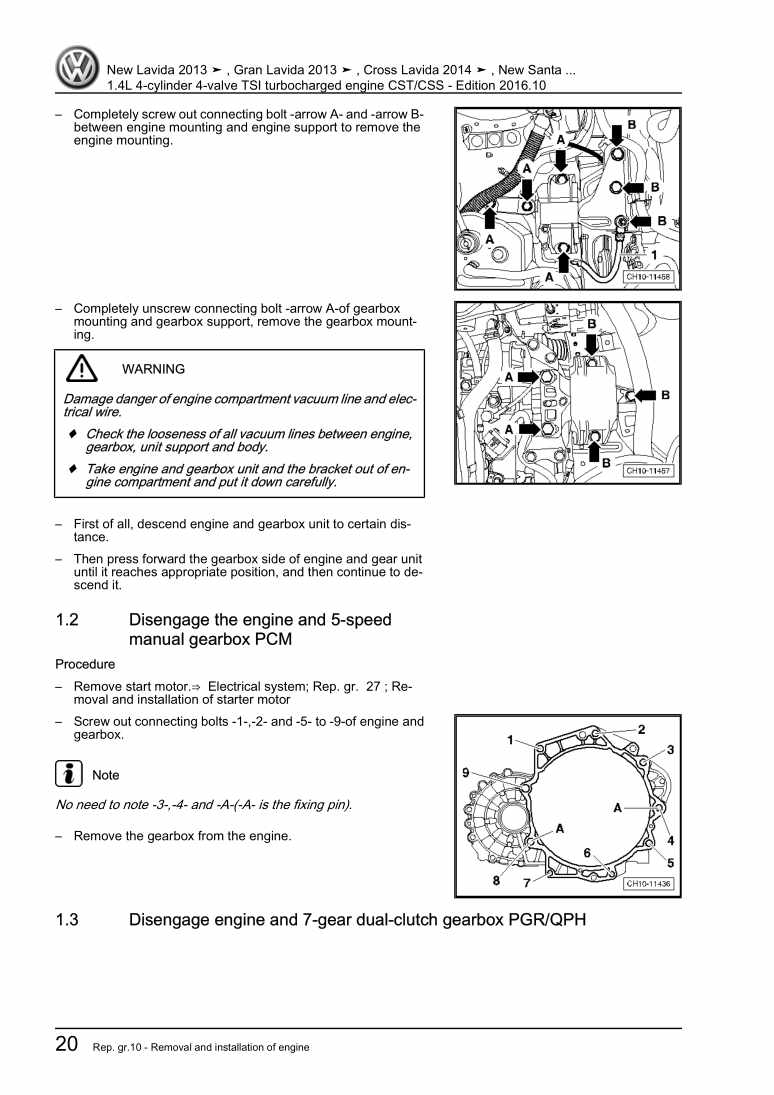
Beispielseite für Reparaturanleitung 1.4L 4-cylinder 4-valve TSI turbocharged engine CST/CSS

Für Iltis (1979 - 1988) / Modell 181 Rl (1970 - 1979) / New Polo [CN] (2010 >) / Lavida Family [CN] (2015 >) / Lavida Family [CN] (2015 >) / NMS [CN] (2016 >) / Touran [CN] (2016 >) / Lamando [CN] (2015 >) / Tiguan [CN] (2013 >) / Santana NF [CN] (2017 >) / Santana Derivat [CN] (2015 >) / Santana NF [CN] (2013 >)

48,38 € Details

Air conditioning system with refrigerant of R134a
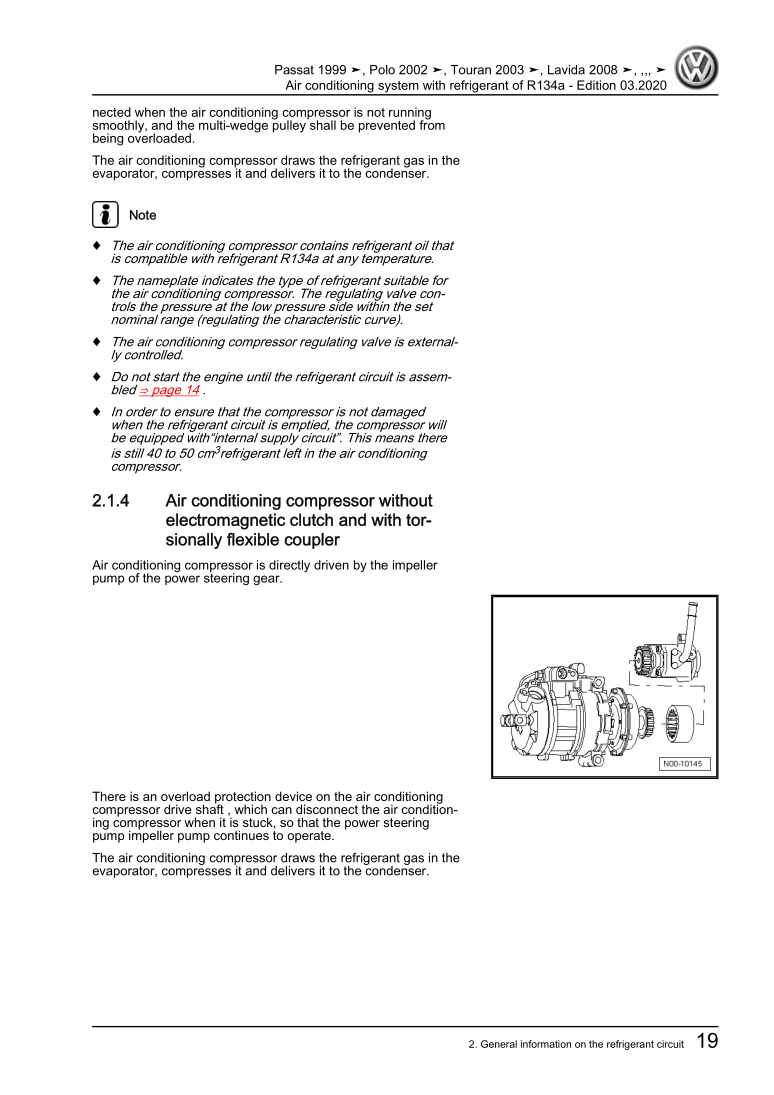
Beispielseite für Reparaturanleitung Air conditioning system with refrigerant of R134a

Für Polo A04 (China) (2002 - 2006) / Polo A04 (China) (2002 - 2006) / Iltis (1979 - 1988) / Passat (China) (2005 - 2006) / Touran (China) (2004 - 2006) / Modell 181 Ll (1970 - 1979) / Polo A04 (China) (2006) / Passat (China) (2000 - 2006) / Polo A04 (China) (2006) / Modell 181 Rl (1970 - 1979) / Tiguan [CN] (2017 >) / NMS [CN] (2012 >) / New Polo [CN] (2010 >) / Lavida Family [CN] (2015 >) / Lavida Family [CN] (2015 >) / NMS [CN] (2016 >) / Touran [CN] (2016 >) / Phideon [CN] (2017 >) / B-SUV [CN] (2017 >) / Lamando [CN] (2015 >) / Tiguan [CN] (2009 >) / Tiguan [CN] (2013 >) / Santana NF [CN] (2017 >) / Santana Derivat [CN] (2015 >) / Santana NF [CN] (2013 >) / Lavida NF Hatchback [CN] (2017 >) / Lavida NF Notchback [CN] (2017 >) / Tharu (CN) (2018 >) / Passat [CN] (2019 >) / Lavida BEV [CN] (2019 >) / T-Cross [CN] (2019 >) / Teramont Coupe [CN] (2019 >) / Polo NF [CN] (2019 >) / Tharu [CN] (2020 >) / Viloran MPV (2020 >) / Passat [CN] (2009 - 2012) / Touran [CN] (2010 >) / Polo [CN] (2011 >)

12,47 € Details

1.4L/1.6L 4-cylinder 4-valve gasoline engine CKA/CPD/CSR/DAH
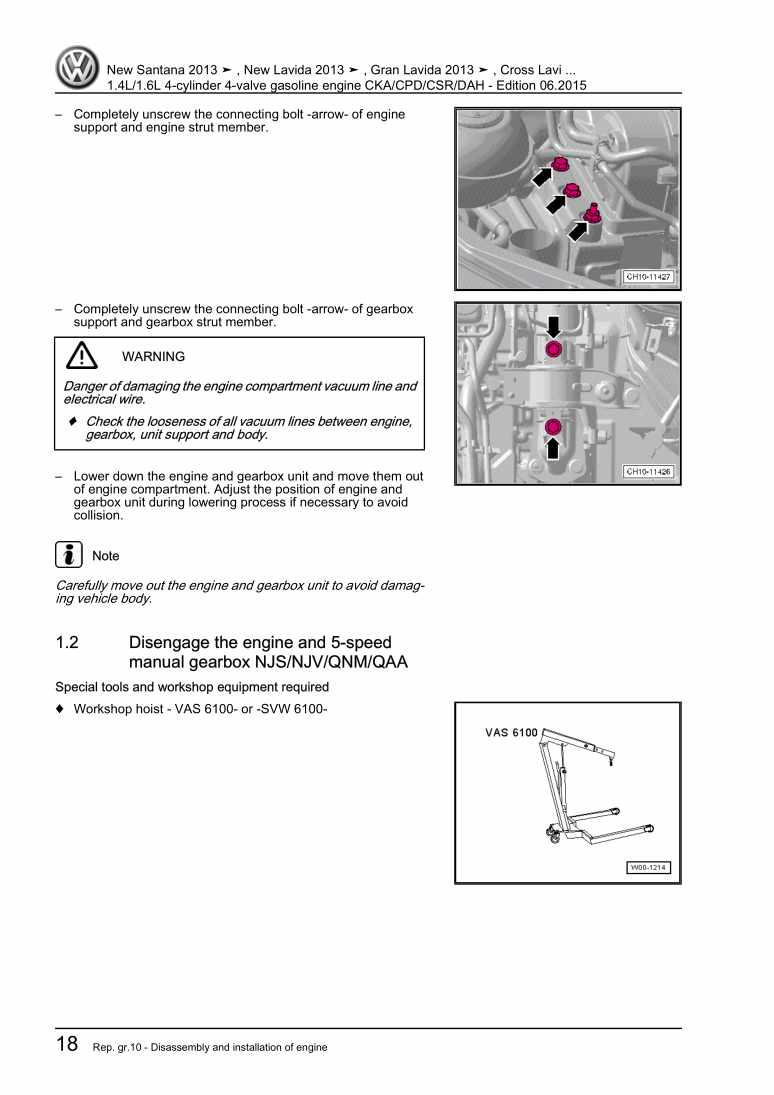
Beispielseite für Reparaturanleitung 1.4L/1.6L 4-cylinder 4-valve gasoline engine CKA/CPD/CSR/DAH

Für Iltis (1979 - 1988) / Modell 181 Rl (1970 - 1979) / New Polo [CN] (2010 >) / Lavida Family [CN] (2015 >) / Lavida Family [CN] (2015 >) / Santana NF [CN] (2017 >) / Santana Derivat [CN] (2015 >) / Santana NF [CN] (2013 >) / Touran [CN] (2010 >)

32,60 € Details

Basic equipment, From April 2013

Beispielseite für Reparaturanleitung Basic equipment, From April 2013

Für Iltis (1979 - 1988) / Lavida Family [CN] (2015 >)

21,98 € Details

General information on electric system
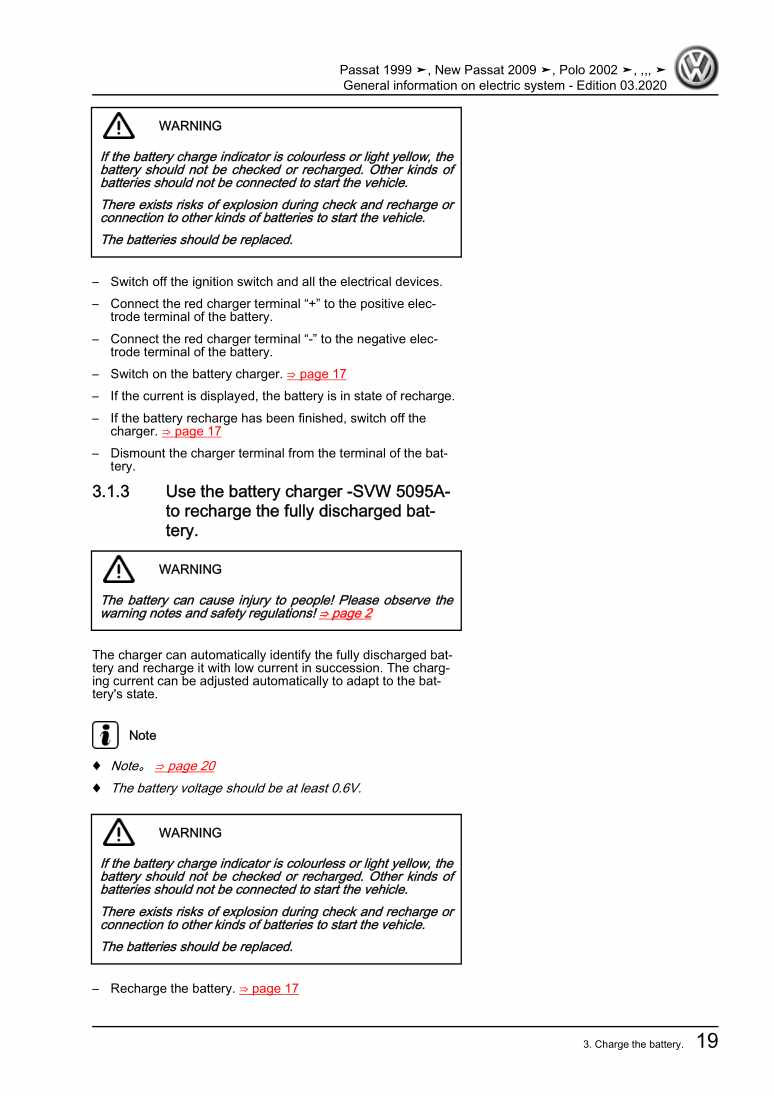
Beispielseite für Reparaturanleitung General information on electric system

Für Polo A04 (China) (2002 - 2006) / Polo A04 (China) (2002 - 2006) / Iltis (1979 - 1988) / Passat (China) (2005 - 2006) / Touran (China) (2004 - 2006) / Modell 181 Ll (1970 - 1979) / Polo A04 (China) (2006) / Passat (China) (2000 - 2006) / Polo A04 (China) (2006) / Modell 181 Rl (1970 - 1979) / Tiguan [CN] (2017 >) / NMS [CN] (2012 >) / New Polo [CN] (2010 >) / Lavida Family [CN] (2015 >) / Lavida Family [CN] (2015 >) / NMS [CN] (2016 >) / Touran [CN] (2016 >) / Phideon [CN] (2017 >) / B-SUV [CN] (2017 >) / Lamando [CN] (2015 >) / Tiguan [CN] (2009 >) / Tiguan [CN] (2013 >) / Santana NF [CN] (2017 >) / Santana Derivat [CN] (2015 >) / Santana NF [CN] (2013 >) / Lavida NF Hatchback [CN] (2017 >) / Lavida NF Notchback [CN] (2017 >) / Lamando (BM2) [CN] (2018 >) / Tharu (CN) (2018 >) / Passat [CN] (2019 >) / Lavida BEV [CN] (2019 >) / T-Cross [CN] (2019 >) / Teramont Coupe [CN] (2019 >) / Polo NF [CN] (2019 >) / Tharu [CN] (2020 >) / Viloran MPV (2020 >) / Passat [CN] (2009 - 2012) / Touran [CN] (2010 >) / Polo [CN] (2011 >)

22,12 € Details

Chassis

Beispielseite für Reparaturanleitung Chassis

Für Iltis (1979 - 1988) / Modell 181 Ll (1970 - 1979) / Modell 181 Rl (1970 - 1979) / Lavida Family [CN] (2015 >) / Lavida Family [CN] (2015 >)

14,21 € Details

Unsere Best Seller

Schon gewusst? Wir bieten auch originale Autoteile an.

Autoteil 2K5863328 Einlage

2K5863328

Einlage

6,02 €

Details
Autoteil 6Q0810221 Schlieteil

6Q0810221

Schlieteil

48,10 €

Details
Autoteil 070109153 Deckel

070109153

Deckel

38,73 €

Details
Autoteil N904162024PK Schraube

N904162024PK

Schraube

1,29 €

Details
Autoteil 06D103469N Zyl.Kopfha

06D103469N

Zyl.Kopfha

257,96 €

Details

Verteilergetriebe und Achsantriebe

Beispielseite für Reparaturanleitung Verteilergetriebe und Achsantriebe

Für Touareg (2003 - 2007)

12,83 € Details

Ratgeber Räder, Reifen

Beispielseite für Reparaturanleitung Ratgeber Räder, Reifen

Für Touran (2016 > )

5,52 € Details

Nr. 526: Die Dieselmotoren-Baureihe EA288 mit Abgasnorm EU6

Beispielseite für Reparaturanleitung Nr. 526: Die Dieselmotoren-Baureihe EA288 mit Abgasnorm EU6

5,89 € Details

image/svg+xml Über Clonck

Originale Reparaturanleitungen und Ersatzteile

Unsere Reparaturanleitungen sind Originale, kommen direkt von Volkswagen und erfüllen die höchsten Qualitätsstandards.

In unserem Originalteile-Shop verkaufen wir hochwertige Originalersatzteile der Fahrzeughersteller. Mithilfe der Suche gibst du die gewünschte Teilenummer (OE-Nummer) ein und bestellst schnell und einfach das benötigte Ersatzteil.

Höchste Qualitätsstandards

Bei Clonck wollen wir Autoschrauber und Kfz-Profis glücklich machen. Aus diesem Grund findest du bei Clonck ausschließlich professionelle und hochwertige Reparaturanleitungen, mit deren Hilfe du dein Fahrzeug fachgerecht reparieren kannst.

Unsere Partner

Autohaus Schmidt GmbH
Automag GmbH Filiale Laim
KFZ-VERLAG GmbH
Zimpel und Franke GmbH

Clonck: Der Autoreparatur-Shop - gibt's auch als App!

Clonck App Logo Play Store

Clonck: Passende Autoteile für deine Autoreparatur

4,5 90

Mit Clonck bestellst du die richtigen Originalersatzteile im Handumdrehen.

  • Fahrzeugmodell hinzufügen
  • Baugruppe auswählen
  • Fahrzeug-Identifizierungsnummer (FIN) eingeben
  • Über 5.000 originale Reparaturanleitungen einsehen
Jetzt App starten
Clonck App Preview Auto Mobiltelefon Autoteile