DER AUTOREPARATUR-SHOP
0
Home » Anleitungen » 5-speed manual gearbox 02C four-wheel drive
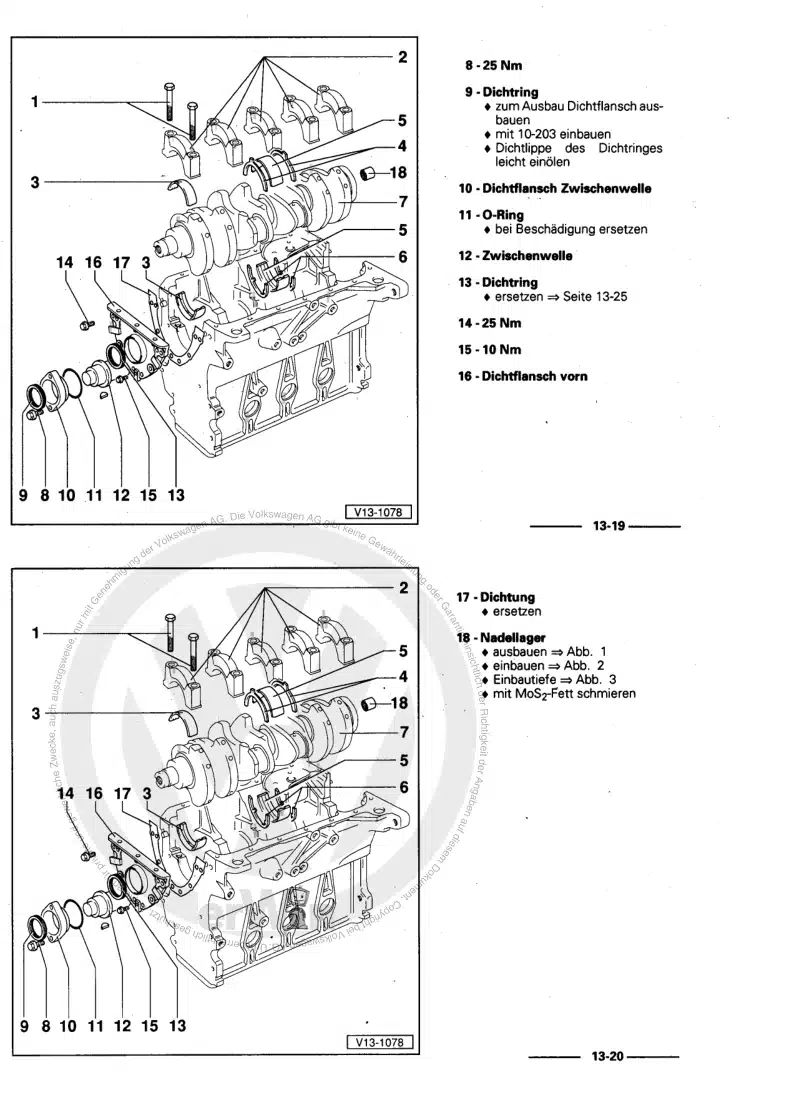
  • Beispielseite für Reparaturanleitung 5-speed manual gearbox 02C four-wheel drive
  • Beispielseite für Reparaturanleitung 2 5-speed manual gearbox 02C four-wheel drive
  • Beispielseite für Reparaturanleitung 3 5-speed manual gearbox 02C four-wheel drive
  • Beispielseite für Reparaturanleitung 5-speed manual gearbox 02C four-wheel drive
  • Beispielseite für Reparaturanleitung 2 5-speed manual gearbox 02C four-wheel drive
  • Beispielseite für Reparaturanleitung 3 5-speed manual gearbox 02C four-wheel drive

5-speed manual gearbox 02C four-wheel drive

Für Bora / Bora Variant / Golf / Golf Variant

Original VW-Reparaturanleitung


30,13 €inkl. 7% MwSt.

  • Deutsch
  • English

Sofort als Download verfügbar

Sprache: English

Digitale PDF Version

9.891 KB

400 Seiten

Detaillierte technische Daten

Sofort lesbar

Diese Reparaturanleitung umfasst: Servicing clutch control, Connecting VAS 5051 and selecting functions, Locations of electrical/electronic components, Checking oil in manual gearbox with bevel box, Adjusting input shaft, Renewing oil seals for flange shafts or right-hand drive flange (gearbox installed) und Replacing bevel box output flange oil seal (bevel box removed). Mehr anzeigen
Sichere Zahlung per PayPal, Kreditkarte, Lastschrift, Sofort-Überweisung oder Giropay
PayPal Logo SEPA Lastschrift Logo Giropay Logo Sofort Überweisung Logo

Reparaturanleitung Bora / Bora Variant / Golf / Golf Variant 5-speed manual gearbox 02C four-wheel drive pdf Download mit dem Inhalt:

Kapitelübersicht

  • Technical data
    1
  • 1 Gearbox identification
    1
  • 1.1 Gearbox identification
    1
  • 1.2 Code letters, assembly allocation, ratios, capacities
    2
  • 2 Rear final drive identification
    4
  • 2.1 Rear final drive identification
    4
  • 2.2 Code letters, assembly allocation, ratios, capacities
    5
  • 3 Transmission layout
    7
  • 3.1 Transmission layout
    7
  • 4 Calculating overall ratio "i"
    9
  • 4.1 Calculating overall ratio "i"
    9
  • 4.2 Notes on brake and performance tests and towing
    9
  • 5 General repair instructions
    9
  • 5.1 General repair instructions
    9
  • Clutch
    12
  • 1 Servicing clutch control
    12
  • 1.1 Servicing clutch control
    12
  • 1.2 Assembly overview - Pedal cluster
    13
  • 1.3 Removing and installing over-centre spring
    14
  • 1.4 Removing and installing clutch pedal
    16
  • 1.5 Assembly overview - Hydraulic system
    19
  • 1.6 Removing and installing master cylinder
    22
  • 1.7 Bleeding clutch system
    27
  • 2 Servicing clutch release mechanism
    27
  • 2.1 Servicing clutch release mechanism
    27
  • 3 Servicing clutch
    31
  • 3.1 Servicing clutch
    31
  • Controls, Housing
    36
  • 1 Connecting VAS 5051 and selecting functions
    36
  • 1.1 Connecting VAS 5051 and selecting functions
    36
  • 2 Locations of electrical/electronic components
    38
  • 2.1 Locations of electrical/electronic components
    38
  • 2.2 Removing and installing four-wheel drive control unit -J492
    42
  • 2.3 Removing and installing Haldex coupling pump -V181-
    43
  • 3 Electrical check of Haldex coupling
    46
  • 3.1 Electrical check of Haldex coupling
    46
  • 4 Servicing gear selector mechanism
    52
  • 4.1 Servicing gear selector mechanism
    52
  • 4.2 Installation position of gear selector mechanism
    52
  • 4.3 Removing and installing selector lever knob and gaiter
    55
  • 4.4 Servicing gear stick and gear stick housing
    57
  • 4.5 Assembly overview - removing and installing selector cables
    61
  • 4.6 Removing and installing gear selector mechanism
    65
  • 4.7 Adjusting gear selector mechanism
    70
  • 5 Removing and installing gearbox
    74
  • 5.1 Removing and installing gearbox
    74
  • 6 Removing and installing bevel box
    94
  • 6.1 Removing and installing bevel box
    94
  • 7 Checking oil in manual gearbox with bevel box
    97
  • 7.1 Checking oil in manual gearbox with bevel box
    97
  • 8 Dismantling and assembling gearbox
    99
  • 8.1 Dismantling and assembling gearbox
    99
  • 8.2 Overview
    99
  • 8.3 Assembly overview
    102
  • 8.4 Removing and installing cover for gearbox housing and 5th gear
    103
  • 8.5 Removing and installing gearbox housing and selector mechanism
    105
  • 8.6 Removing and installing input shaft, output shaft (pinion shaft), differential and selector forks
    107
  • 8.7 Assembly sequence
    109
  • 9 Servicing gearbox housing and clutch housing
    127
  • 9.1 Servicing gearbox housing and clutch housing
    127
  • 10 Dismantling and assembling gearbox selector mechanism
    137
  • 10.1 Dismantling and assembling gearbox selector mechanism
    137
  • 11 Dismantling and assembling selector forks
    144
  • 11.1 Dismantling and assembling selector forks
    144
  • Gears, Shafts
    153
  • 1 Dismantling and assembling input shaft
    153
  • 1.1 Dismantling and assembling input shaft
    153
  • 1.2 From gearbox build date 05 11 1 circlips for 5th gear synchronisation have been modified
    166
  • 2 Adjusting input shaft
    168
  • 2.1 Adjusting input shaft
    168
  • 2.2 Table of adjustment shims
    170
  • 2.3 Performing measurement check
    172
  • 3 Dismantling and assembling output shaft
    173
  • 3.1 Dismantling and assembling output shaft
    173
  • 4 Adjusting output shaft
    201
  • 4.1 Adjusting output shaft
    201
  • 5 Dismantling and assembling reverse shaft
    205
  • 5.1 Dismantling and assembling reverse shaft
    205
  • Final drive, Differential rear
    211
  • 1 Renewing oil seals for flange shafts or right-hand drive flange (gearbox installed)
    211
  • 1.1 Renewing oil seals for flange shafts or right-hand drive flange (gearbox installed)
    211
  • 1.2 Renewing left-hand flange shaft oil seal
    211
  • 1.3 Renewing oil seal for flange shaft or right-hand drive flange
    214
  • 2 Replacing bevel box output flange oil seal (bevel box removed)
    216
  • 2.1 Replacing bevel box output flange oil seal (bevel box removed)
    216
  • 3 Dismantling and assembling differential
    218
  • 3.1 Dismantling and assembling differential
    218
  • 4 Adjustment overview
    233
  • 4.1 Adjustment overview
    233
  • 5 Adjusting differential
    234
  • 5.1 Adjusting differential
    234
  • 6 Dismantling and assembling bevel box
    237
  • 6.1 Dismantling and assembling bevel box
    237
  • 7 Renewing needle roller bearing (polygon bearing) for right output shaft or right flanged shaft
    260
  • 7.1 Renewing needle roller bearing (polygon bearing) for right output shaft or right flanged shaft
    260
  • 8 Adjusting shaft bevel gear and bevel gear (gear set)
    263
  • 8.1 Adjusting shaft bevel gear and bevel gear (gear set)
    263
  • 8.2 General notes
    263
  • 8.3 Adjusting and marking of gear sets
    264
  • 8.4 Position of shims
    266
  • 8.5 Adjustment overview (bevel box)
    266
  • 8.6 Recommended sequence for adjusting gear set
    267
  • 8.7 Determining shim "S4" thickness when replacing output flange
    267
  • 8.8 Adjusting shaft bevel gear
    268
  • 8.9 Adjusting bevel gear
    275
  • 9 Removing and installing propshaft
    279
  • 9.1 Removing and installing propshaft
    279
  • 9.2 Removing and installing front flexible coupling
    284
  • 9.3 Removing and installing rear flexible coupling
    287
  • 10 Servicing propshaft
    292
  • 10.1 Servicing propshaft
    292
  • 11 Checking function of Haldex coupling
    301
  • 11.1 Checking function of Haldex coupling
    301
  • 12 Renewing propshaft flange oil seal on rear final drive (final drive removed)
    302
  • 12.1 Renewing propshaft flange oil seal on rear final drive (final drive removed)
    302
  • 13 Renewing flange shaft oil seal (final drive installed)
    305
  • 13.1 Renewing flange shaft oil seal (final drive installed)
    305
  • 15 Renewing O-rings for rear axle housing cover (final drive installed)
    310
  • 15.1 Renewing O-rings for rear axle housing cover (final drive installed)
    310
  • 16 Removing and installing rear final drive
    312
  • 16.1 Removing and installing rear final drive
    312
  • 17 Checking rear final drive oil
    317
  • 17.1 Checking rear final drive oil
    317
  • 18 Checking oil level in Haldex coupling or changing oil
    317
  • 18.1 Checking oil level in Haldex coupling or changing oil
    317
  • 18.2 Checking Haldex coupling oil level
    317
  • 18.3 Changing oil in Haldex coupling
    319
  • 18.4 Changing Haldex coupling oil filter
    320
  • 19 Dismantling and assembling rear final drive
    322
  • 19.1 Dismantling and assembling rear final drive
    322
  • 19.2 Removing and installing Haldex coupling cover and plates
    323
  • 19.3 Removing and installing pinion housing
    327
  • 19.4 Removing and installing differential and input shaft bevel gear
    331
  • 19.5 Removing and installing Haldex coupling plate housing cover
    335
  • 19.6 Assembly sequence
    340
  • 20 Dismantling and assembling differential
    353
  • 20.1 Dismantling and assembling differential
    353
  • 21 Servicing shaft bevel gear bearings
    359
  • 21.1 Servicing shaft bevel gear bearings
    359
  • 22 Servicing input shaft bevel gear bearings
    371
  • 22.1 Servicing input shaft bevel gear bearings
    371
  • 23 Adjusting bevel gear and shaft bevel gear (gear set)
    381
  • 23.1 Adjusting bevel gear and shaft bevel gear (gear set)
    381
  • 23.2 General notes
    381
  • 23.3 Adjusting and marking of gear sets
    382
  • 23.4 Position of shims
    384
  • 23.5 Adjustment overview (rear final drive)
    384
  • 23.6 Recommended sequence for adjusting gear set
    385
  • 23.7 Adjusting shaft bevel gear
    386
  • 23.8 Adjusting bevel gear
    391
Hersteller­bezeichnung 5-speed manual gearbox 02C four-wheel drive
Hersteller Volkswagen
Passend für Bora / Bora Variant / Golf / Golf Variant (1998 - 2006)
Passende Autotypen 1J
Kategorie Reparaturanleitung

Im Moment sind noch keine Bewertungen für dieses Produkt vorhanden.

Ähnliche Reparaturanleitungen

Basic equipment, from October 1998

Beispielseite für Reparaturanleitung Basic equipment, from October 1998

Für Bora / Bora Variant / Golf / Golf Variant (1998 - 2006)

40,99 € Details

4-cyl. injection engine (2.0 ltr.), mechanics

Beispielseite für Reparaturanleitung 4-cyl. injection engine (2.0 ltr.), mechanics

Für Bora / Bora Variant / Golf / Golf Variant (1998 - 2006)

12,25 € Details

5-cyl. injection engine (4-valve)

Beispielseite für Reparaturanleitung 5-cyl. injection engine (4-valve)

Für Bora / Bora Variant / Golf / Golf Variant (1998 - 2006)

14,43 € Details

Basic equipment, Golf Variant and Bora Variant, from May 1999

Beispielseite für Reparaturanleitung Basic equipment, Golf Variant and Bora Variant, from May 1999

Für Bora / Bora Variant / Golf / Golf Variant (1998 - 2006)

59,19 € Details

Direct injection and glow plug system with distributor pump as of 05.99

Beispielseite für Reparaturanleitung Direct injection and glow plug system with distributor pump as of 05.99

Für Bora / Bora Variant / Golf / Golf Variant (1998 - 2006)

10,40 € Details

Motronic injection and ignition system (4 valve), roller rocker finger, APE

Beispielseite für Reparaturanleitung Motronic injection and ignition system (4 valve), roller rocker finger, APE

Für Bora / Bora Variant / Golf / Golf Variant (1998 - 2006)

14,58 € Details

Electrical system

Beispielseite für Reparaturanleitung Electrical system

Für Bora / Bora Variant / Golf / Golf Variant (1998 - 2006)

19,94 € Details

Motronic injection and ignition system (2.0 ltr. engine)

Beispielseite für Reparaturanleitung Motronic injection and ignition system (2.0 ltr. engine)

Für Bora / Bora Variant / Golf / Golf Variant (1998 - 2006)

12,40 € Details

Automatic gearbox 01M self-diagnosis

Beispielseite für Reparaturanleitung Automatic gearbox 01M self-diagnosis

Für Bora / Bora Variant / Golf / Golf Variant (1998 - 2006)

6,46 € Details

General body repairs, exterior

Beispielseite für Reparaturanleitung General body repairs, exterior

Für Bora / Bora Variant / Golf / Golf Variant (1998 - 2006)

16,33 € Details

Unsere Best Seller

Schon gewusst? Wir bieten auch originale Autoteile an.

Autoteil 5GM819728DDAR Ausstroem.

5GM819728DDAR

Ausstroem.

190,89 €

Details
Autoteil 3G9877439 Dichtung

3G9877439

Dichtung

114,06 €

Details
Autoteil 3AB971557D Leitg.Satz

3AB971557D

Leitg.Satz

17,43 €

Details
Autoteil 82A807682F9B9 Gitter

82A807682F9B9

Gitter

34,10 €

Details
Autoteil 2Q0129509A Luftfuehrg

2Q0129509A

Luftfuehrg

36,32 €

Details

4-Zylinder-Dieselmotor (1,9 l-Motor) 028.B / ADE / ADG

Beispielseite für Reparaturanleitung 4-Zylinder-Dieselmotor (1,9 l-Motor) 028.B / ADE / ADG

Für Industriemotoren - Industrial Engines ()

7,57 € Details

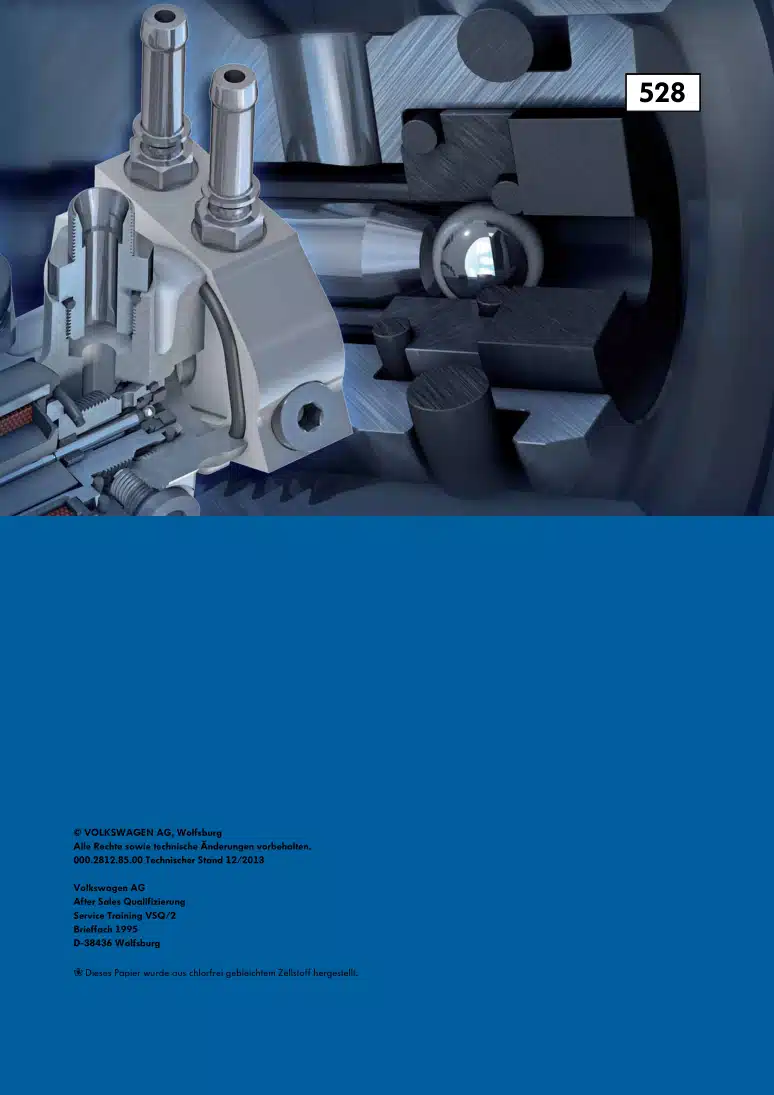
Nr. 528: Der Erdgasantrieb im Golf/Golf Variant TGI BlueMotion

Beispielseite für Reparaturanleitung Nr. 528: Der Erdgasantrieb im Golf/Golf Variant TGI BlueMotion

5,26 € Details

Kardanwelle und Achsantrieb hinten

Beispielseite für Reparaturanleitung Kardanwelle und Achsantrieb hinten

Für Passat / Passat Variant (2005 - 2008) / Golf (2004 - 2007) / Tiguan (2008) / Passat CC (2009) / Golf (2009) / Sharan (2011)

20,15 € Details

image/svg+xml Über Clonck

Originale Reparaturanleitungen und Ersatzteile

Unsere Reparaturanleitungen sind Originale, kommen direkt von Volkswagen und erfüllen die höchsten Qualitätsstandards.

In unserem Originalteile-Shop verkaufen wir hochwertige Originalersatzteile der Fahrzeughersteller. Mithilfe der Suche gibst du die gewünschte Teilenummer (OE-Nummer) ein und bestellst schnell und einfach das benötigte Ersatzteil.

Höchste Qualitätsstandards

Bei Clonck wollen wir Autoschrauber und Kfz-Profis glücklich machen. Aus diesem Grund findest du bei Clonck ausschließlich professionelle und hochwertige Reparaturanleitungen, mit deren Hilfe du dein Fahrzeug fachgerecht reparieren kannst.

Unsere Partner

Autohaus Schmidt GmbH
Automag GmbH Filiale Laim
KFZ-VERLAG GmbH
Zimpel und Franke GmbH

Clonck: Der Autoreparatur-Shop - gibt's auch als App!

Clonck App Logo Play Store

Clonck: Passende Autoteile für deine Autoreparatur

4,5 90

Mit Clonck bestellst du die richtigen Originalersatzteile im Handumdrehen.

  • Fahrzeugmodell hinzufügen
  • Baugruppe auswählen
  • Fahrzeug-Identifizierungsnummer (FIN) eingeben
  • Über 5.000 originale Reparaturanleitungen einsehen
Jetzt App starten
Clonck App Preview Auto Mobiltelefon Autoteile