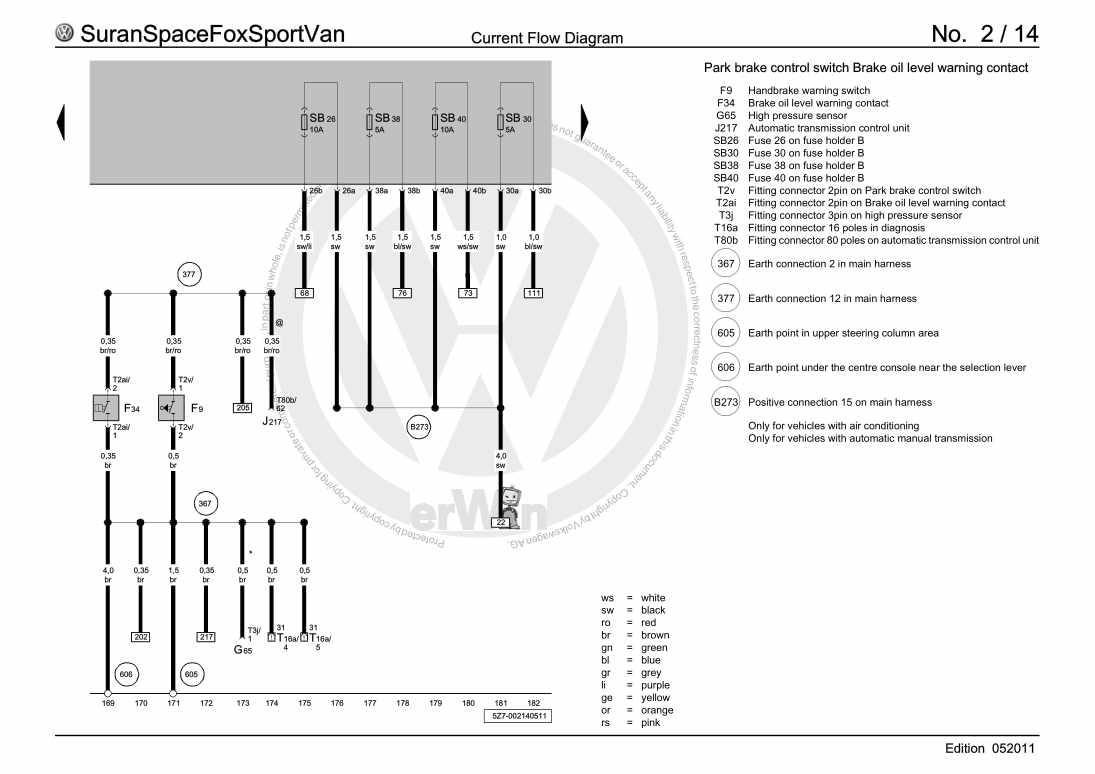
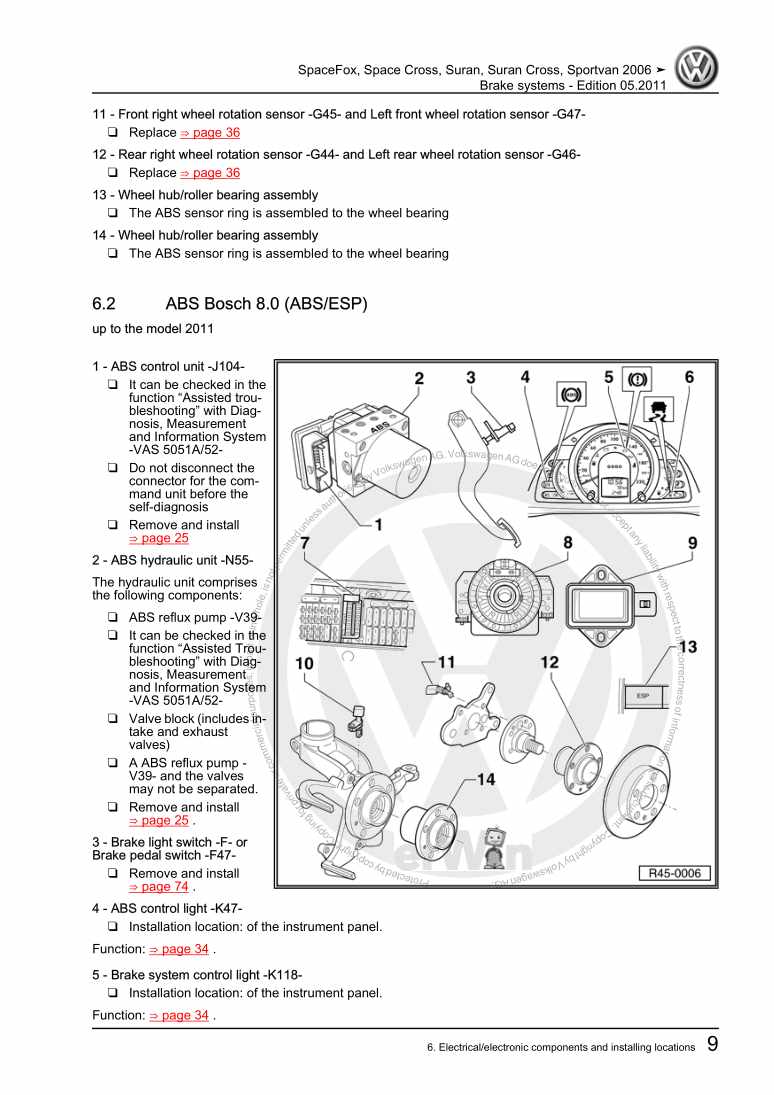
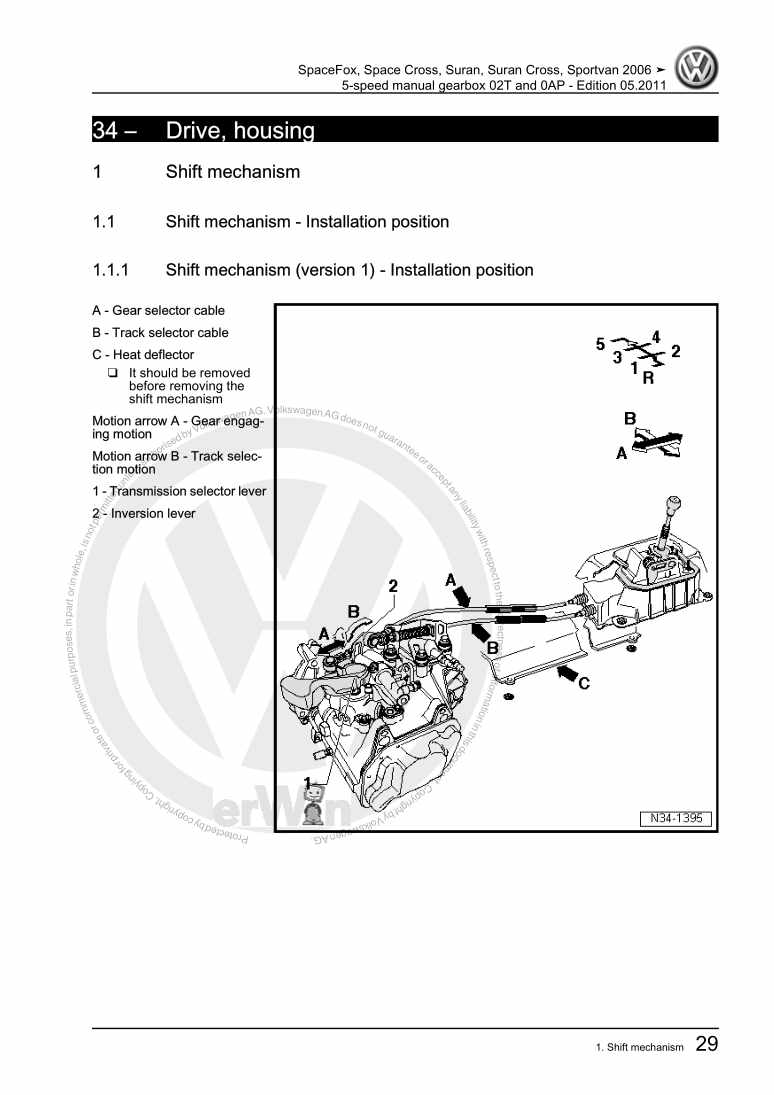
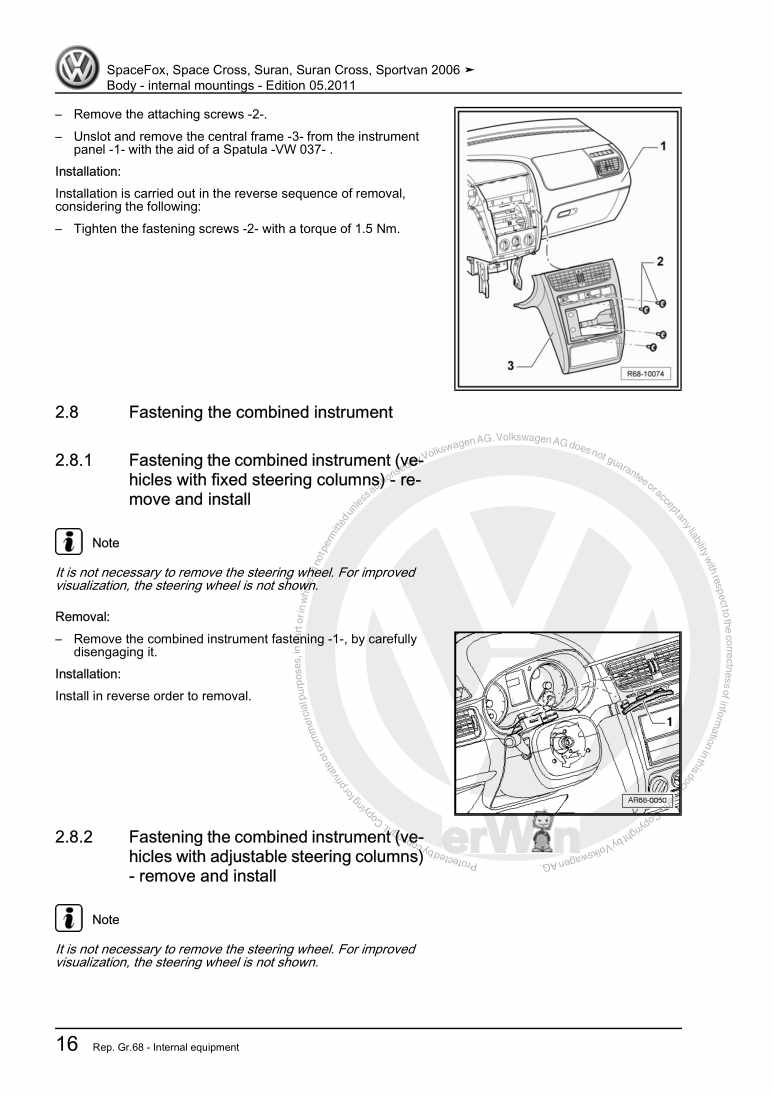
Starter, alternator, battery
11 Battery A - guidelines
11.1 Fundamental principles for the subject Battery A
11.2 Battery types
11.3 Warning notes and safety rules
21.4 Connection terminals of Battery A
32 Battery A - Check
52.1 Check sequence of a battery
52.2 Visual checking
52.3 Inspection of Battery A equipped with charge eye (peephole viewer)
62.4 Inspection of Battery A of low maintenance
72.5 Check of the resting voltage of Battery A
102.6 Charge inspection of Battery A
113 Battery A - charge
163.1 Onboard supply charger unit VAS 5095 A
163.2 Onboard supply charger unit VAS 5900
203.3 Delphi Battery - charge procedure
303.4 Fully discharged batteries
334 Battery A - Disconnect and connect
344.1 Disconnecting
344.2 Connect
365 Battery A - Remove and install
385.1 Removal
385.2 Installation
405.3 Console of Battery A - Remove and install
415.4 Tightening torques - Battery
426 Starter
436.1 Starter B - Remove and install
436.2 Starter B (Manufactured by Valeo) - Disassemble and assemble
456.3 Starter B (Manufactured by Bosch) - disassemble and assemble
496.4 Tightening torques - Starter
597 Alternator
607.1 Generator (Alternator) C - Attaching cable (B+)
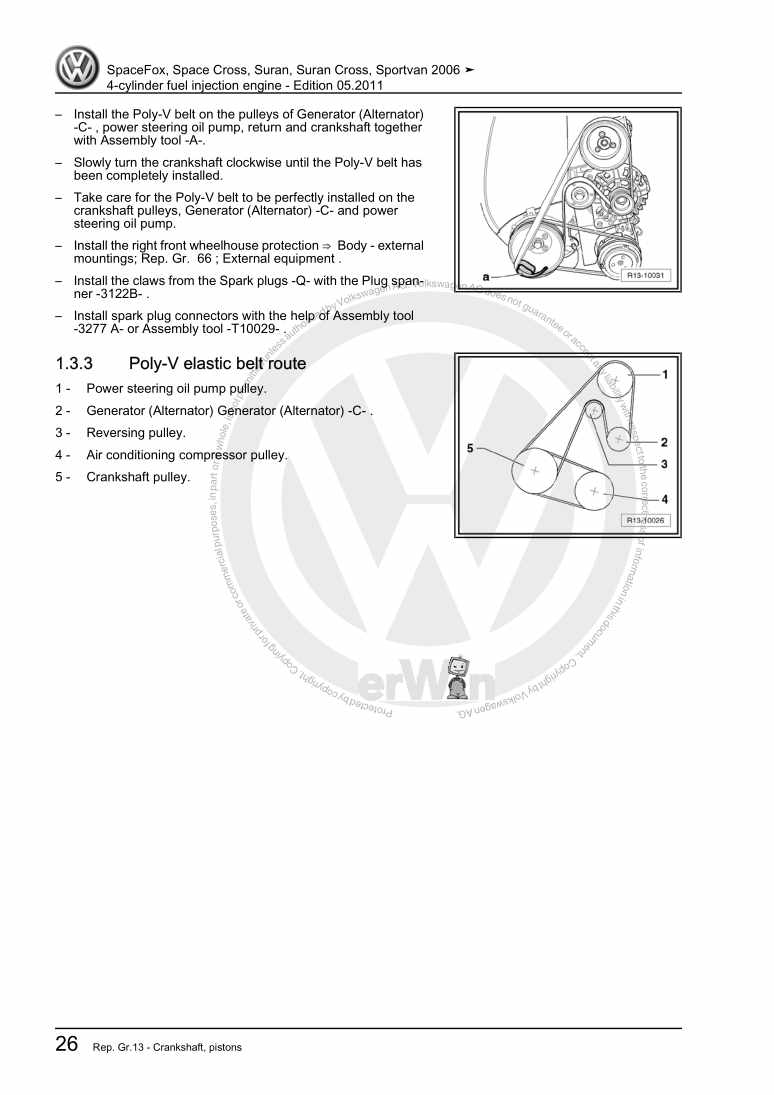
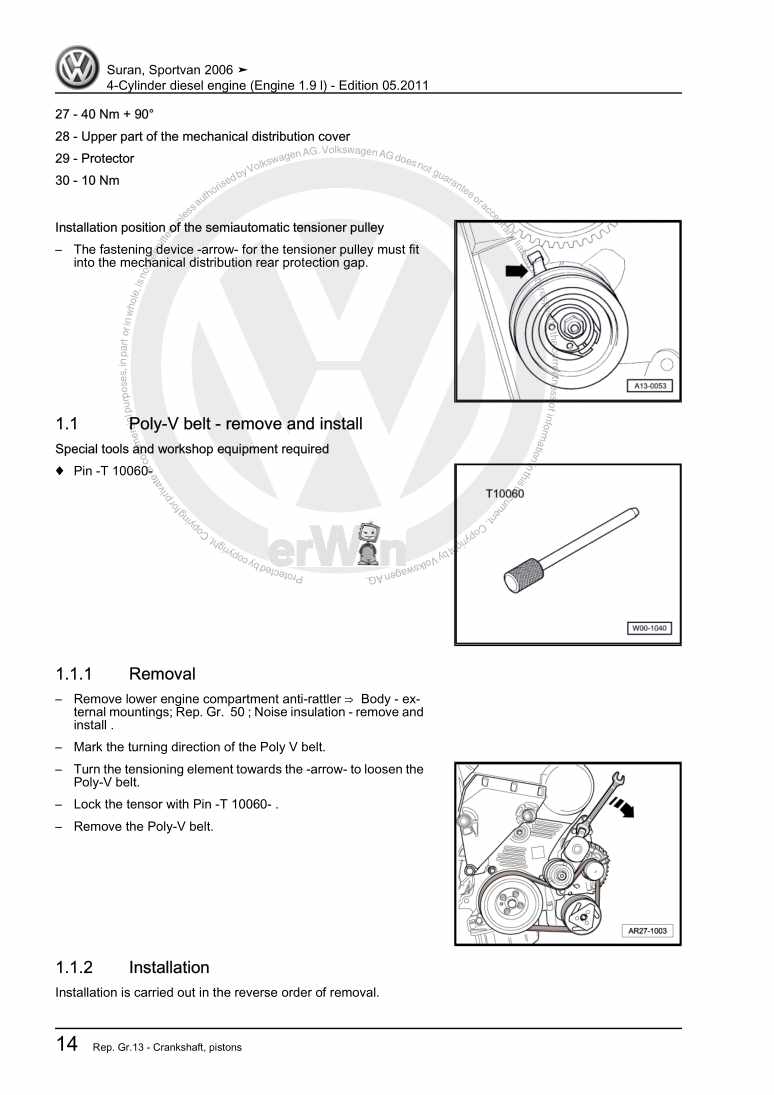
617.2 Poly-V Belt of Generator (Alternator) C - Check
617.3 Alternator with Poly-V belt (all motorizations, except CCRA, CFZA) - assembly overview
627.6 Voltage regulator (Bosch) - remove and install
697.7 Voltage regulator (Valeo) - remove and install
707.8 Poly-V belt alternator pulley - replace
717.9 Tightening torques - Alternator
73Instrument case, indicators
741 Combined instrument (up to the model 2010)
741.1 Combined instrument - replace
741.2 Combined instrument - Remove and install
751.3 Combined instrument connector occupation
761.4 Control lamp symbology on the combined instrument
771.5 Tightening torque
782 Combined instrument (up from model-year 2011)
792.1 Location and Indication of defects
792.2 Combined instrument K - replace
792.3 Combined instrument K - remove and install
812.4 Combined instrument K - description of rear part
822.5 Combined instrument K - connector pinout
832.6 Combined instrument K - control light symbols
84Windshield wiper and washer, rear window and headlights
861 Windshield wiper system
861.1 Windshield wiper system - Assembly overview
871.2 Windshield wiper blade and arm set - remove and install
871.3 Windshield wiper mechanism - remove and install
881.4 Windshield wiper blade - remove and install
891.5 Windshield wiper blade resting position - adjust
901.6 Blade application angle on the windshield - adjust
901.7 Windshield wiper motor V - disassemble and assemble
912 Windshield washer system
932.1 Windshield washer system - assembly overview
942.2 Reservoir for the windshield washer system - remove and install
942.3 Windshield washer pump V5 and/or Rear window washer pump V13 - remove and install
952.4 Windshield washer system spray nozzles - replace
952.5 Windshield washer system spray nozzles - adjust
963 Rear window wiper system
973.1 Rear window wiper and washer system - assembly overview
983.2 Rear window wiper arm - remove and install
983.3 Rear window wiper engine - remove and install
993.4 Rear window wiper blade resting position - adjust
993.5 Rear window wiper blade - remove and install
1004 Rear window washer
1014.1 Rear window washer - assembly overview
1014.2 Rear window washer system spray nozzle - adjust
1014.3 Spray nozzle - replace
1025 Tightening torque
104Switches, lights and external lamps
1051 Main headlights - single parabola (up to model-year 2010)
1051.1 Main headlights - assembly overview
1051.2 Main headlights (single) - remove and install
1051.3 Headlights - adjust
1061.4 Lamps - replace
1072 Main headlights - double parabola (up to model-year 2010)
1092.1 Main headlights (double parabola) - assembly overview
1092.2 Main headlights (double parabola) - remove and install
1092.3 Headlights - adjust
1102.4 Lamps - replace
1113 Main headlights (up from model-year 2011)
1133.1 Main headlights - assembly overview
1143.2 Main headlights (single parabola) - remove and install
1153.3 Main headlights (double parabola) - remove and install
1163.4 Main headlight lamps (single parabola) - replace
1173.5 Main headlight lamps (double parabola) - replace
1194 Fog headlights (up to model-year 2010)
1224.1 Fog headlights - assembly overview
1224.2 Fog lights - remove and install
1224.3 Fog headlight lamp - replace
1235 Fog headlights (up from model-year 2011)
1245.1 Fog headlights - assembly overview
1255.2 Fog lights - remove and install
1256 Fog lights (Suran Cross/Space Cross models)
1286.1 Fog headlights - assembly overview
1296.2 Fog lights - remove and install
1296.3 Left fog light lamp L22 and/or Right fog light lamp L23 - replace
1317 Headlights - check adjustment
1347.1 Check headlight adjustment (with the new inspection display without 15° adjustment line)
1357.2 Headlights - adjust
1368 Side turn signal lights (up from model-year 2011)
1388.1 Side indicator lights incorporated to external rearview mirrors
1389 Tail lights (up to the model 2010)
1399.1 Tail lights - assembly overview
1399.2 Tail light - remove and install
1409.3 Tail light on the luggage compartment cover - remove and install
14110 Tail lights (up to model-year 2011)
14310.1 Tail lights - assembly overview
14310.2 Tail light - remove and install
14410.3 Tail light on the luggage compartment cover - remove and install
14611 License plate light
14811.1 License plate light - remove and install
14811.2 License plate light X - change the lamp
14912 Auxiliary brake light
15012.1 Auxiliary brake light - remove and install
15013 Switch set
15214 Steering lock set
15414.1 Steering lock set - remove and install
15415 Ignition/start switch and key cylinder
15615.1 Key cylinder - remove and install
15615.2 Ignition switch D - remove and install
15815.3 Ignition switch D - occupation of pins
15816 Tightening torque
159Switches, lights and internal bulbs, alarm
1601 Lights and internal switches
1601.1 Light switch - remove and install
1601.2 Instrument panel switches (up to model-year 2010) - remove and install
1601.3 Instrument panel switches (up from model-year 2011) - remove and install
1611.4 Front internal light W1 with reading light
1621.5 Rear interior light W43 - remove and install
1661.6 Vanity mirror lighting - removal and installation
1661.7 Glove compartment light W6
1672 Front door lights and switches
1692.1 Front interior light switch. (door contact) E459 - remove and install
1692.2 Front/rear window drive switches and window block switch - remove and install
1702.5 Interior locking switch, driver side E150 - remove and install
1723 Lights and switches in the boot
1733.1 Trunk lighting switch F5 - remove and install
1733.2 Trunk lighting W3 - remove and install
1733.3 12 V socket in the luggage compartment
1744 Horns
1764.1 Horn - assembly overview
1764.2 Horn - remove and install
1764.3 Alarm horn - remove and install
1774.4 Alarm horn for diesel engines - remove and install
1784.5 Horn activator H
1785 Immobilizer (up to the model 2010)
1805.1 Immobilizer control unit - remove and install
1805.2 Immobilizer reading coil D2 - remove and install
1805.3 Transponder
1805.4 Ignition key
1806 Immobilizer (up from model-year 2011)
1826.1 Immobilizer control unit J362 - replace
1826.2 Immobilizer reading coil D2 - remove and install
1826.3 Ignition key - variable code transponder
1826.4 Ignition key - adapt to immobilizer
1826.5 Ignition key - replace the Battery A
1827 Tracker (up from model-year 2012)
1837.1 Tracker - assembly overview
1837.2 Tracker antenna - remove and install
1847.3 Tracker - remove and install
1868 Alarm
1878.1 Alarm - activate and deactivate
1878.2 Ultrasound sensor for the alarm system G209 - remove and install
1889 Auxiliary parking system (PDC)
1899.1 Auxiliary parking system - assembly overview
1909.2 Control unit for parking aid J446 - remove and install
1909.3 Warning buzzer for rear parking aid H15 - remove and install
1929.4 Auxiliary parking sensor - remove and install
19310 Tightening torque
195Cables and wiring harnesses
1961 Vehicle diagnosis, measurement and information system
1961.1 Diagnosis, Measurement and Information System VAS 5051A/52 - connect .
1962 Fuse and relay support
1982.1 Fuse and relay support - remove and install
1983 Coupling stations and engine compartment bellows lid
1993.1 Coupling station on pillar A - assembly overview
1993.2 Coupling station on pillar B - assembly overview
2003.3 Caul lid on engine compartment partition panel - remove and install
2004 Fuse box
2014.1 Fuse box - remove and install
2015 Control unit
2065.1 Central control unit for the convenience system J393
2065.2 Control unit of lights with windshield wiper functions J917
2076 Repairs of wiring harnesses and connections
2086.1 Wiring harness repair set
2086.2 Description of tools
2086.3 General notes on repair works on the vehicle electrical system
2106.4 Wiring harness repairs
2116.5 Repair of connectors terminals
2206.6 Unlock and disassemble connectors
224
