Technical data
11 Safety information
11.1 Safety regulations for working on fuel supply
11.2 Safety measures when working on vehicles with start/stop system
11.4 Safety precautions when working on the cooling system
21.5 Safety precautions when working on ignition system
22 Identification
32.1 Engine number/engine data
33 Repair instructions
63.1 Rules for cleanliness
63.2 General information
63.3 General repair instructions
63.4 Foreign objects in engine
73.5 Contact corrosion
73.6 Routing and attachment of lines
73.7 Fitting radiator and condensers
73.8 Checking vacuum system
7Removing and installing engine
91 Removing and installing engine
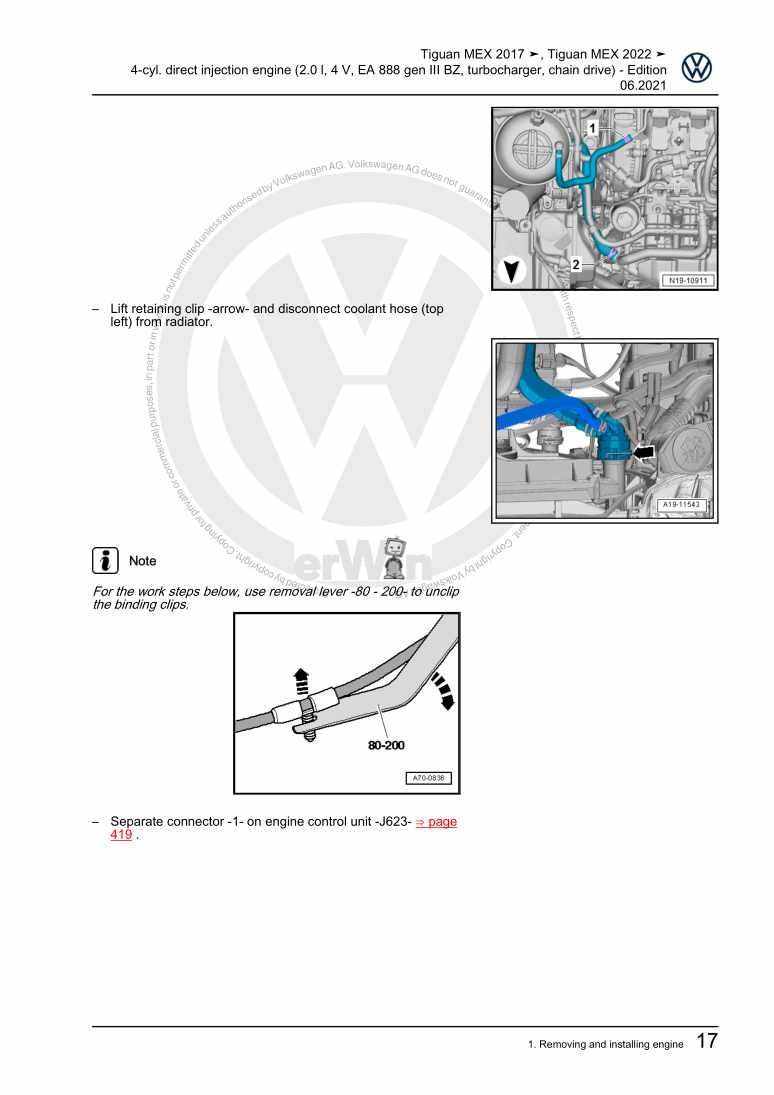
91.1 Removing engine
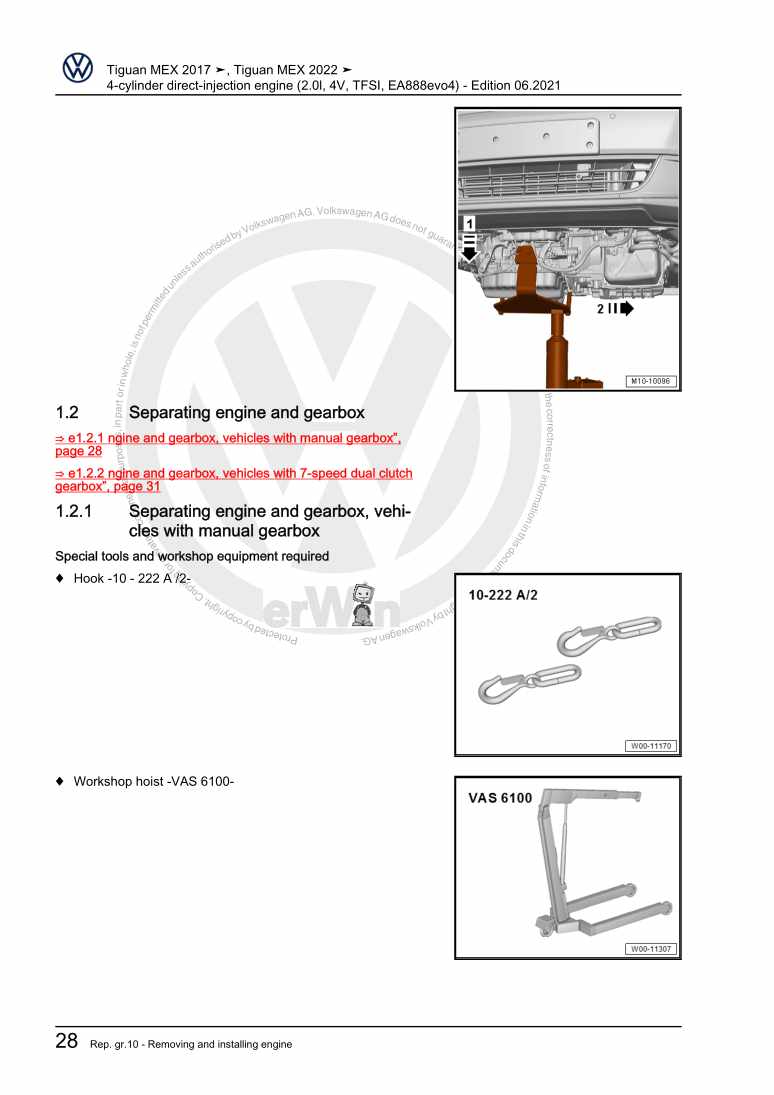
91.2 Separating engine and gearbox
181.3 Securing engine on engine and gearbox support
211.4 Installing engine
232 Assembly mountings
282.1 Assembly overview – assembly mountings
282.2 Removing and installing engine mounting
302.3 Removing and installing gearbox mounting
312.4 Removing and installing pendulum support
332.5 Supporting engine in installation position
342.6 Adjusting assembly mountings
392.7 Checking adjustment of assembly mountings
423 Engine cover panel
433.1 Removing and installing engine cover
43Crankshaft group
441 Cylinder block (pulley end)
441.1 Assembly overview - poly V-belt drive
441.2 Removing and installing poly-V belt
481.3 Removing and installing tensioner for poly V-belt
521.4 Removing and installing vibration damper
531.5 Removing and installing engine support
561.6 Renewing crankshaft oil seal - belt pulley end
592 Cylinder block, gearbox end
632.1 Assembly overview - cylinder block, gearbox end
632.2 Removing and installing flywheel
662.3 Removing and installing sealing flange on gearbox side
673 Crankshaft
803.1 Renewing needle bearing in crankshaft
803.2 Crankshaft dimensions
823.3 Measuring axial clearance of crankshaft
824 Pistons and conrods
844.1 Assembly overview - pistons and conrods
844.2 Removing and installing pistons
864.3 Checking pistons and cylinder bores
884.4 Separating new conrod
904.5 Checking radial clearance of conrods
904.6 Removing and installing oil spray jets
914.7 Setting piston to TDC position
92Cylinder head, valve gear
951 Cylinder head
951.1 Assembly overview - cylinder head
951.2 Assembly overview - camshaft housing
971.3 Removing and installing cylinder head
1001.4 Removing and installing camshaft housing
1041.5 Checking compression
1092 Toothed belt drive
1122.1 Assembly overview - toothed belt cover
1122.2 Assembly overview - toothed belt
1132.3 Assembly overview - valve timing tool
1162.4 Removing and installing toothed belt guard
1162.5 Removing and installing toothed belt
1172.6 Preassembling and installing valve timing tool
1242.7 Checking valve timing
1342.8 Adjusting valve timing
1372.9 Removing toothed belt from camshaft
1473 Valve gear
1523.1 Assembly overview - valve gear
1523.2 Removing and installing camshaft oil seal
1553.3 Removing and installing camshaft adjuster
1673.4 Removing and installing cam actuators
1803.5 Removing and installing inlet camshaft control valve 1 N727
1823.6 Removing and installing exhaust camshaft control valve 1 N318
1833.7 Removing and installing valve stem oil seals
1843.8 Removing and installing holder for oil seal
1994 Inlet and exhaust valves
2034.1 Checking valve guides
2034.2 Checking valves
2044.3 Valve dimensions
204Lubrication
2051 Sump, oil pump
2051.1 Assembly overview - sump/oil pump
2051.2 Engine oil:
2101.3 Removing and installing oil sump
2101.4 Removing and installing oil pump
2151.5 Removing and installing oil level and oil temperature sender G266
2182 Engine oil cooler
2192.1 Assembly overview - engine oil cooler
2192.2 Removing and installing engine oil cooler
2193 Crankcase ventilation
2213.1 Assembly overview - crankcase breather system
2213.2 Removing and installing oil separator
2224 Oil filter, oil pressure switch
2274.1 Assembly overview - oil pressure switches/oil pressure control
2274.2 Removing and installing oil pressure sender G10
2274.3 Checking oil pressure and oil pressure switch
2294.4 Removing and installing oil filter housing
2294.5 Removing and installing oil pressure regulating valve N428
230Cooling
2321 Cooling system/coolant
2321.1 Connection diagram - coolant hoses
2321.2 Checking cooling system for leaks
2341.3 Draining and adding coolant
2371.4 Flushing cooling system
2462 Coolant pump, regulation of cooling system
2612.1 Assembly overview - coolant pump, thermostat
2612.2 Assembly overview - electric coolant pump
2632.3 Assembly overview - coolant temperature sender
2632.4 Removing and installing electric coolant pump
2642.5 Removing and installing coolant pump
2672.6 Removing and installing toothed belt pulley for coolant pump
2722.7 Removing and installing coolant temperature sender G62
2762.8 Removing and installing radiator outlet coolant temperature sender G83
2782.9 Removing and installing engine outlet coolant temperature sender G82
2792.10 Removing and installing engine temperature regulation module GX33
2812.11 Checking coolant pump
2863 Coolant pipes
2923.1 Assembly overview - coolant pipes
2923.2 Removing and installing coolant pipes
2944 Radiator, radiator fan
3034.1 Assembly overview - radiator, radiator fan
3034.2 Assembly overview – radiator cowl and radiator fan
3054.3 Removing and installing radiator
3064.4 Removing and installing water radiator for charge air cooling circuit
3094.5 Removing and installing radiator cowl
3144.6 Removing and installing radiator fan V7
315Turbocharging/supercharging
3171 Turbocharger
3171.1 Assembly overview - turbocharger
3171.2 Removing and installing turbocharger
3211.3 Removing and installing connection for turbocharger
3261.4 Removing and installing charge pressure control module GX34
3282 Charge air system
3332.1 Assembly overview - charge air system
3332.2 Removing and installing charge air cooler
3362.3 Removing and installing charge pressure sender GX26
3382.4 Checking charge air system for leaks
3392.5 Removing and installing air intake pipe
3432.6 Checking charge air cooler for leaks
349Mixture preparation - injection
3551 Injection system
3551.1 Overview of fitting locations - injection system
3552 Air filter
3632.1 Assembly overview - air filter housing
3632.2 Removing and installing air filter housing
3652.3 Removing and installing air guide on lock carrier
3673 Intake manifold
3693.1 Assembly overview – intake manifold
3693.2 Removing and installing intake manifold
3723.3 Removing and installing throttle valve module GX3
3763.4 Cleaning throttle valve module GX3
3784 Injectors
3804.1 Assembly overview - fuel rail with injectors
3804.2 Removing and installing fuel rail
3824.3 Removing and installing injectors
3834.4 Cleaning injectors
3905 Senders and sensors
3935.1 Removing and installing intake manifold sender GX9
3935.2 Removing and installing fuel pressure sender G247
3945.3 Checking fuel pressure sender G247
3965.4 Removing and installing exhaust gas pressure sensor 1 G450
4005.5 Removing and installing air mass measurement module GX35
4016 High-pressure pump
4036.1 Assembly overview - high-pressure pump
4036.2 Removing and installing high-pressure pump
4046.3 Removing and installing high-pressure pipe
4067 Lambda probe
4097.1 Assembly overview - Lambda probe
4097.2 Removing and installing Lambda probe
4108 Engine control unit
4128.1 Removing and installing engine control unit J623
412Exhaust system
4201 Exhaust pipes and silencers
4201.1 Assembly overview – silencers
4201.2 Removing and installing silencer
4221.3 Separating exhaust pipes from silencers
4241.4 Aligning exhaust system free of stress
4261.5 Checking exhaust system for leaks
4261.6 Installation position of clamp
4271.7 Assembly overview - front exhaust pipe
4281.8 Removing and installing bracket for front exhaust pipe
4282 Emission control
4302.1 Assembly overview – emission control
4302.2 Removing and installing catalytic converter
4332.3 Removing and installing particulate filter
4382.4 Removing and installing exhaust flap control unit J883
439Ignition system
4401 Ignition system
4401.1 Assembly overview - ignition system
4401.2 Removing and installing ignition coils with output stage
4421.3 Removing and installing knock sensor 1 G61
4461.4 Removing and installing engine speed sender G28
4471.5 Removing and installing inlet camshaft position sender G1002
4491.6 Removing and installing exhaust camshaft position sender G1003
450
